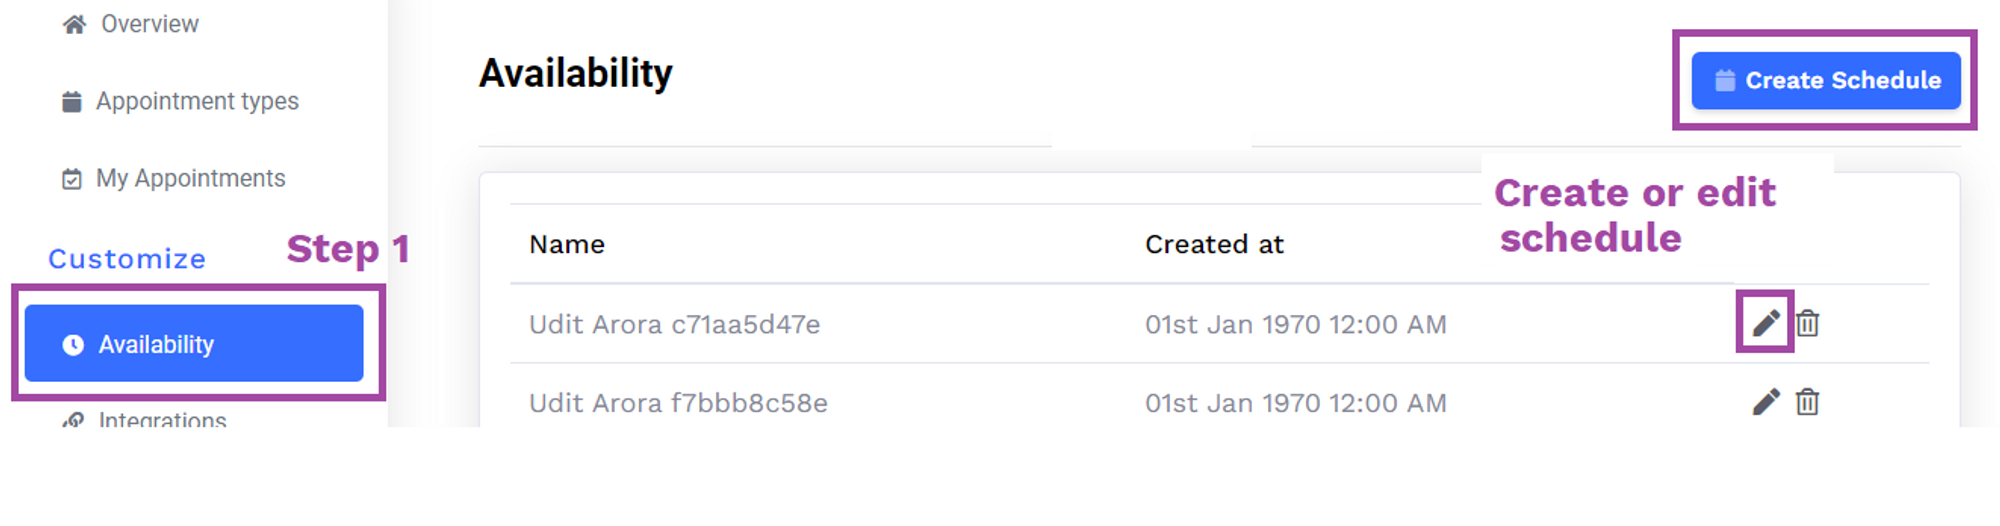
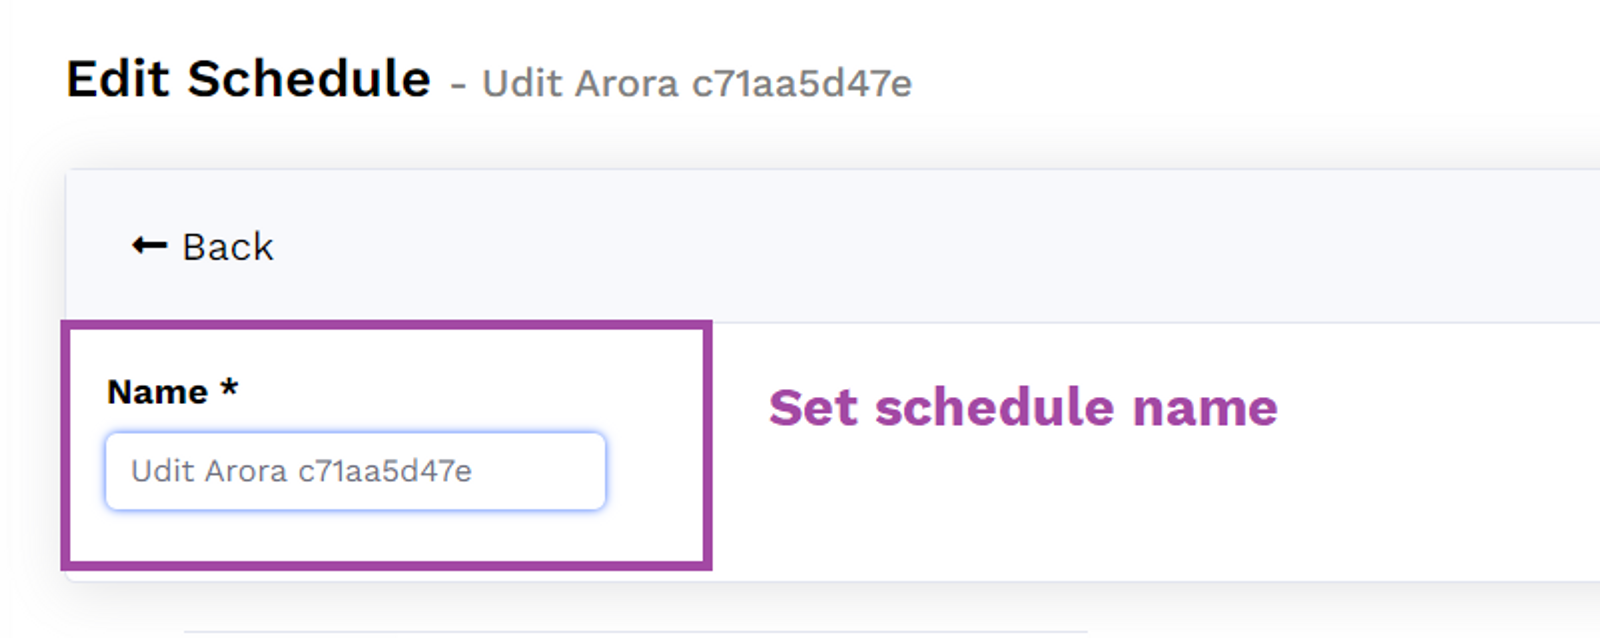
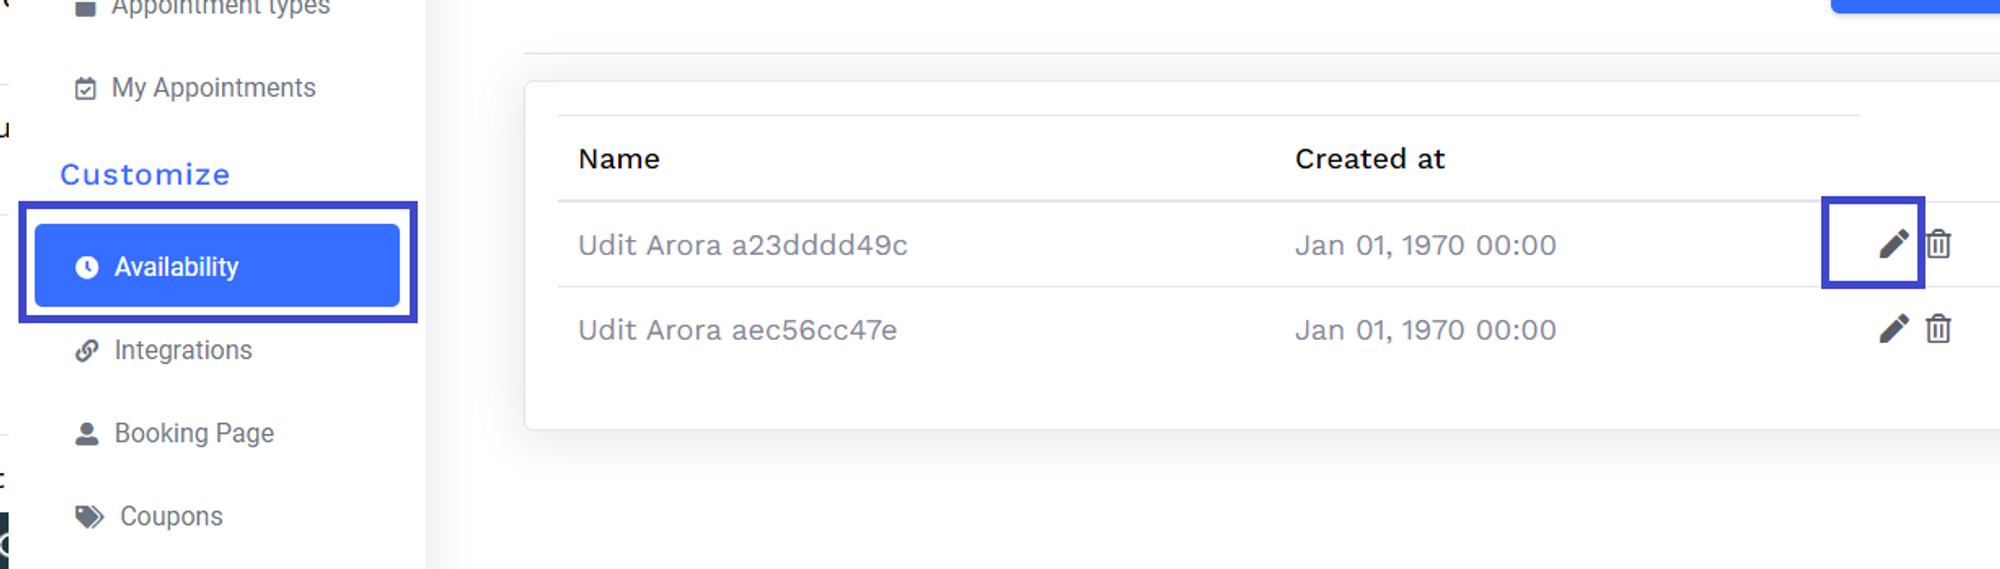
Step 1: Create or edit the schedule
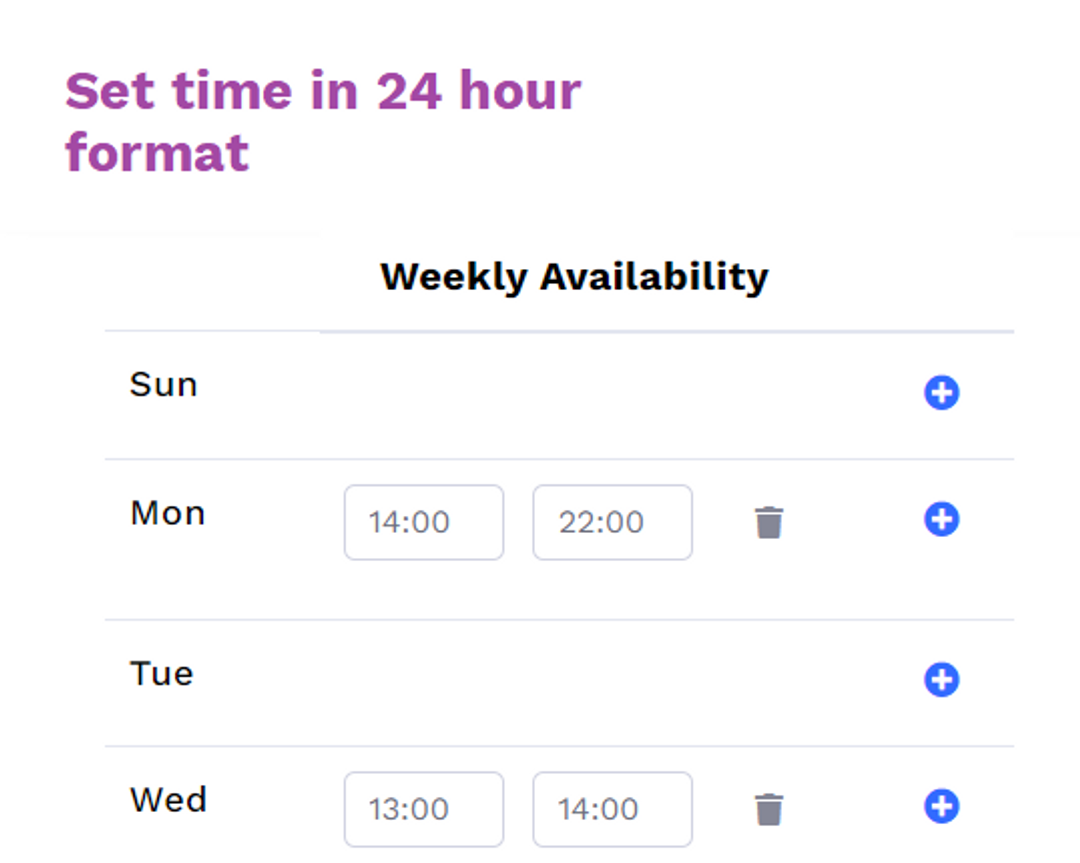
Step 2: Set your weekly availability
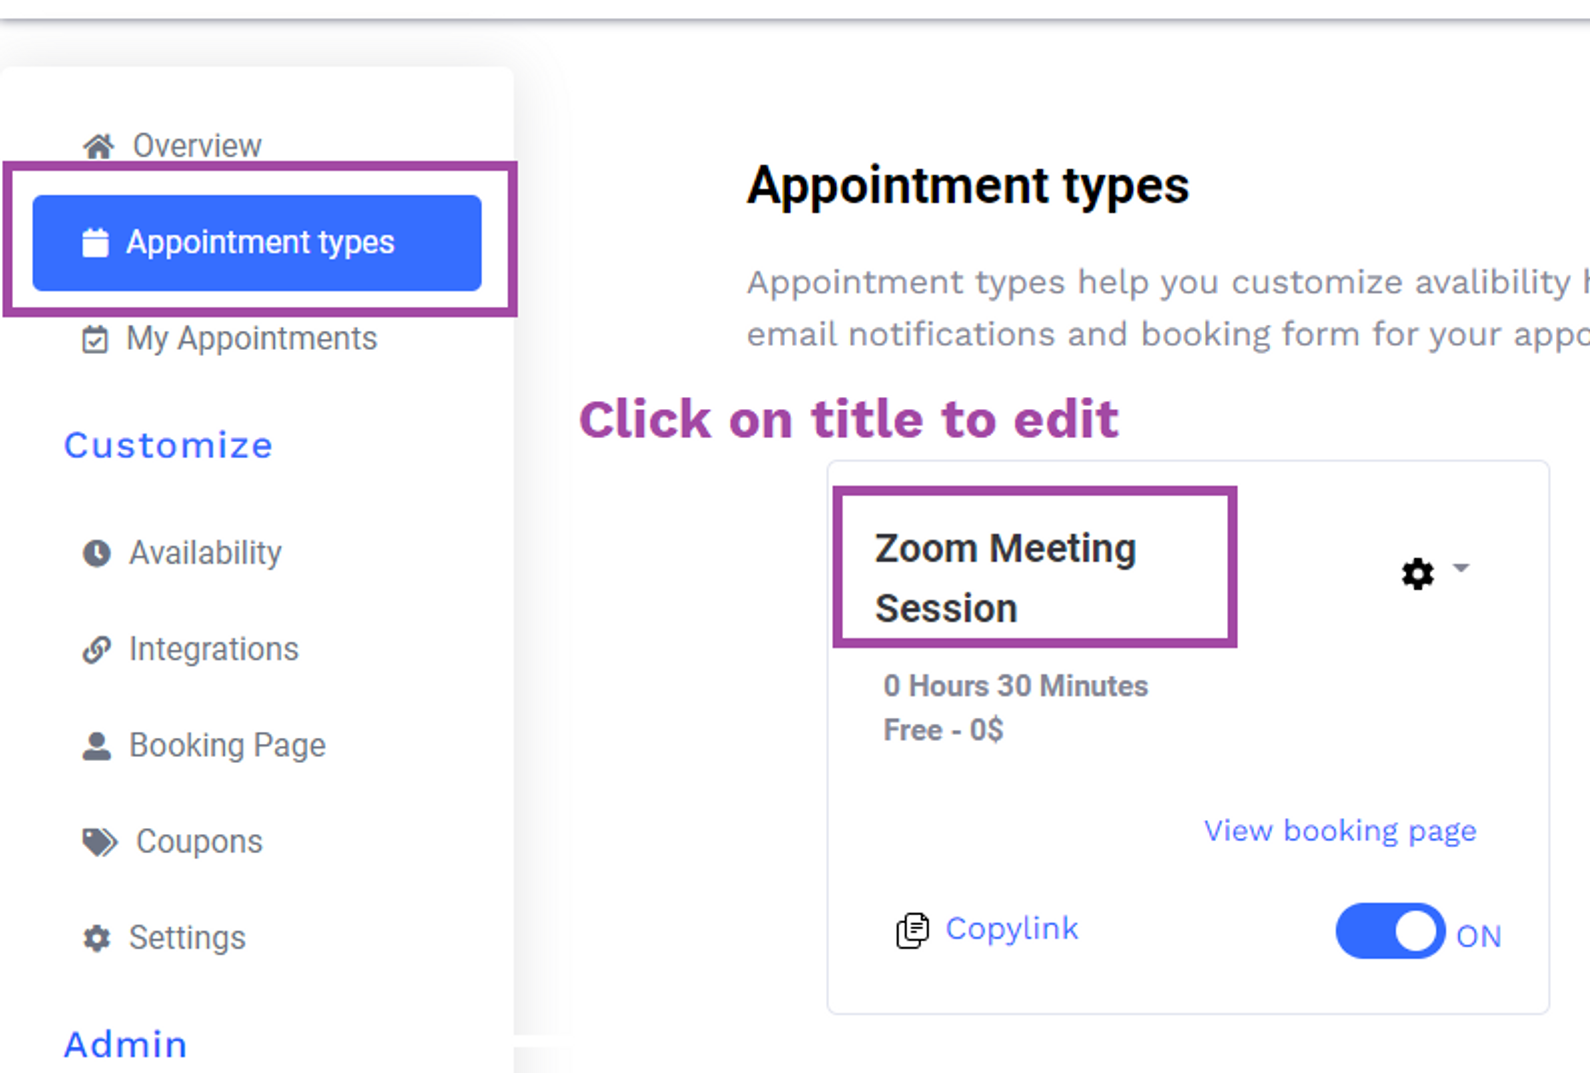
Step 3: Assign schedule to appointment type
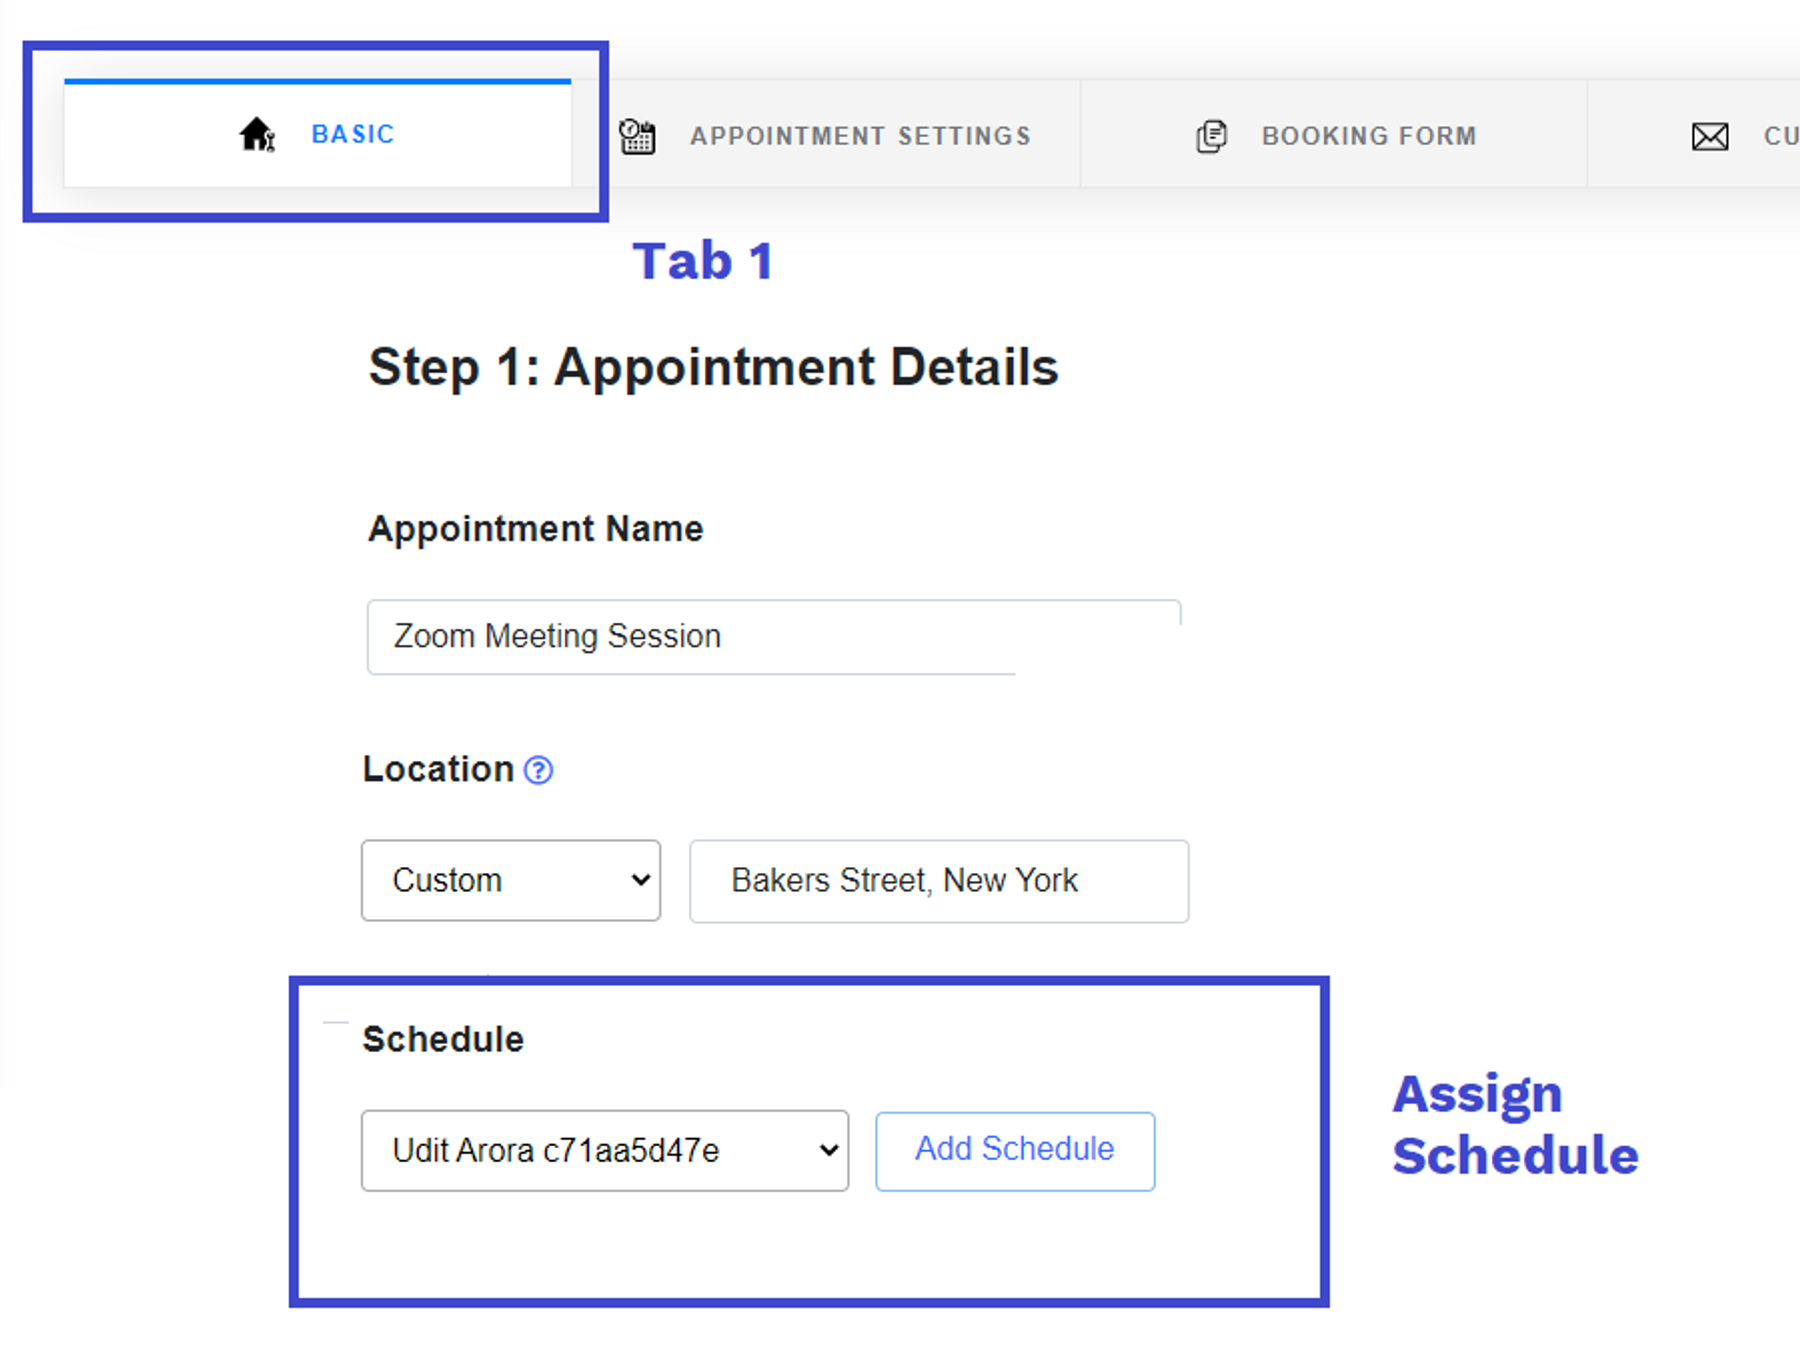
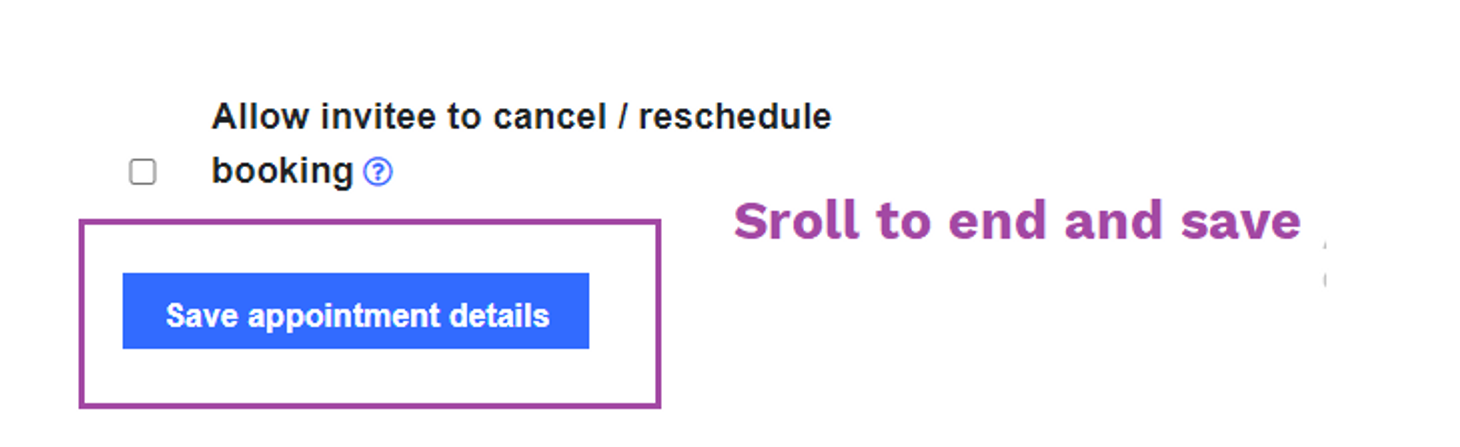
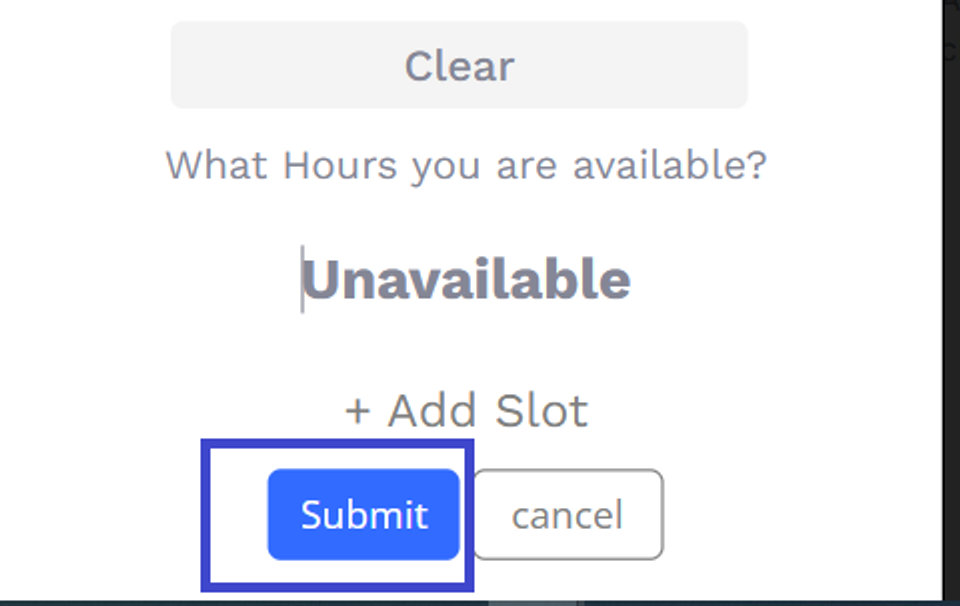
Save the settings
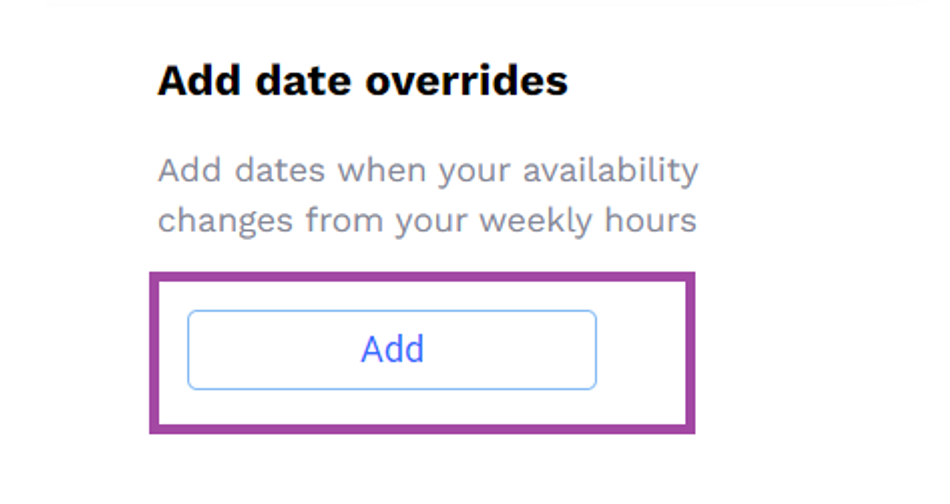
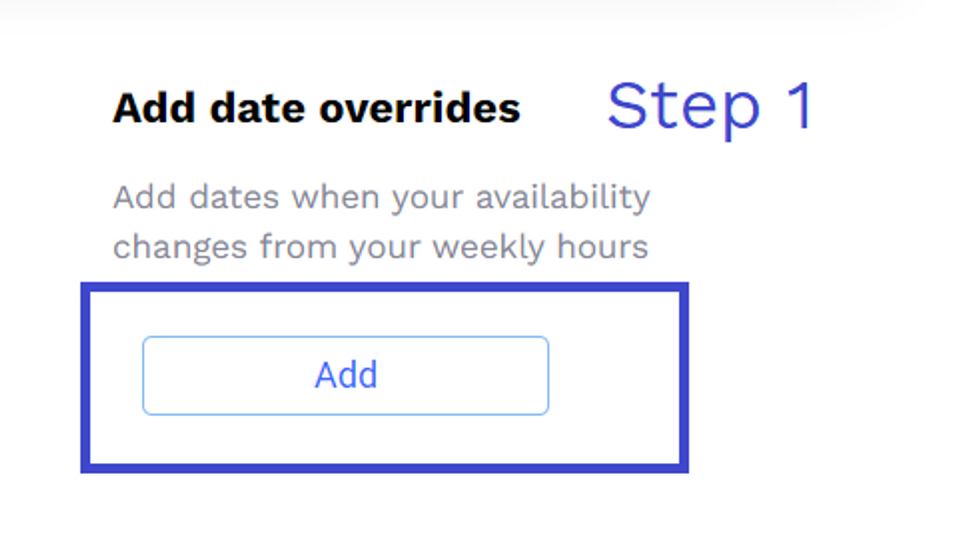
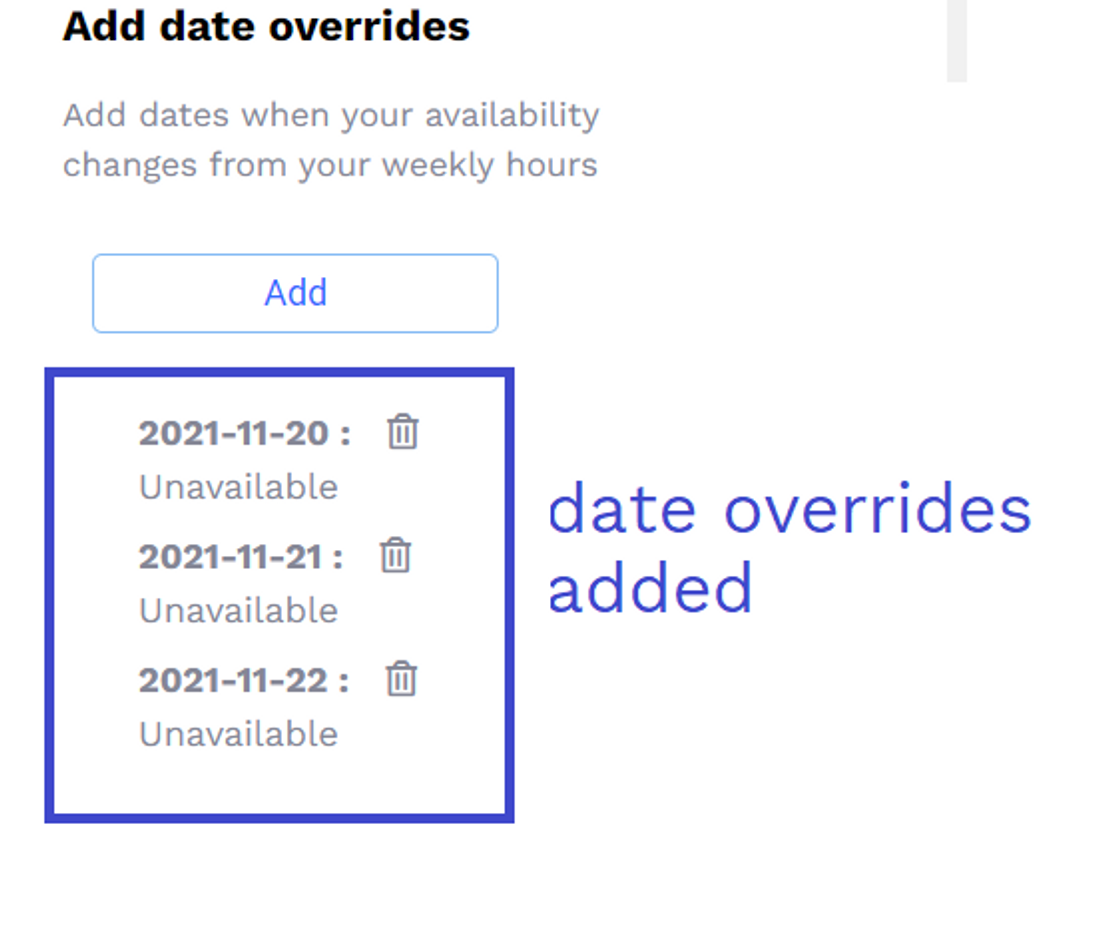
- Click on "Add"
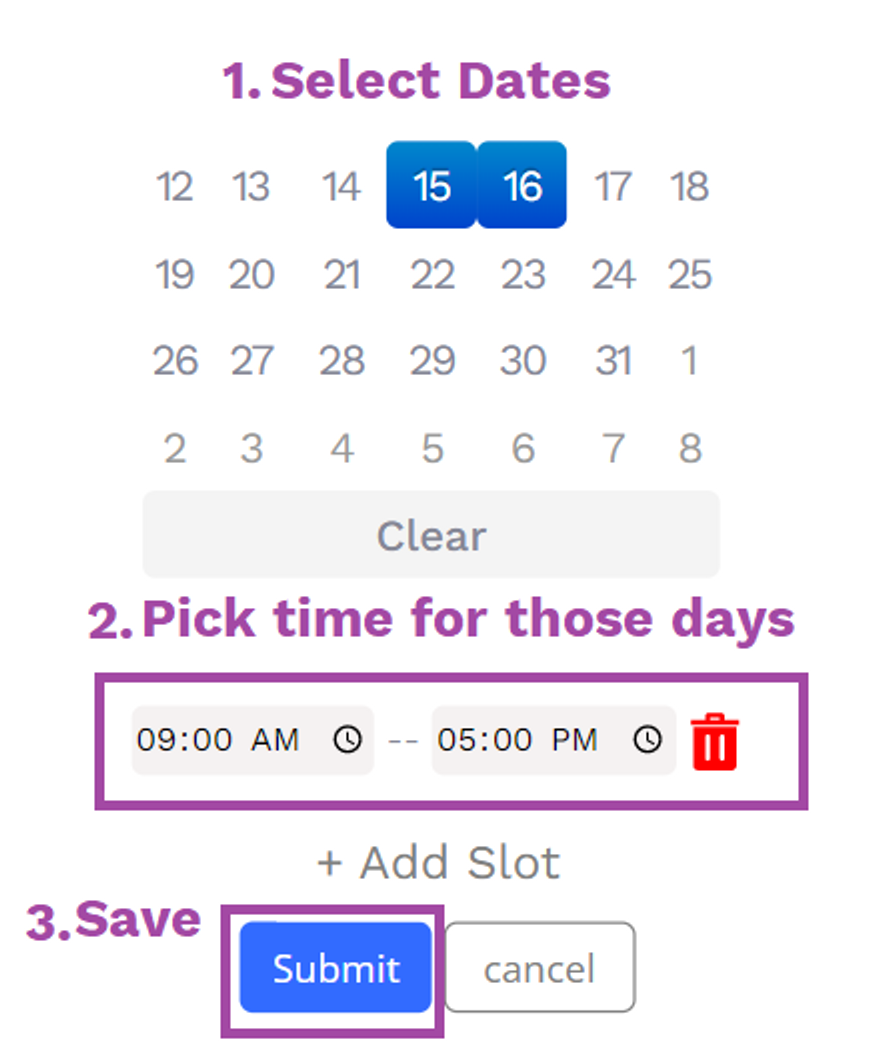
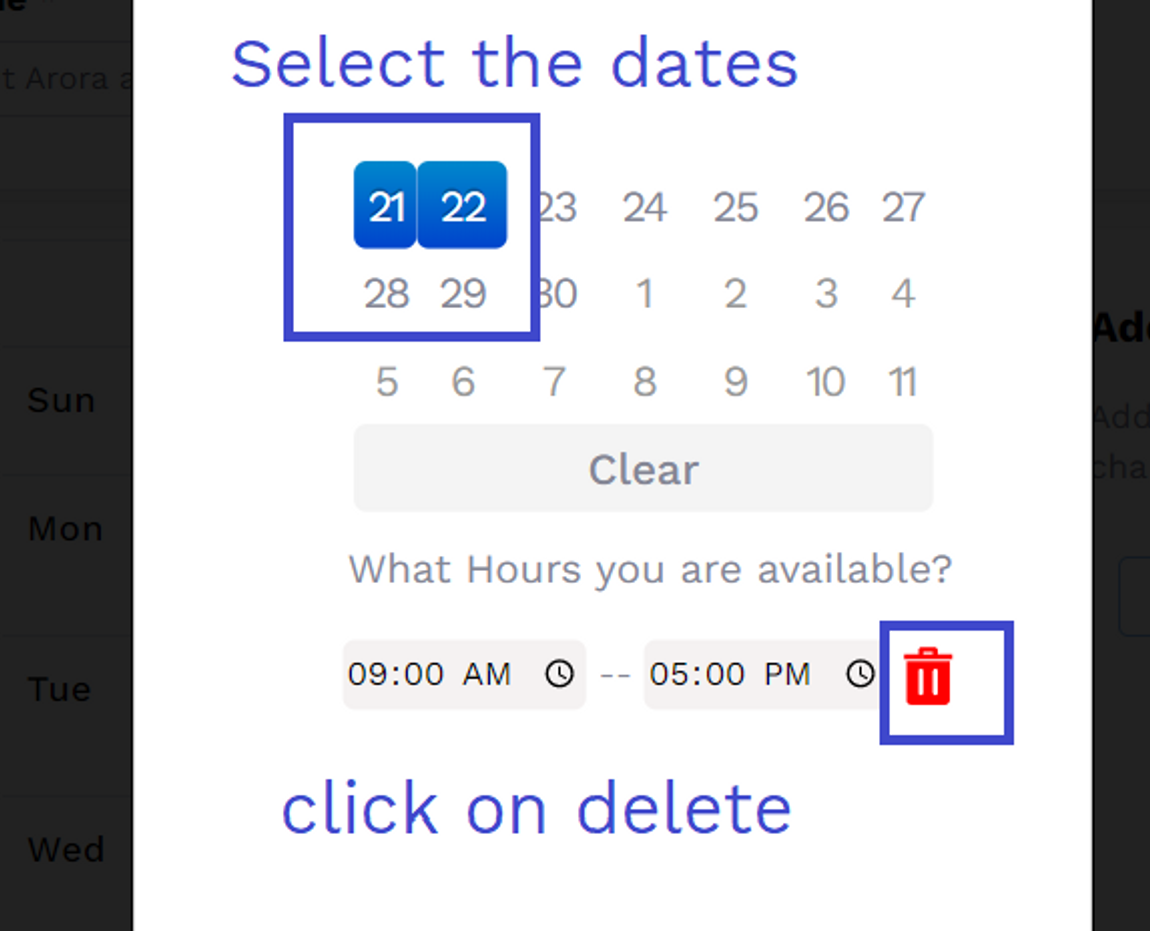
- Select dates and respective availability
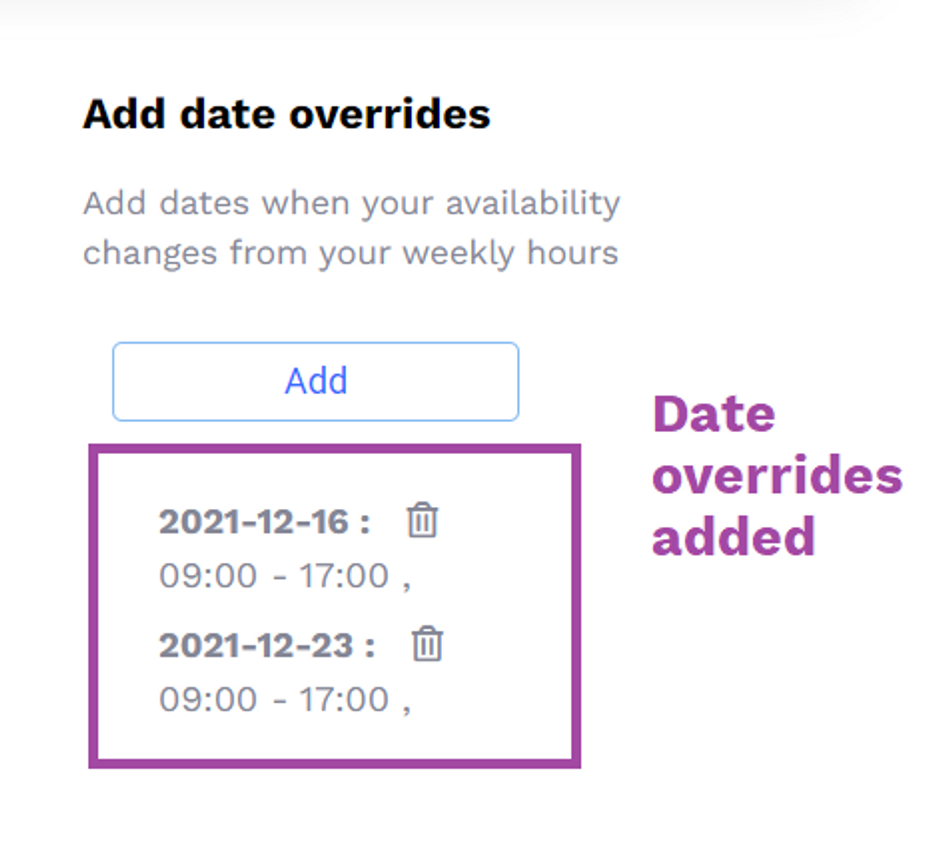
- Result: Date override got added
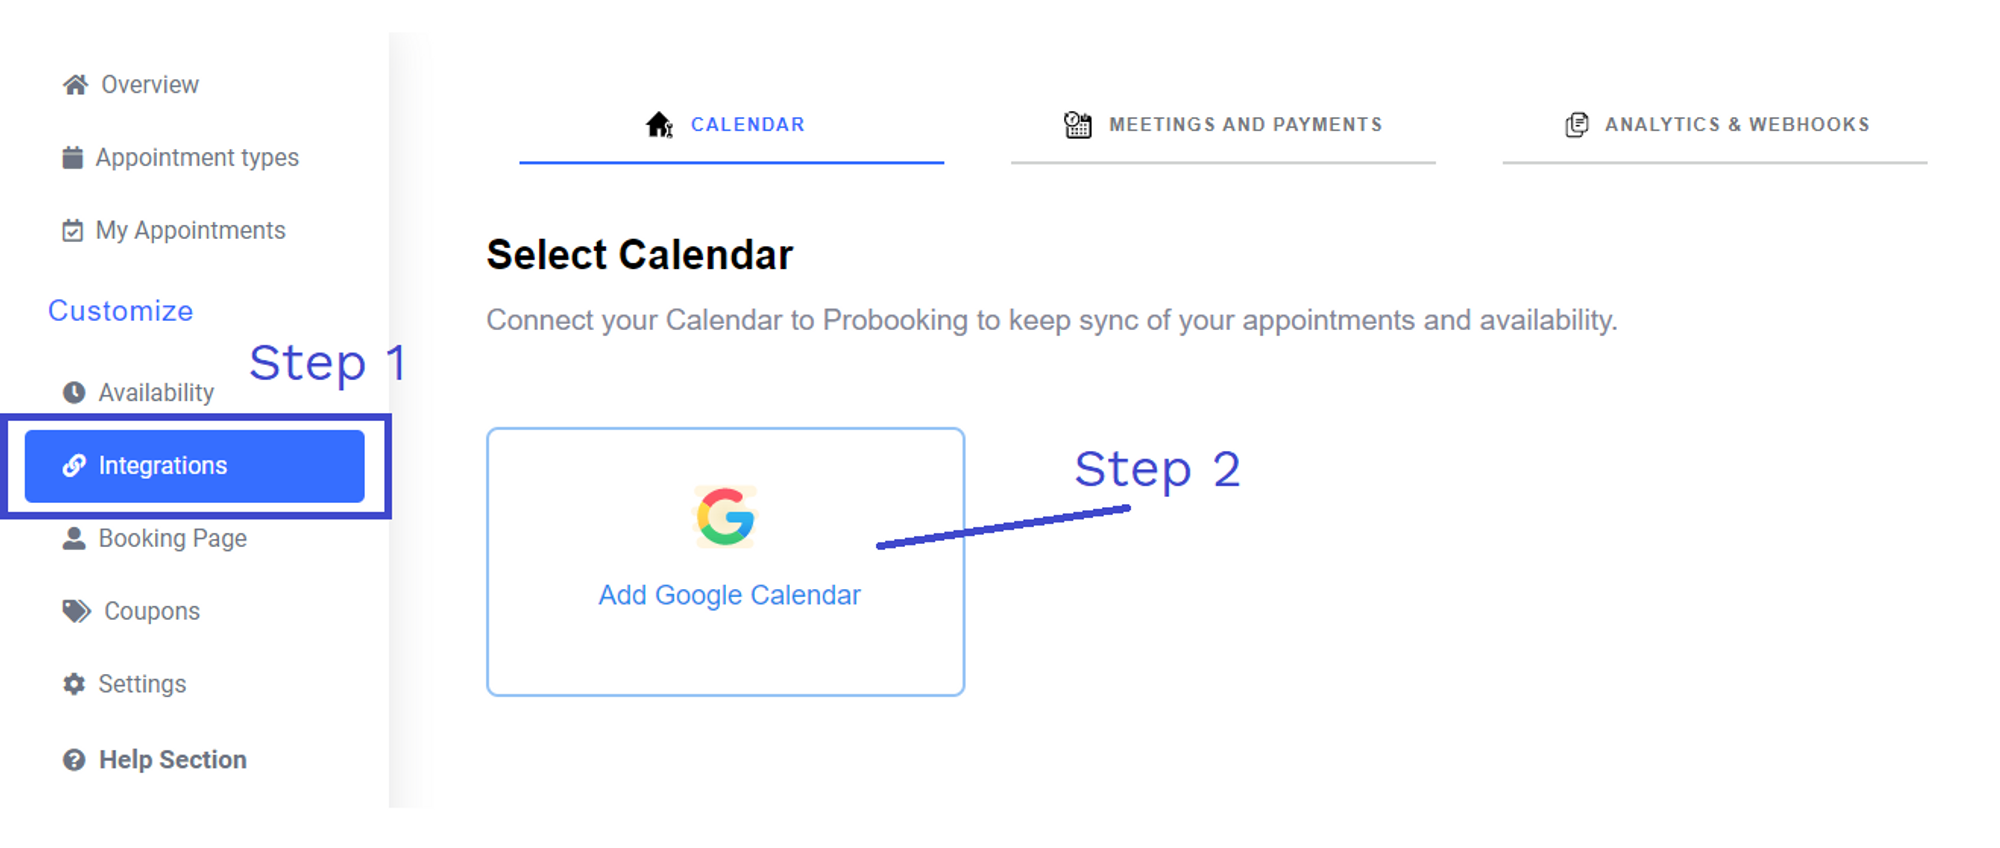
2-way Google Sync so you are never double booked
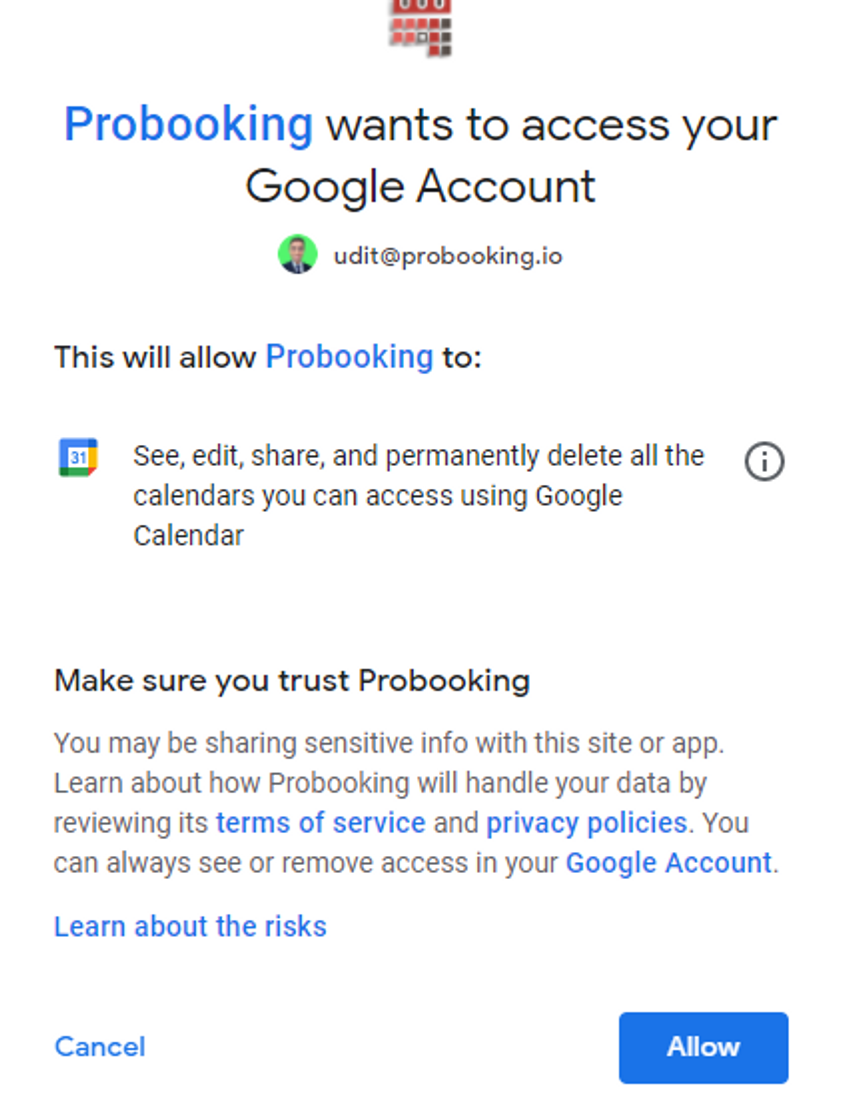
Click "Allow"
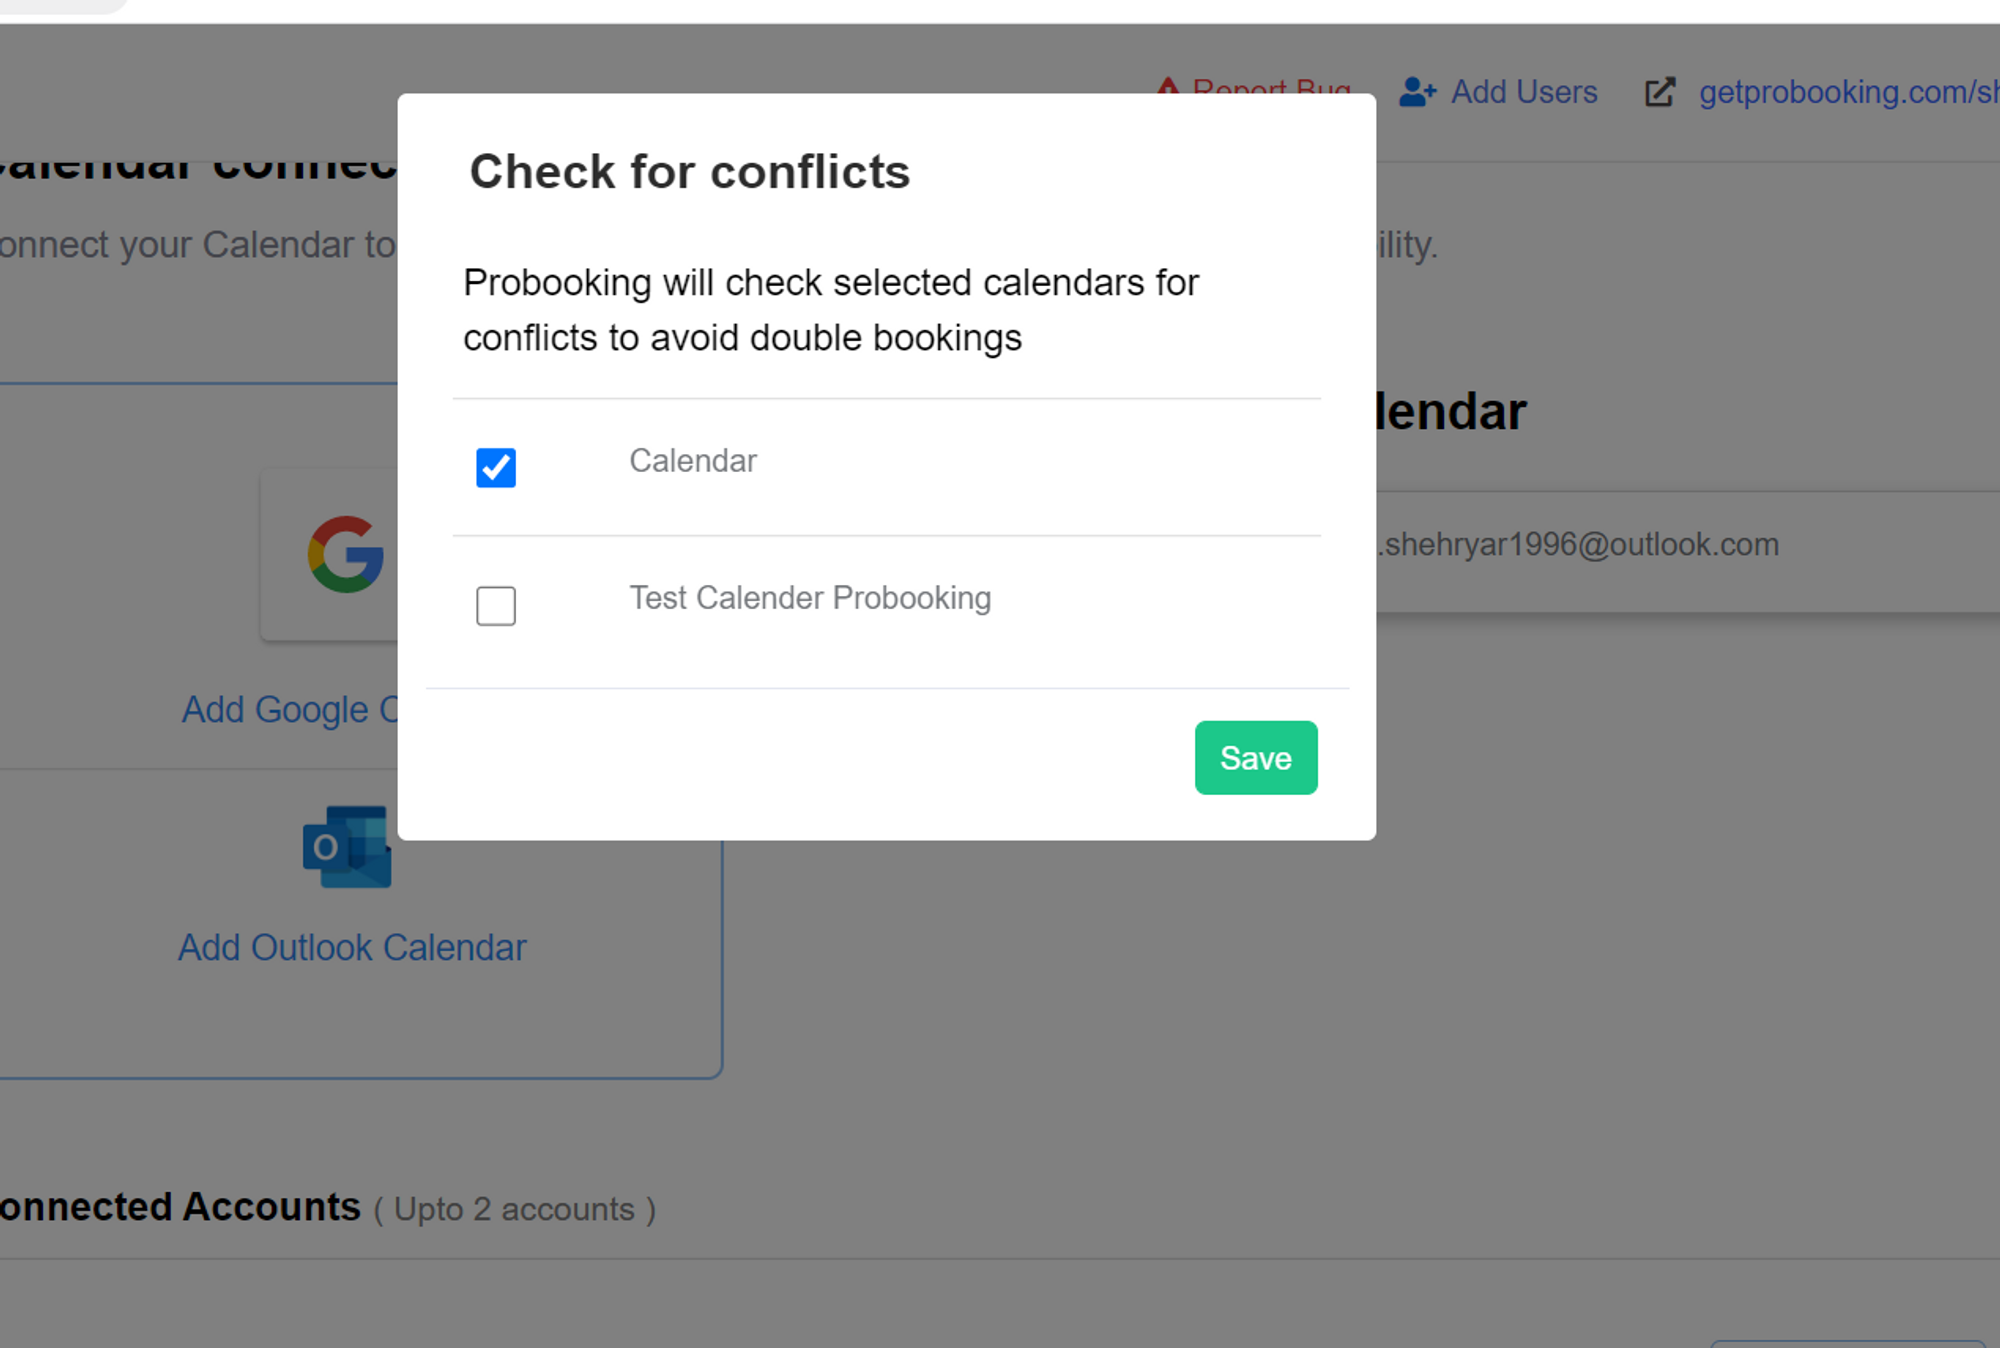
Step 3: Check calendar conflicts
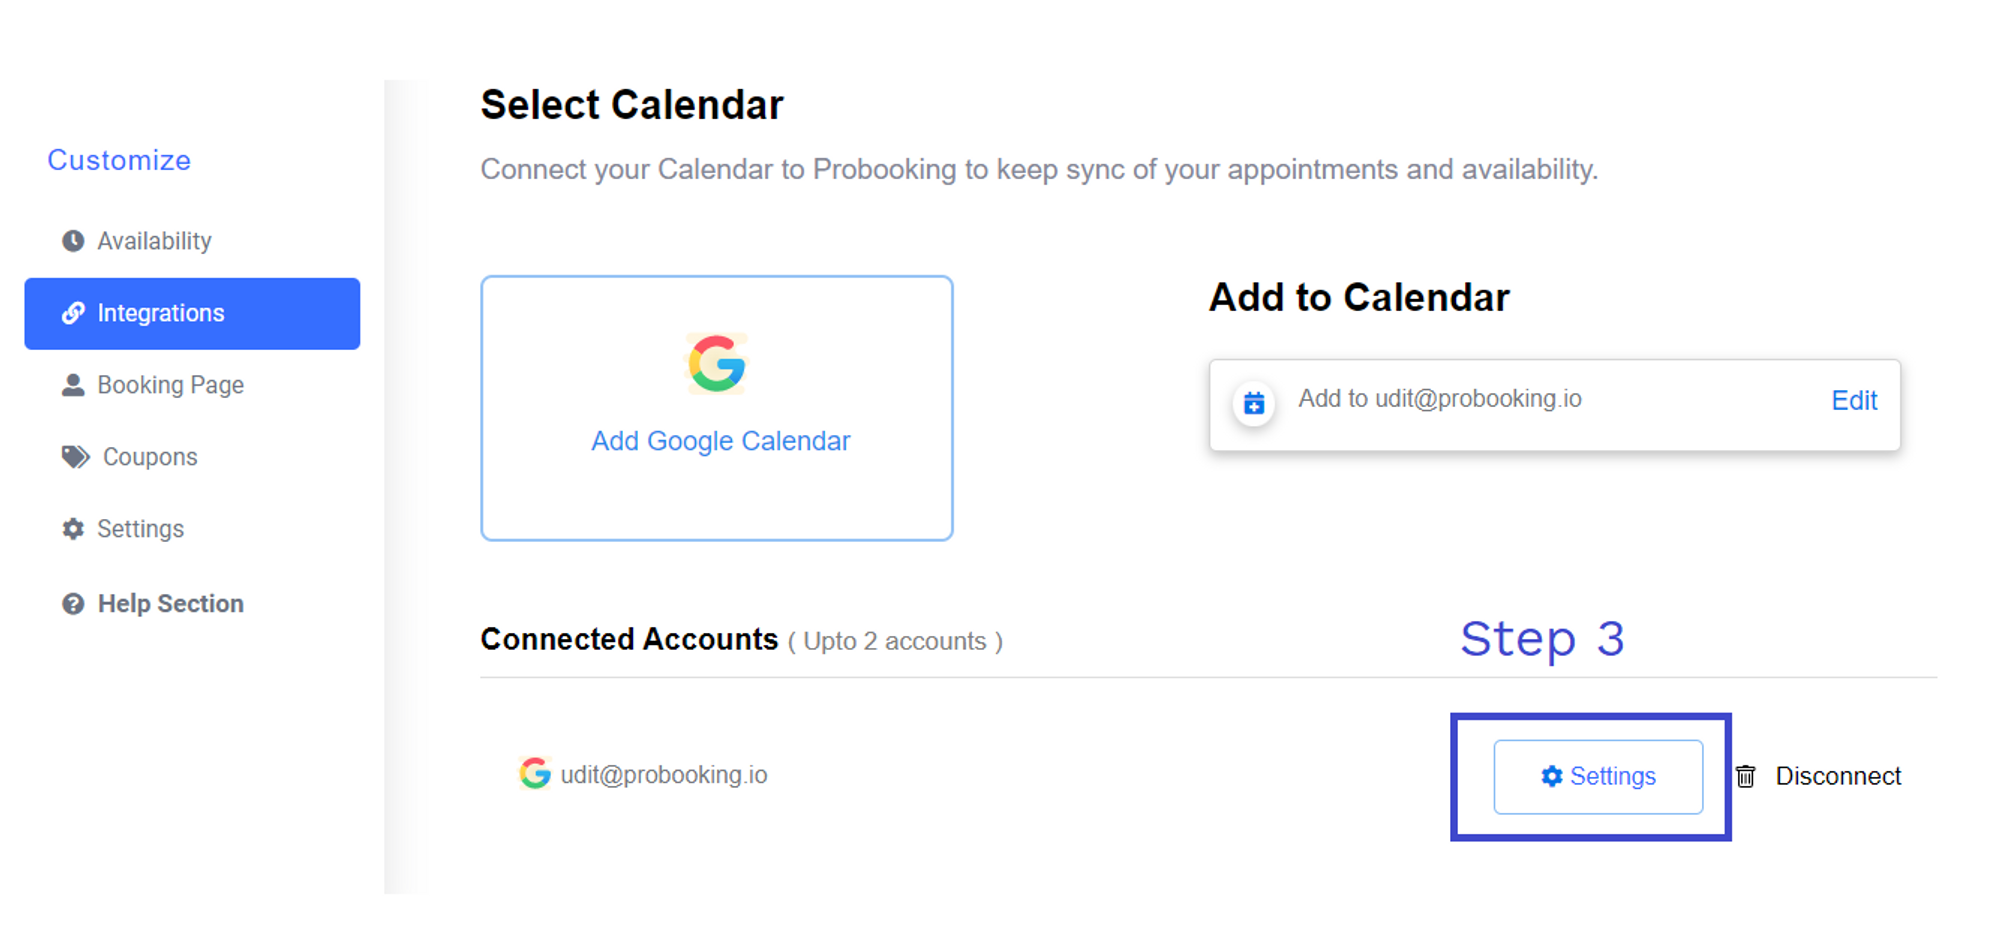
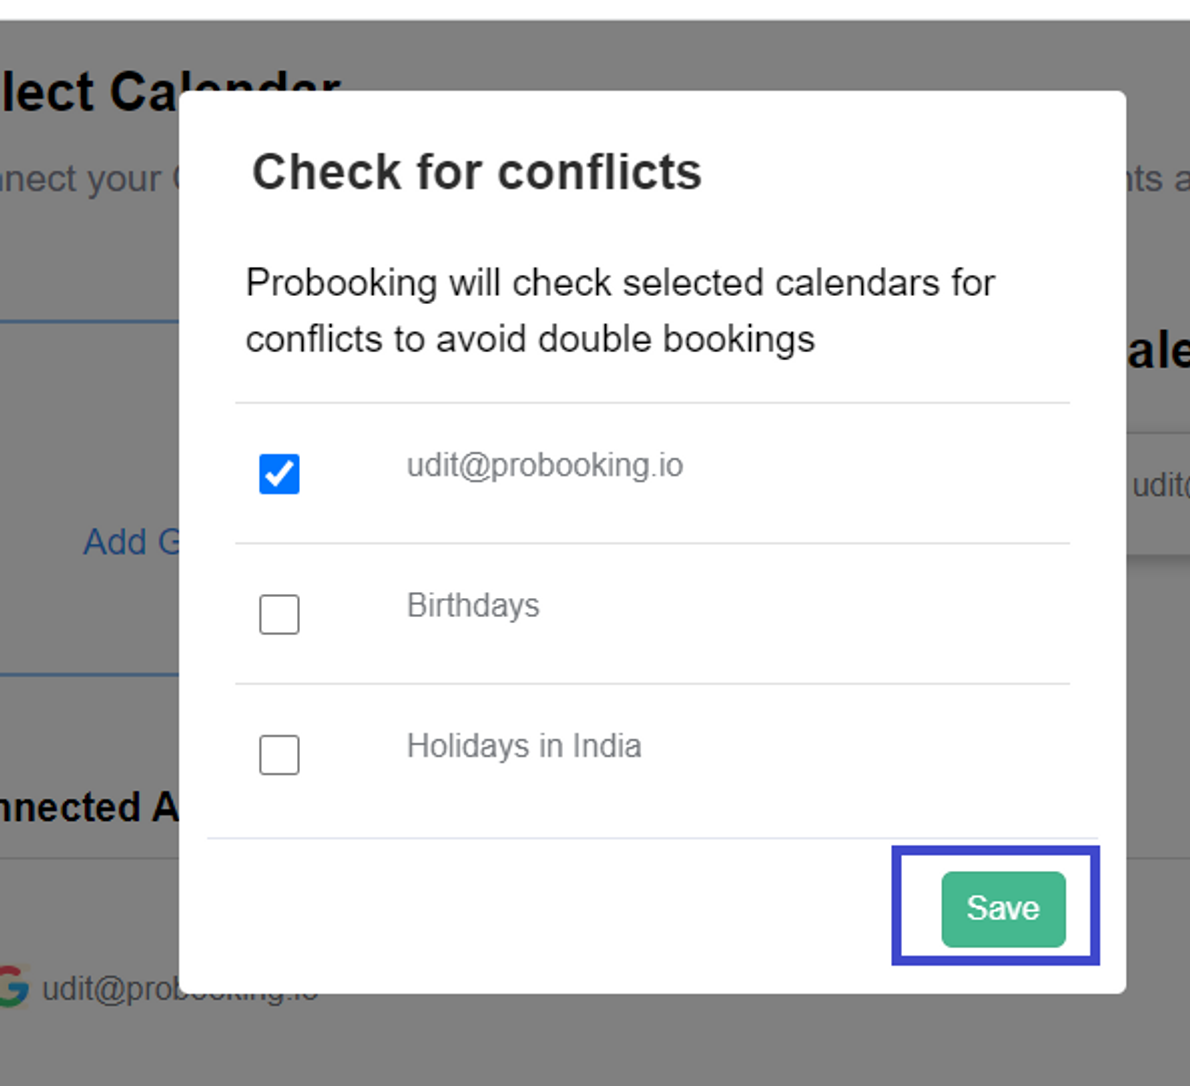
Select calendars which you want Probooking to check for blocking availability
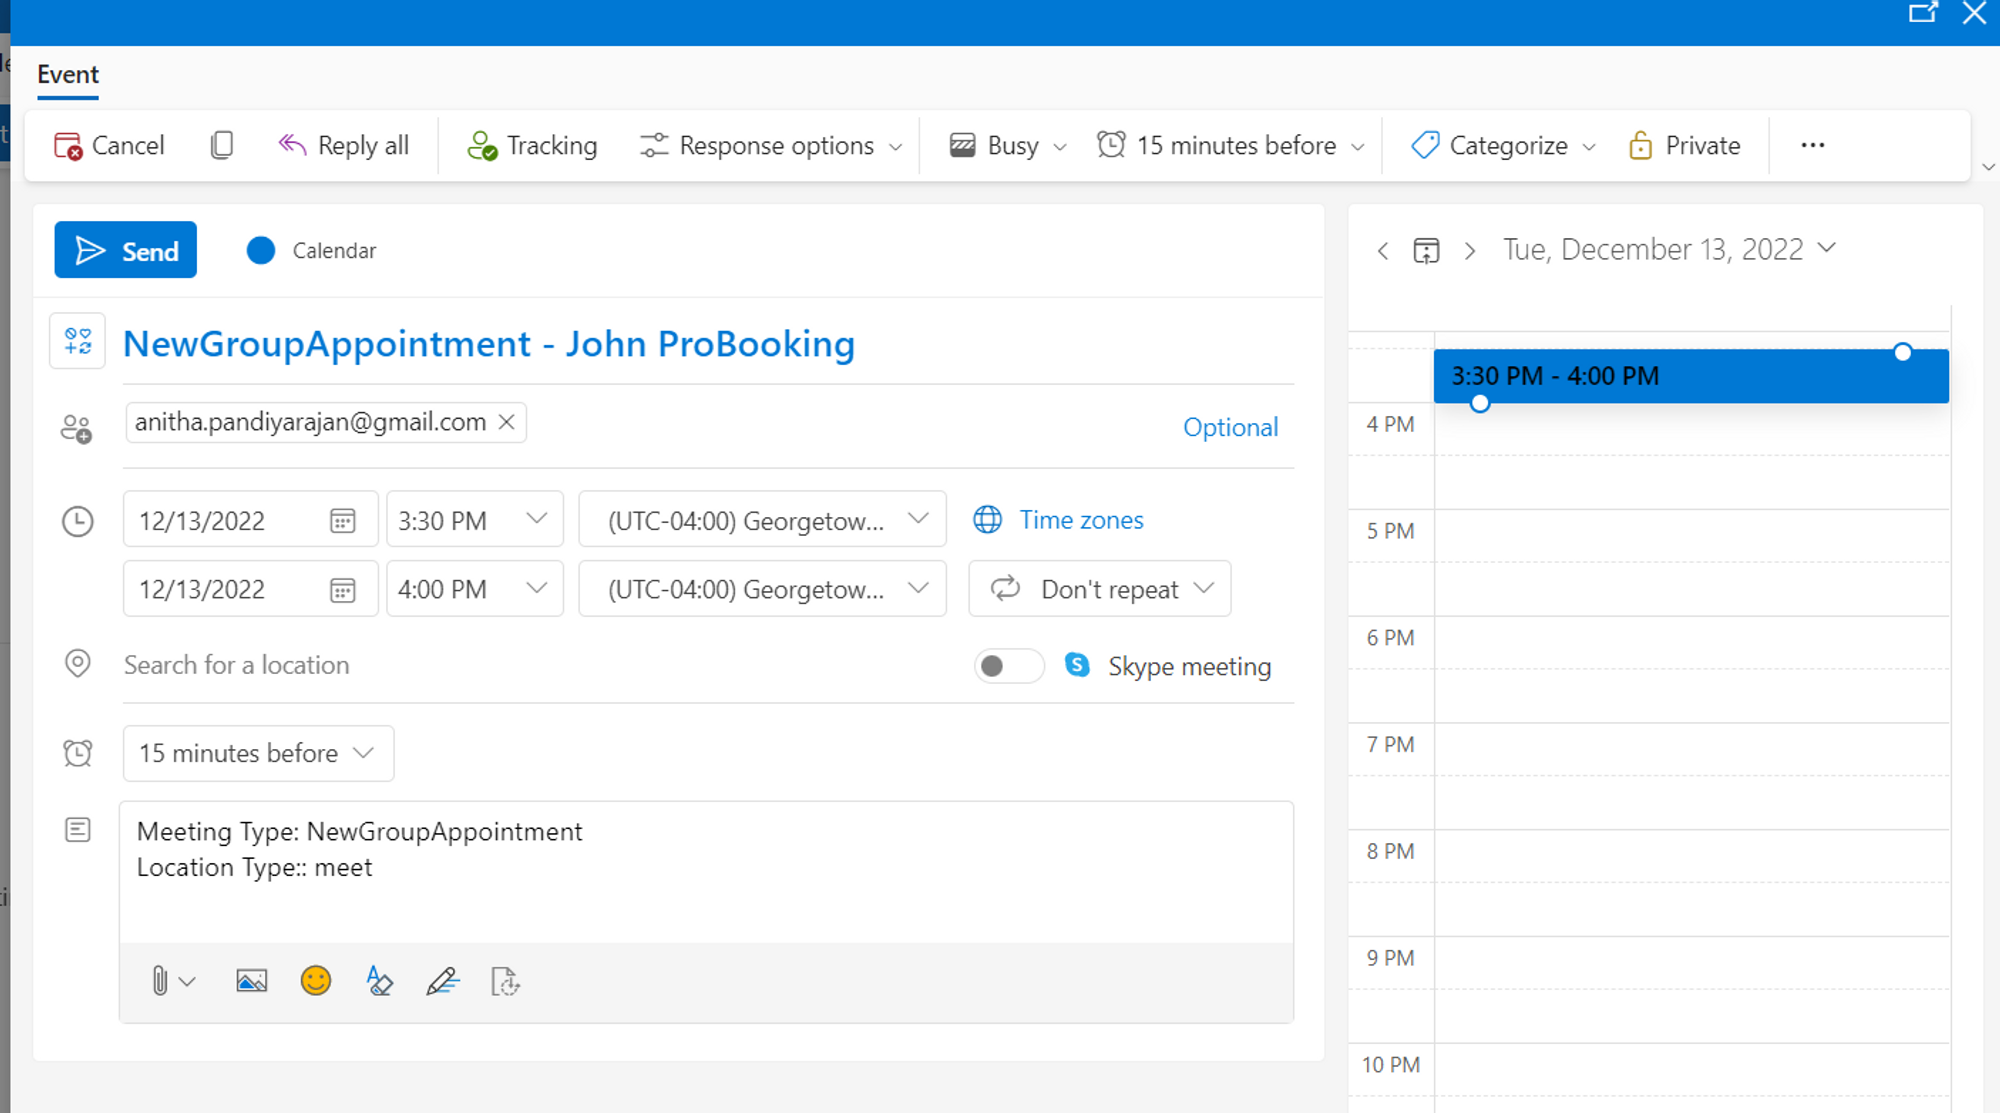
Final check - In Google calendar
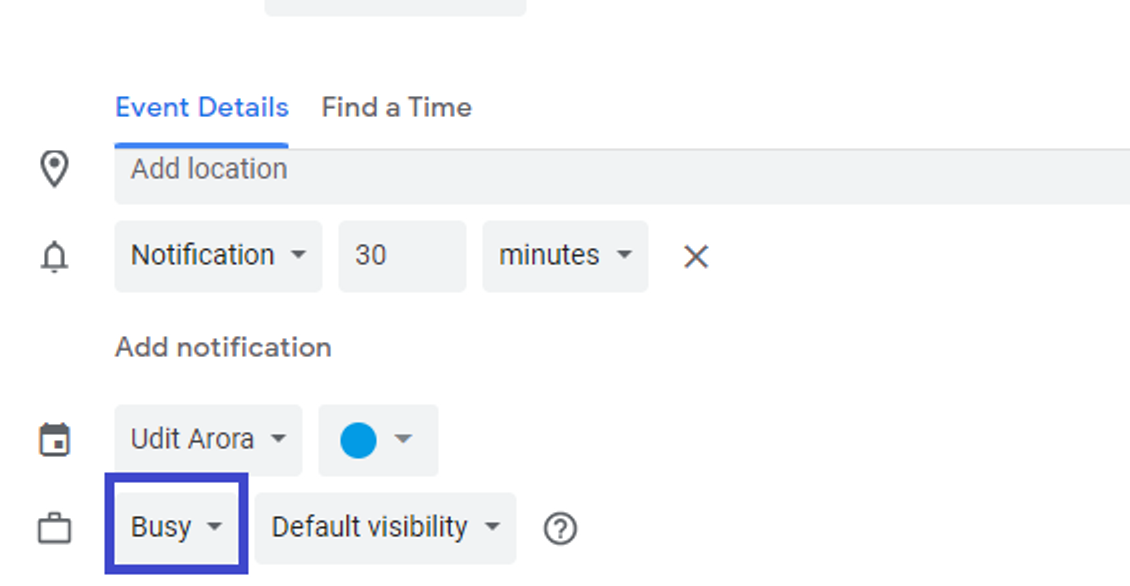
Note: Only busy events are blocked from your Google calendar
Now your Google calendar is set up, you are ready to start scheduling appointments!
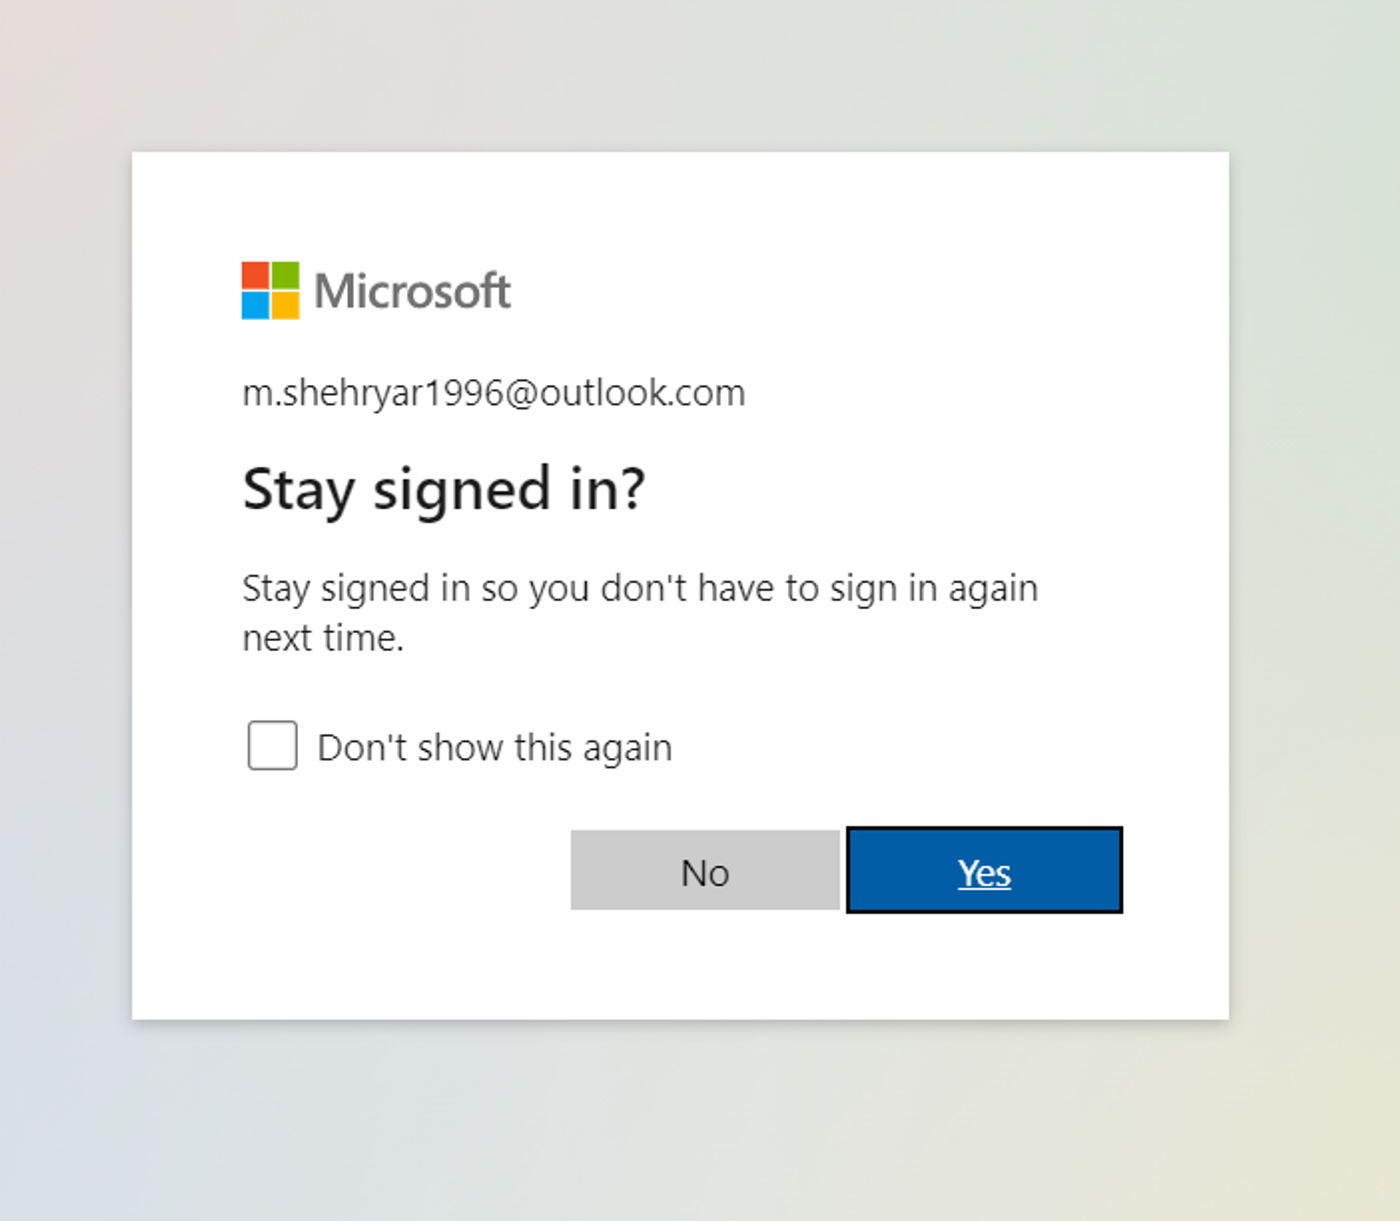
Click "Yes"
Check calendar conflicts
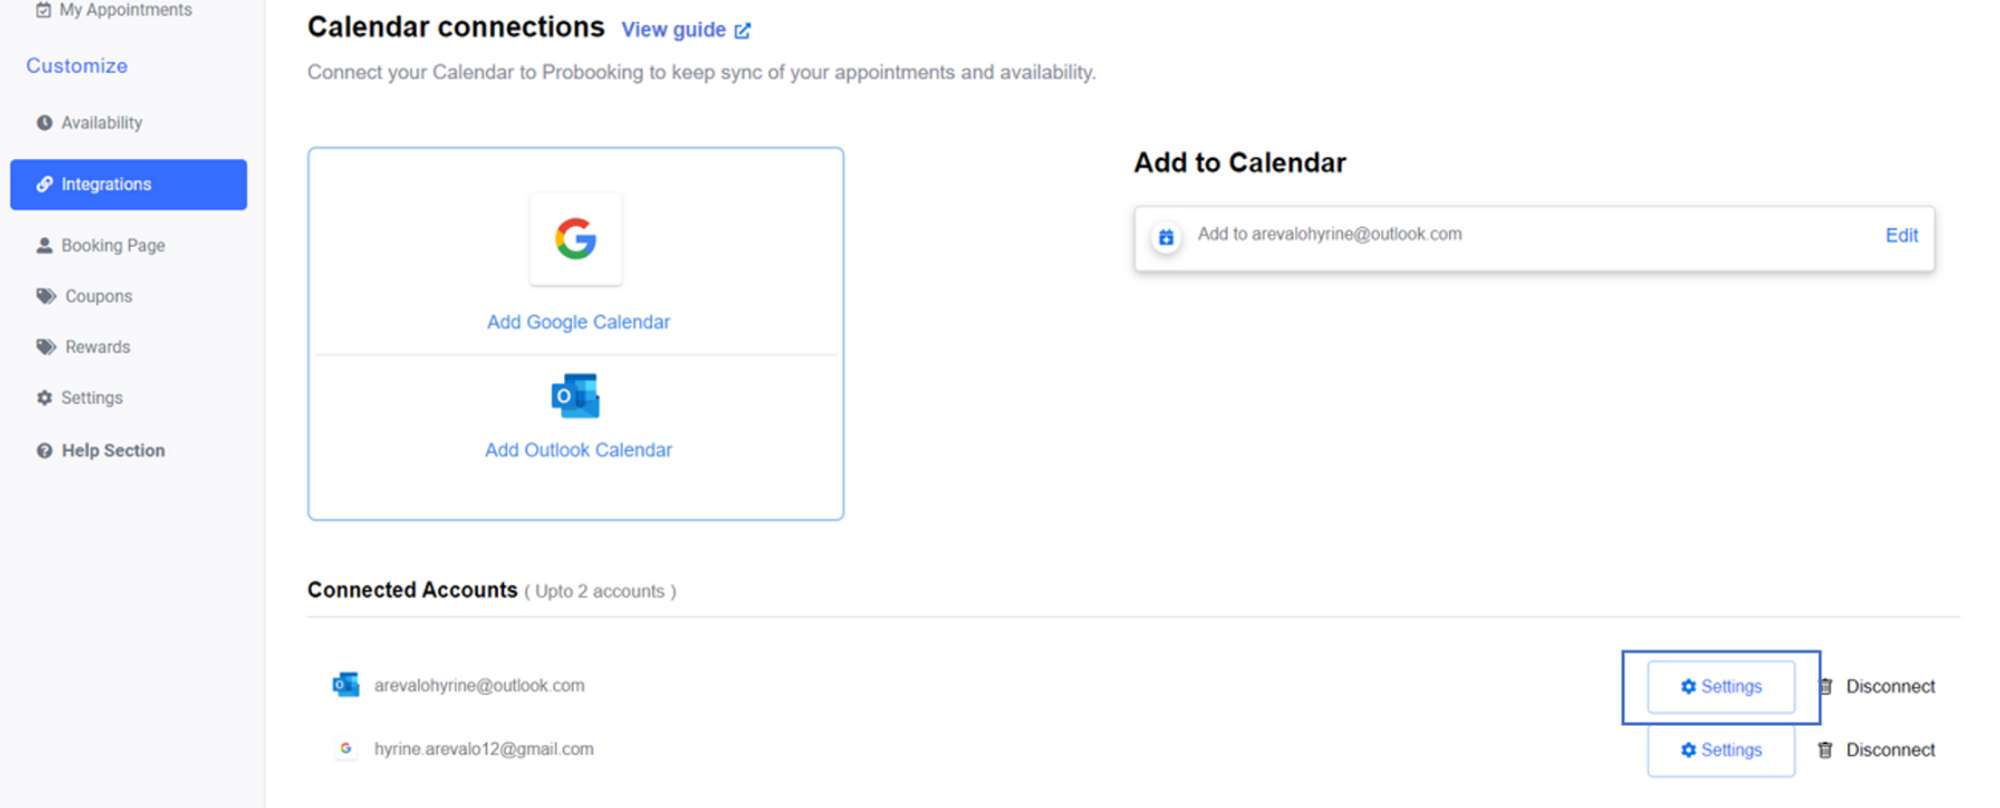
Step 4: Select calendars which you want Probooking to check blocking availability
Final check - In outlook calendar
Note: Only busy events are blocked from your outlook calendar
Now your outlook calendar is set up, you are ready to start scheduling availability!
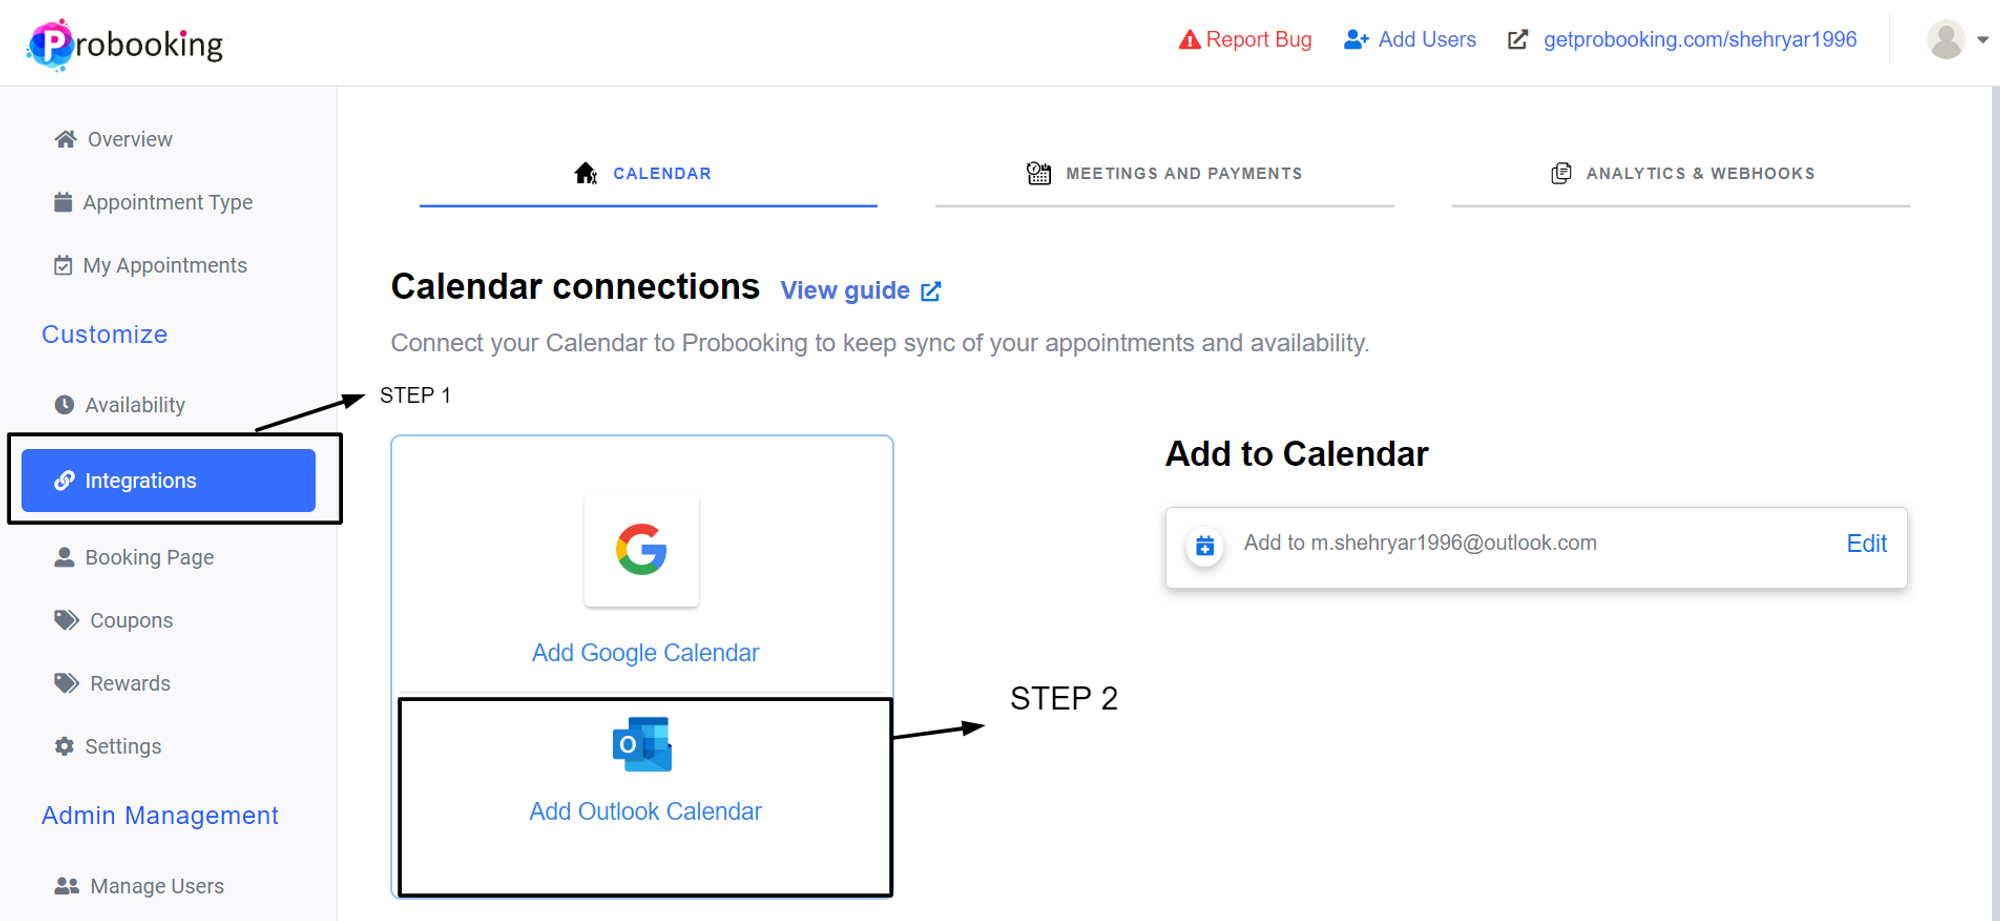
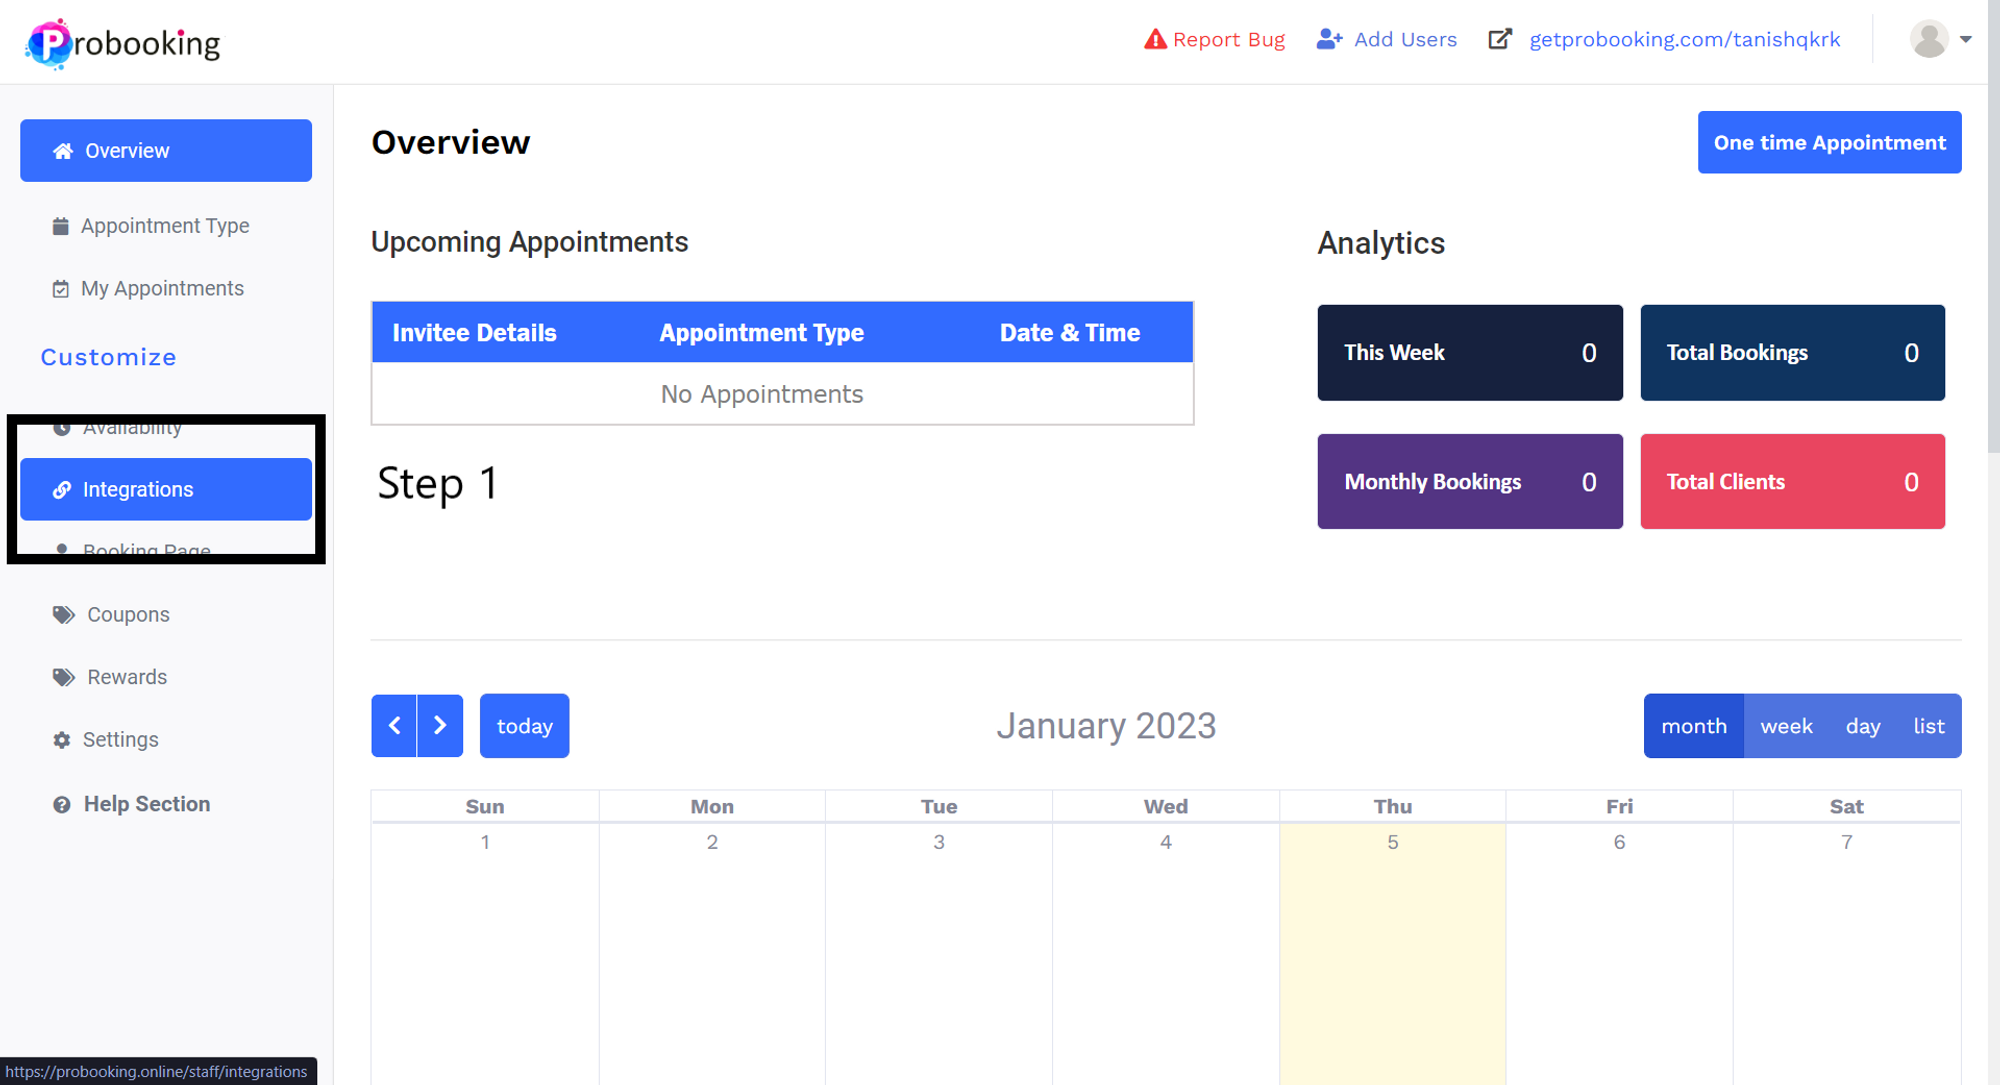
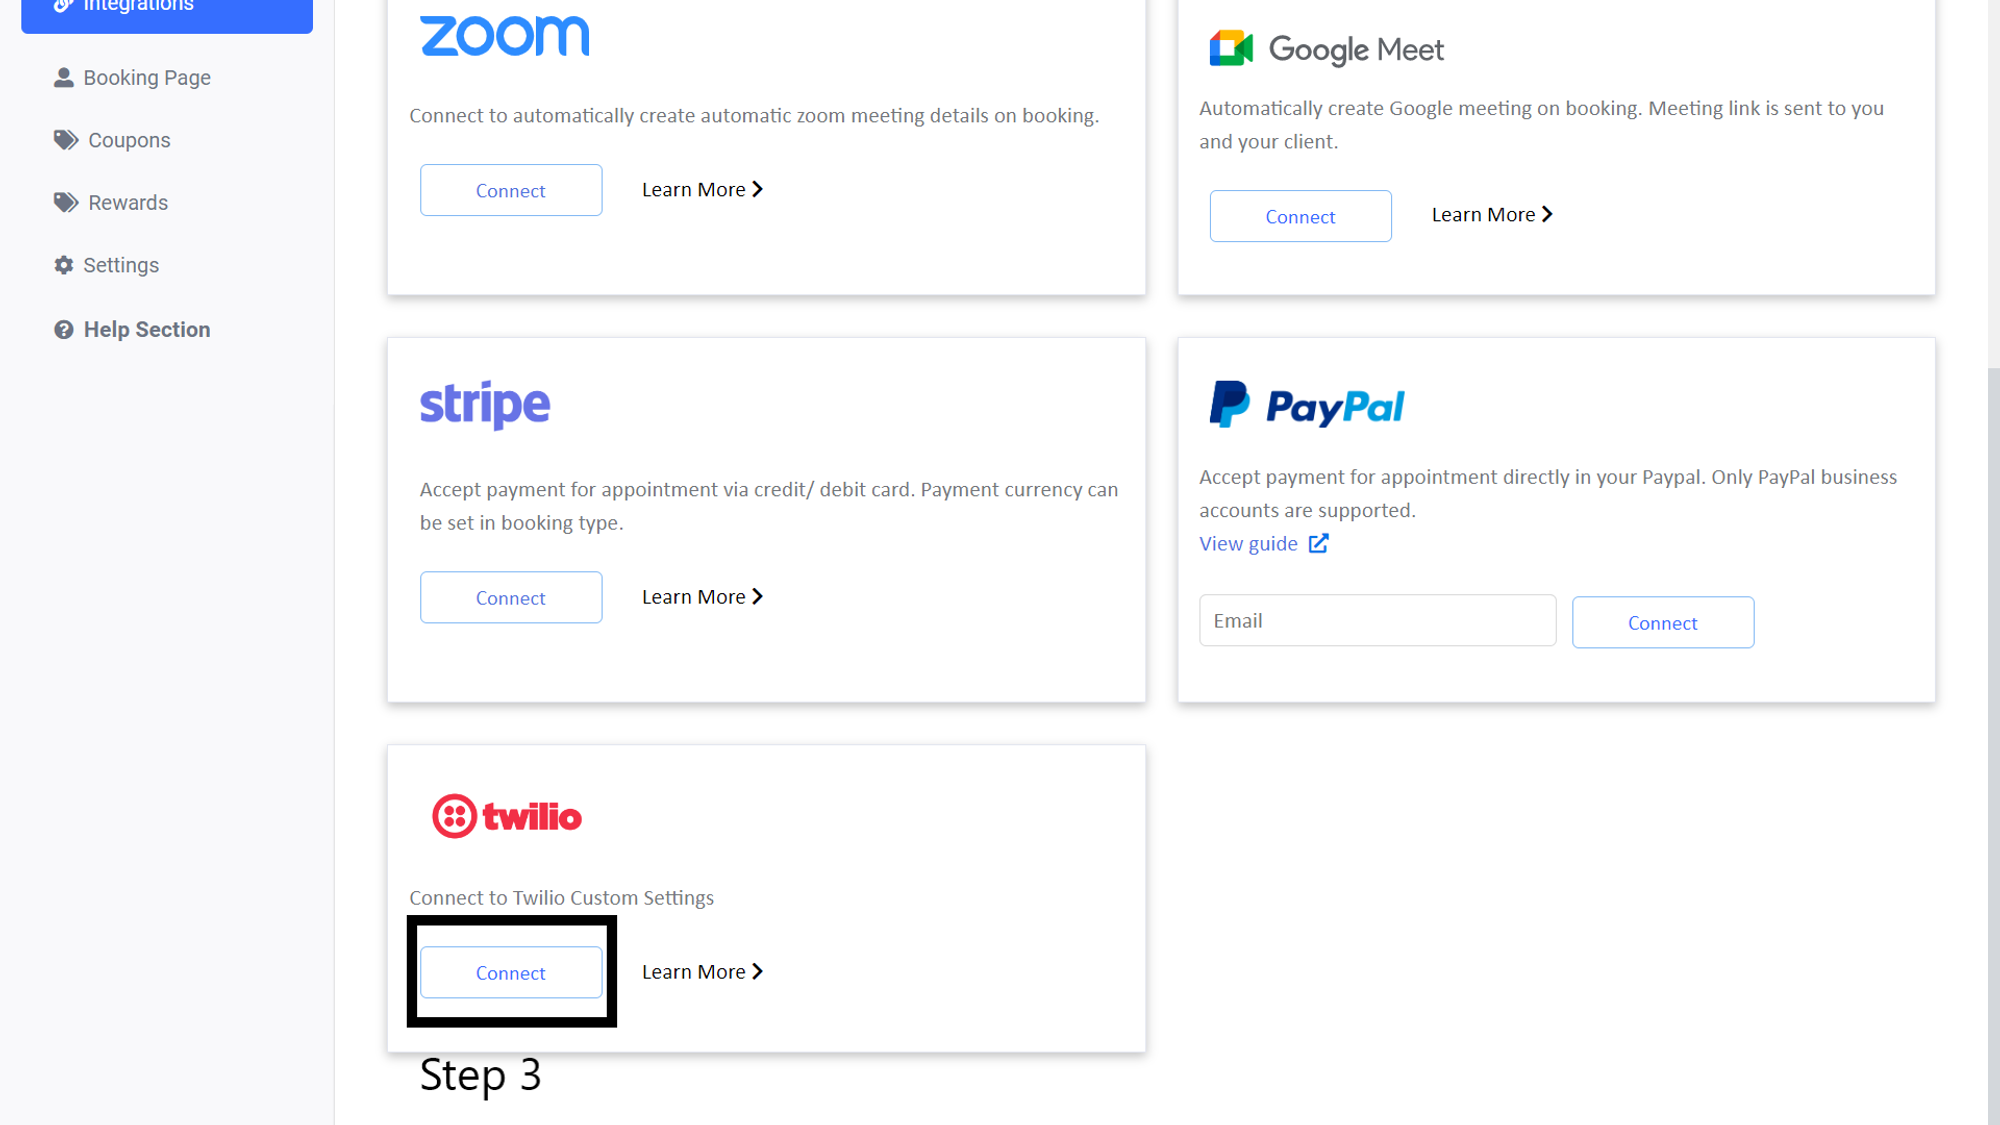
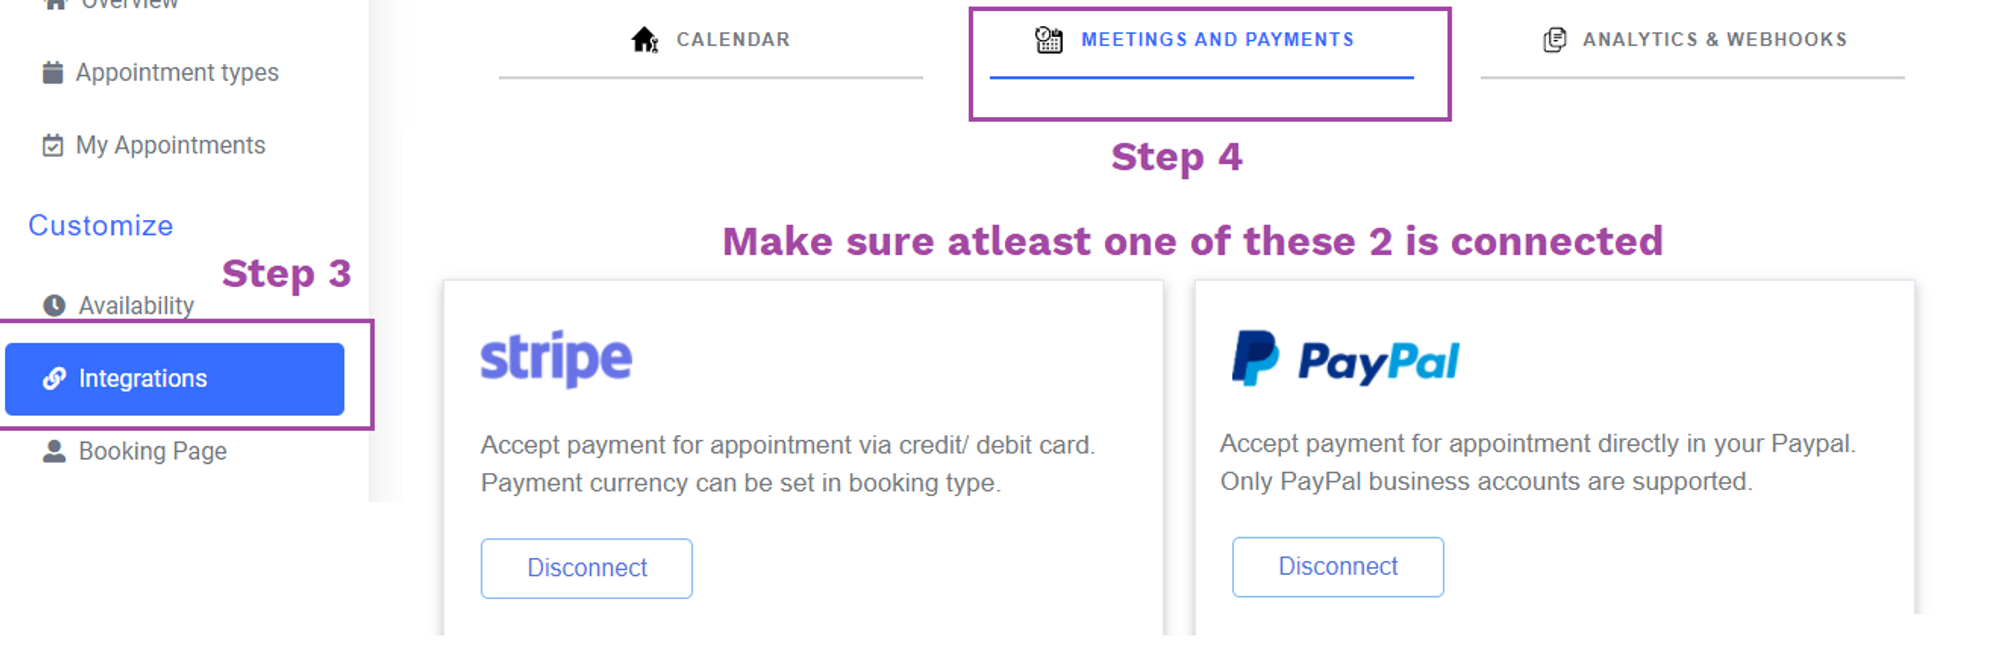
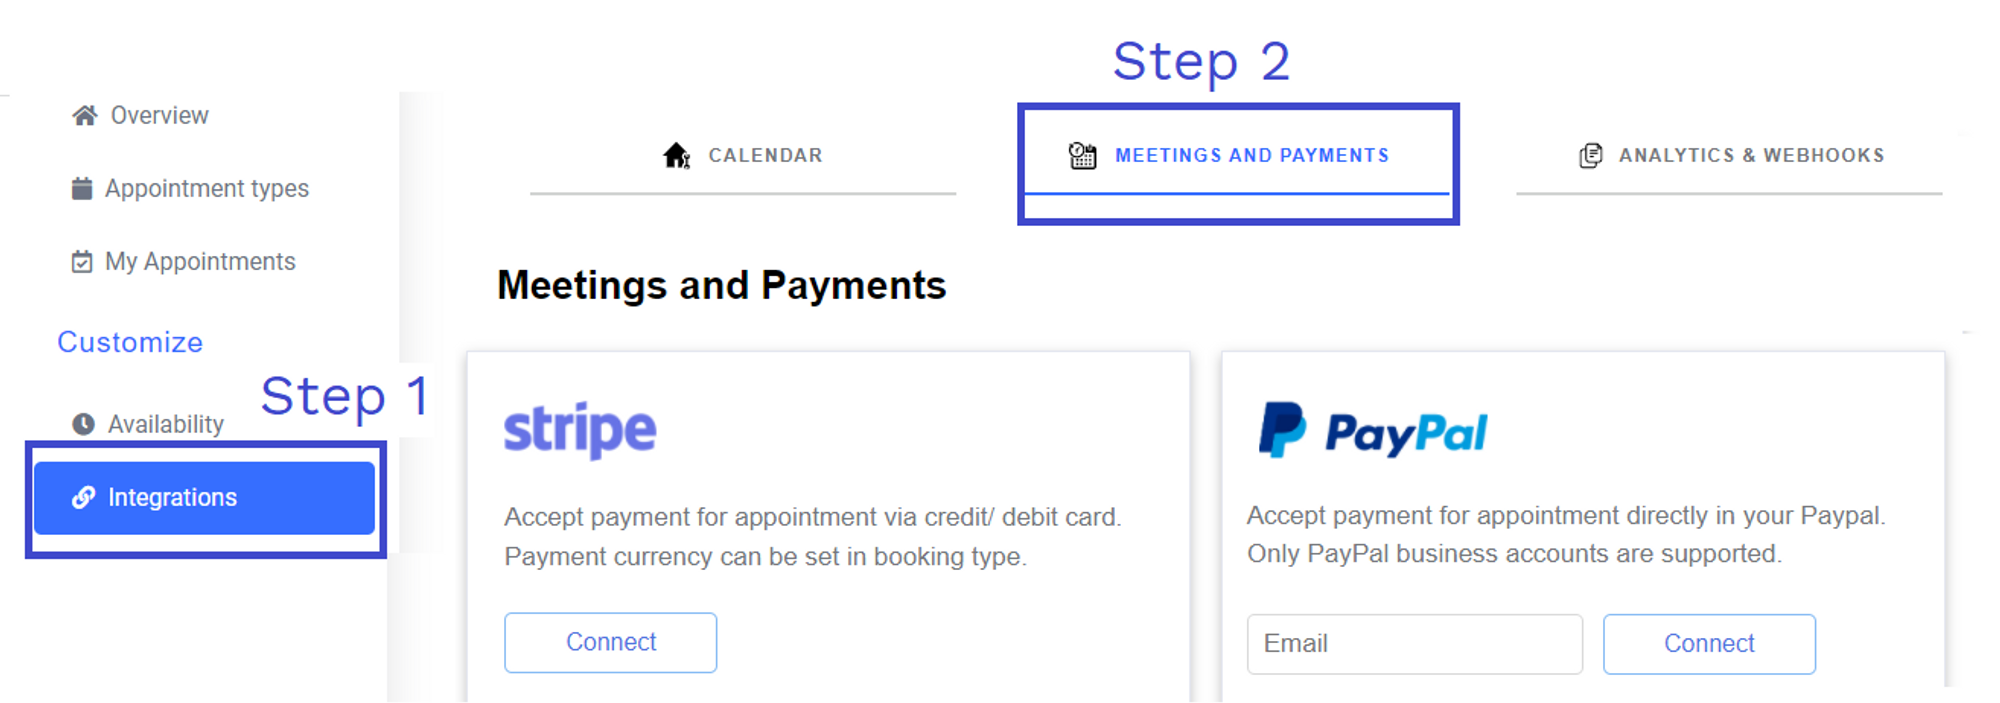
Click on integrations
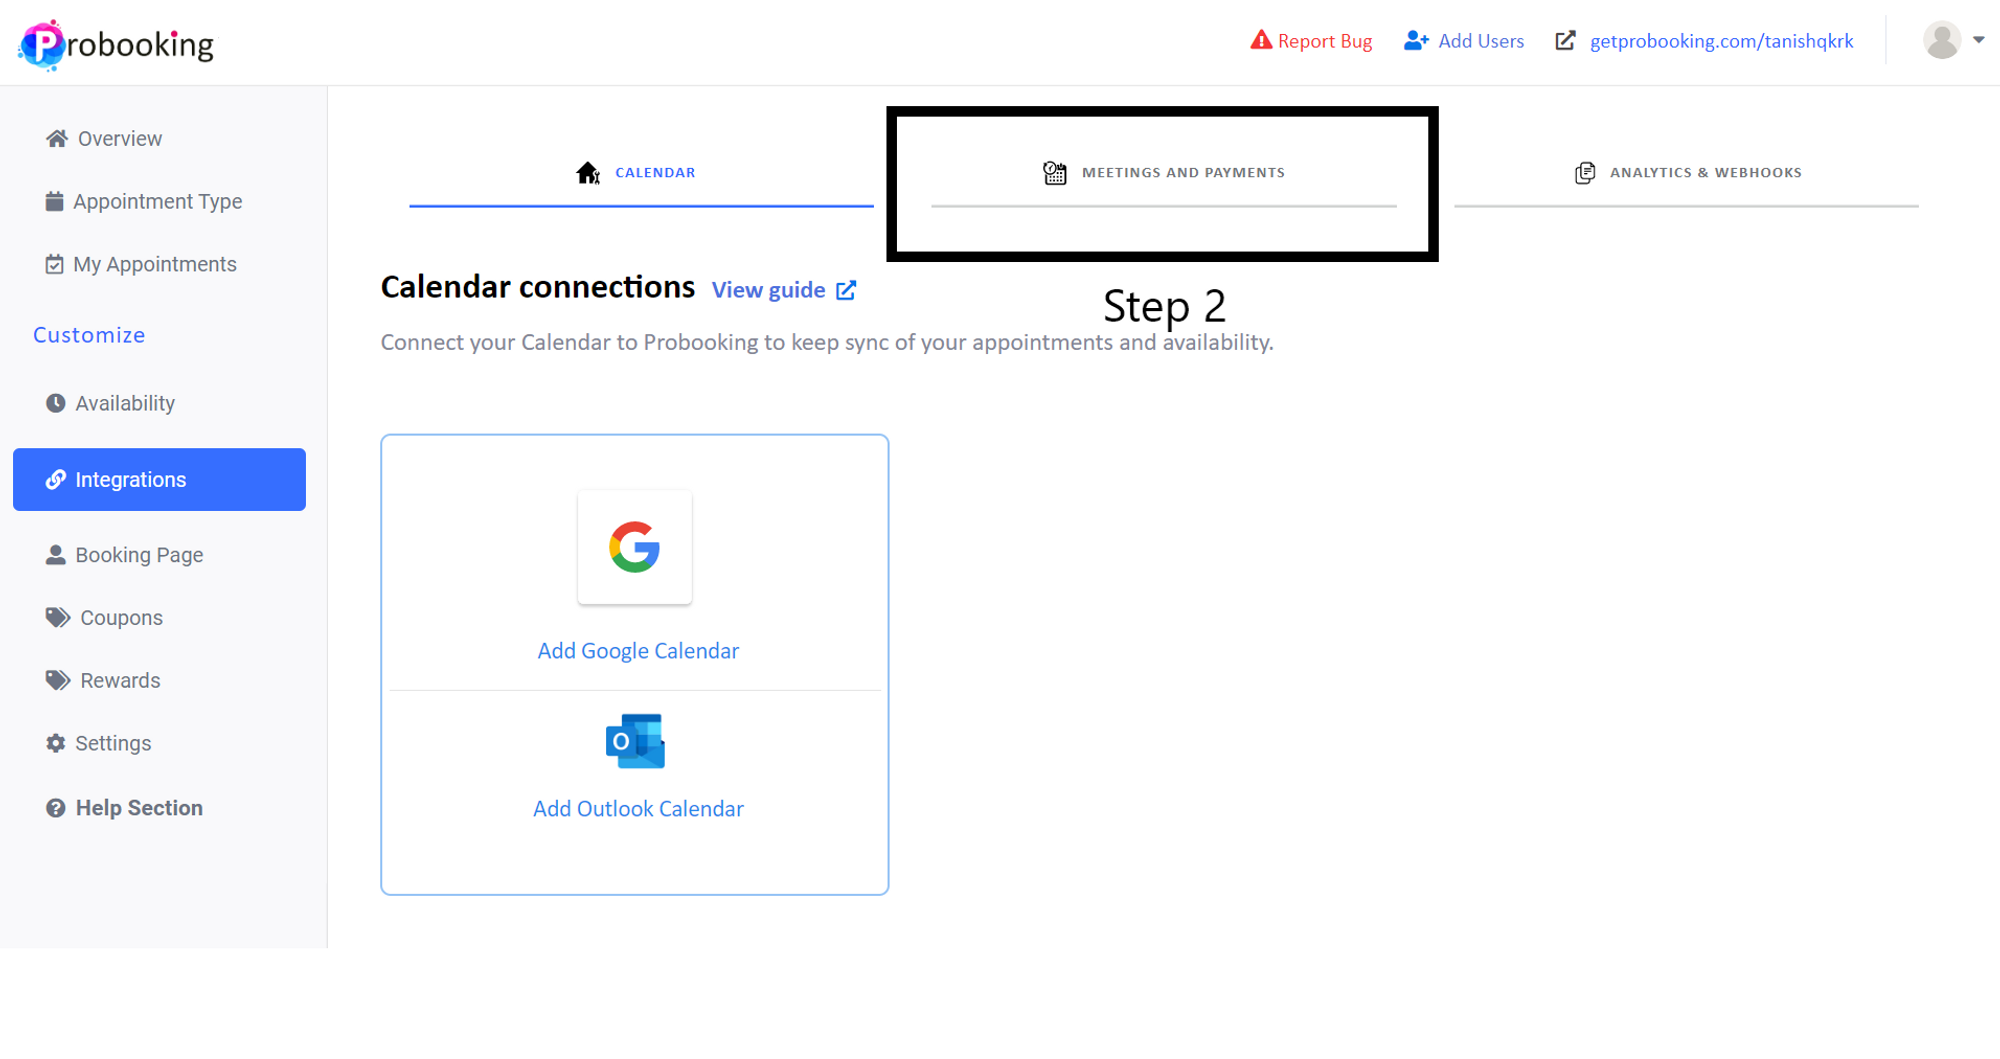
Go to meetings and payments
Click connect in Twilio
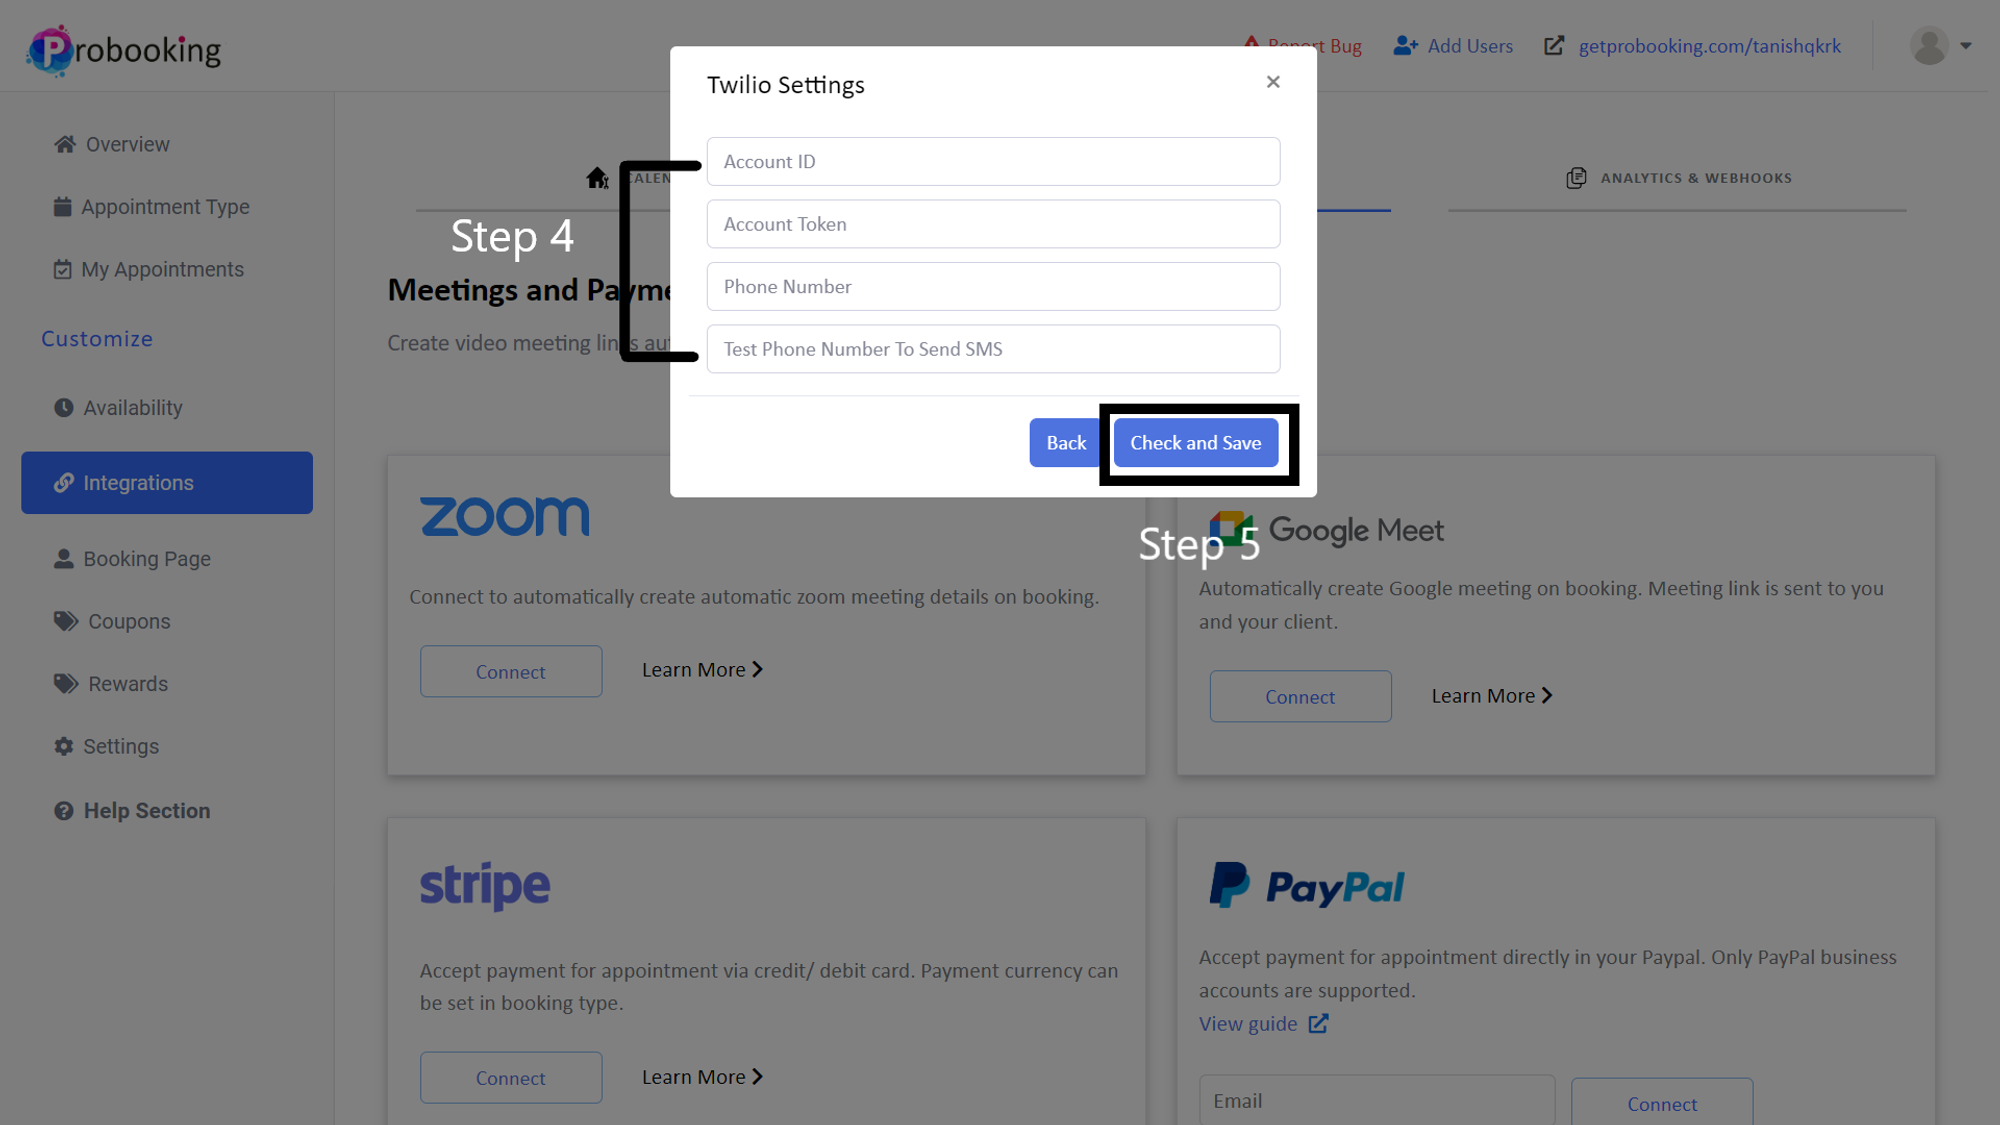
Enter your:
Click 'check and save'
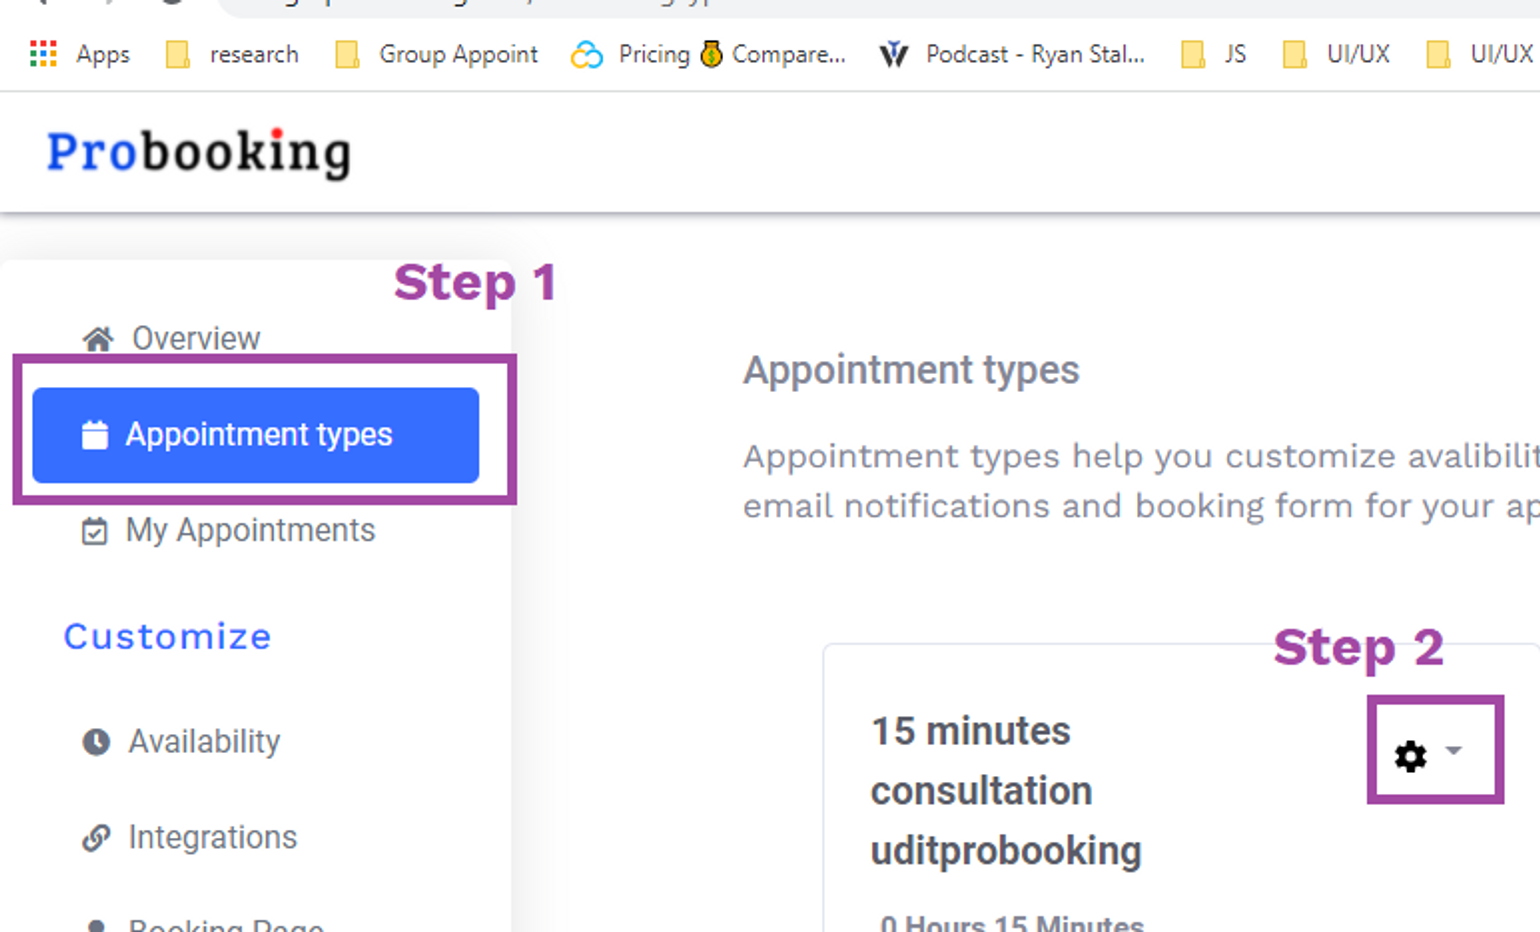

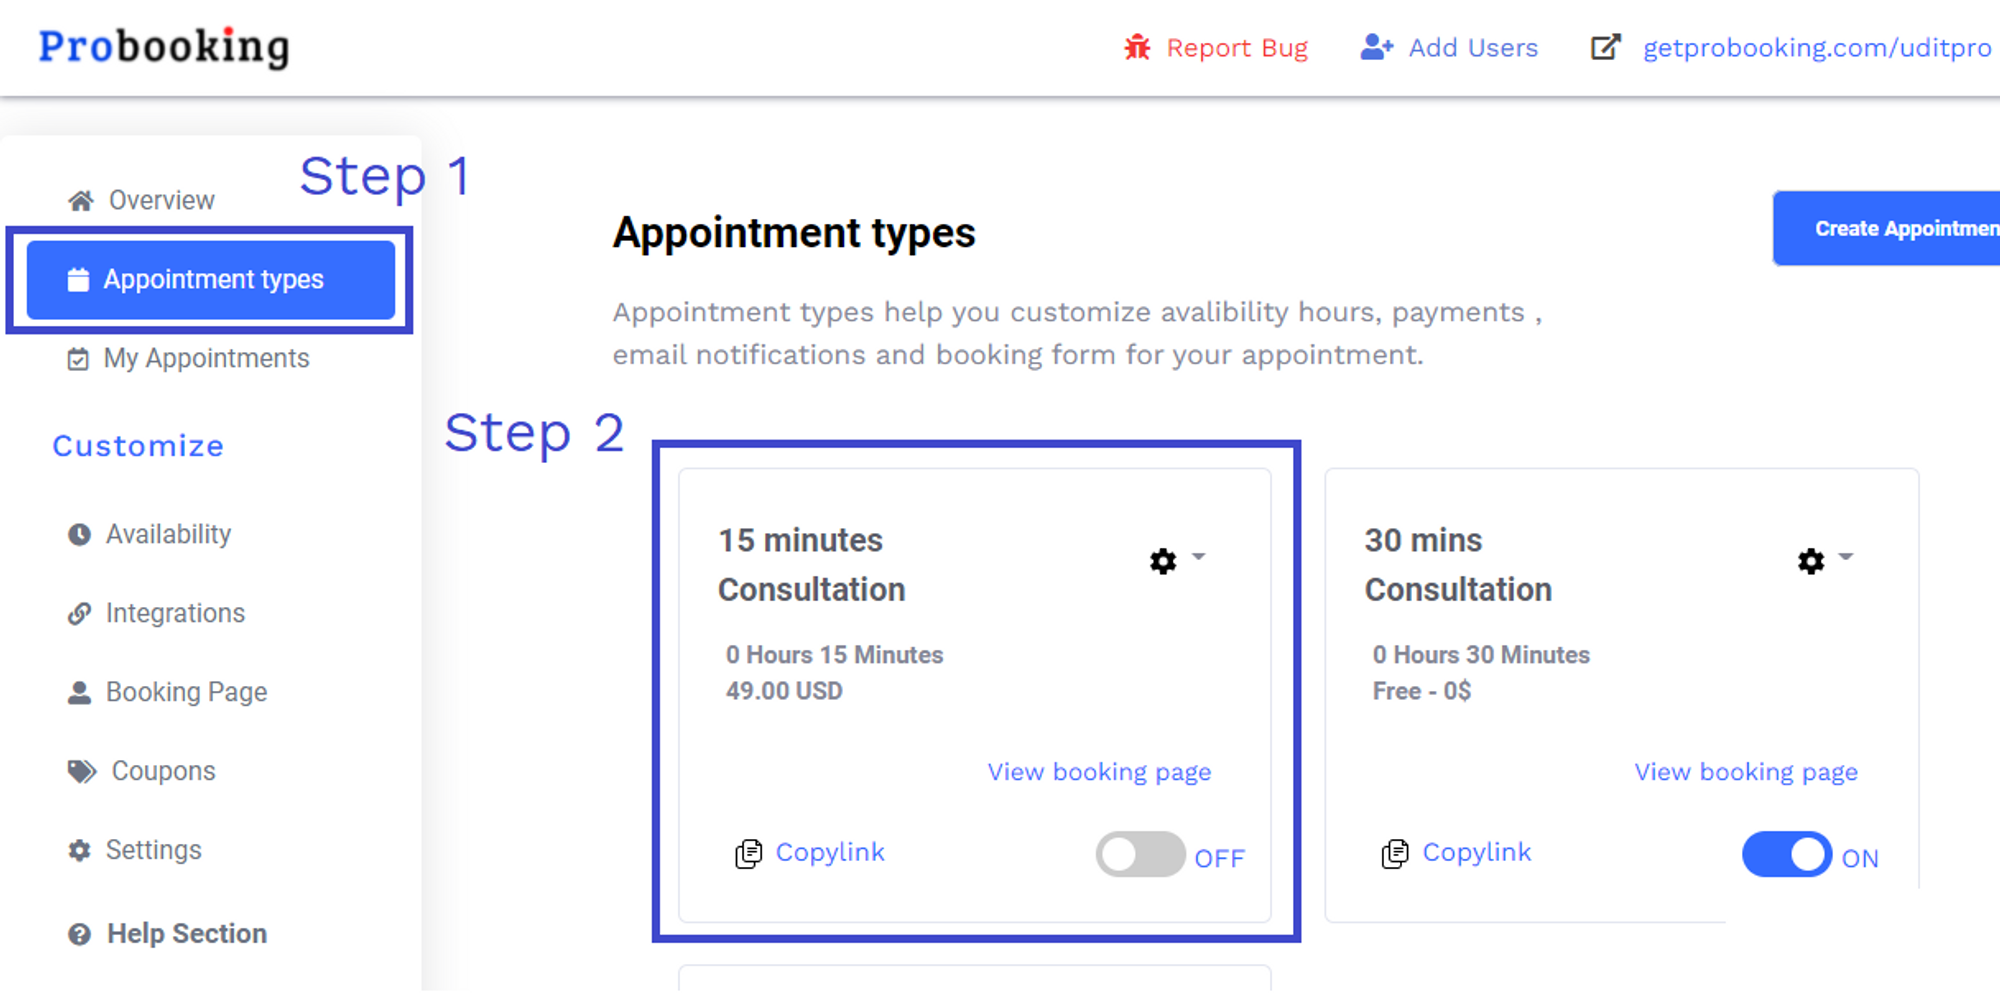
Step 1: Go to appointment type
Select the appointment type want to apply reminders on

Step 2: Select "Custom Emails"
Select email reminders option
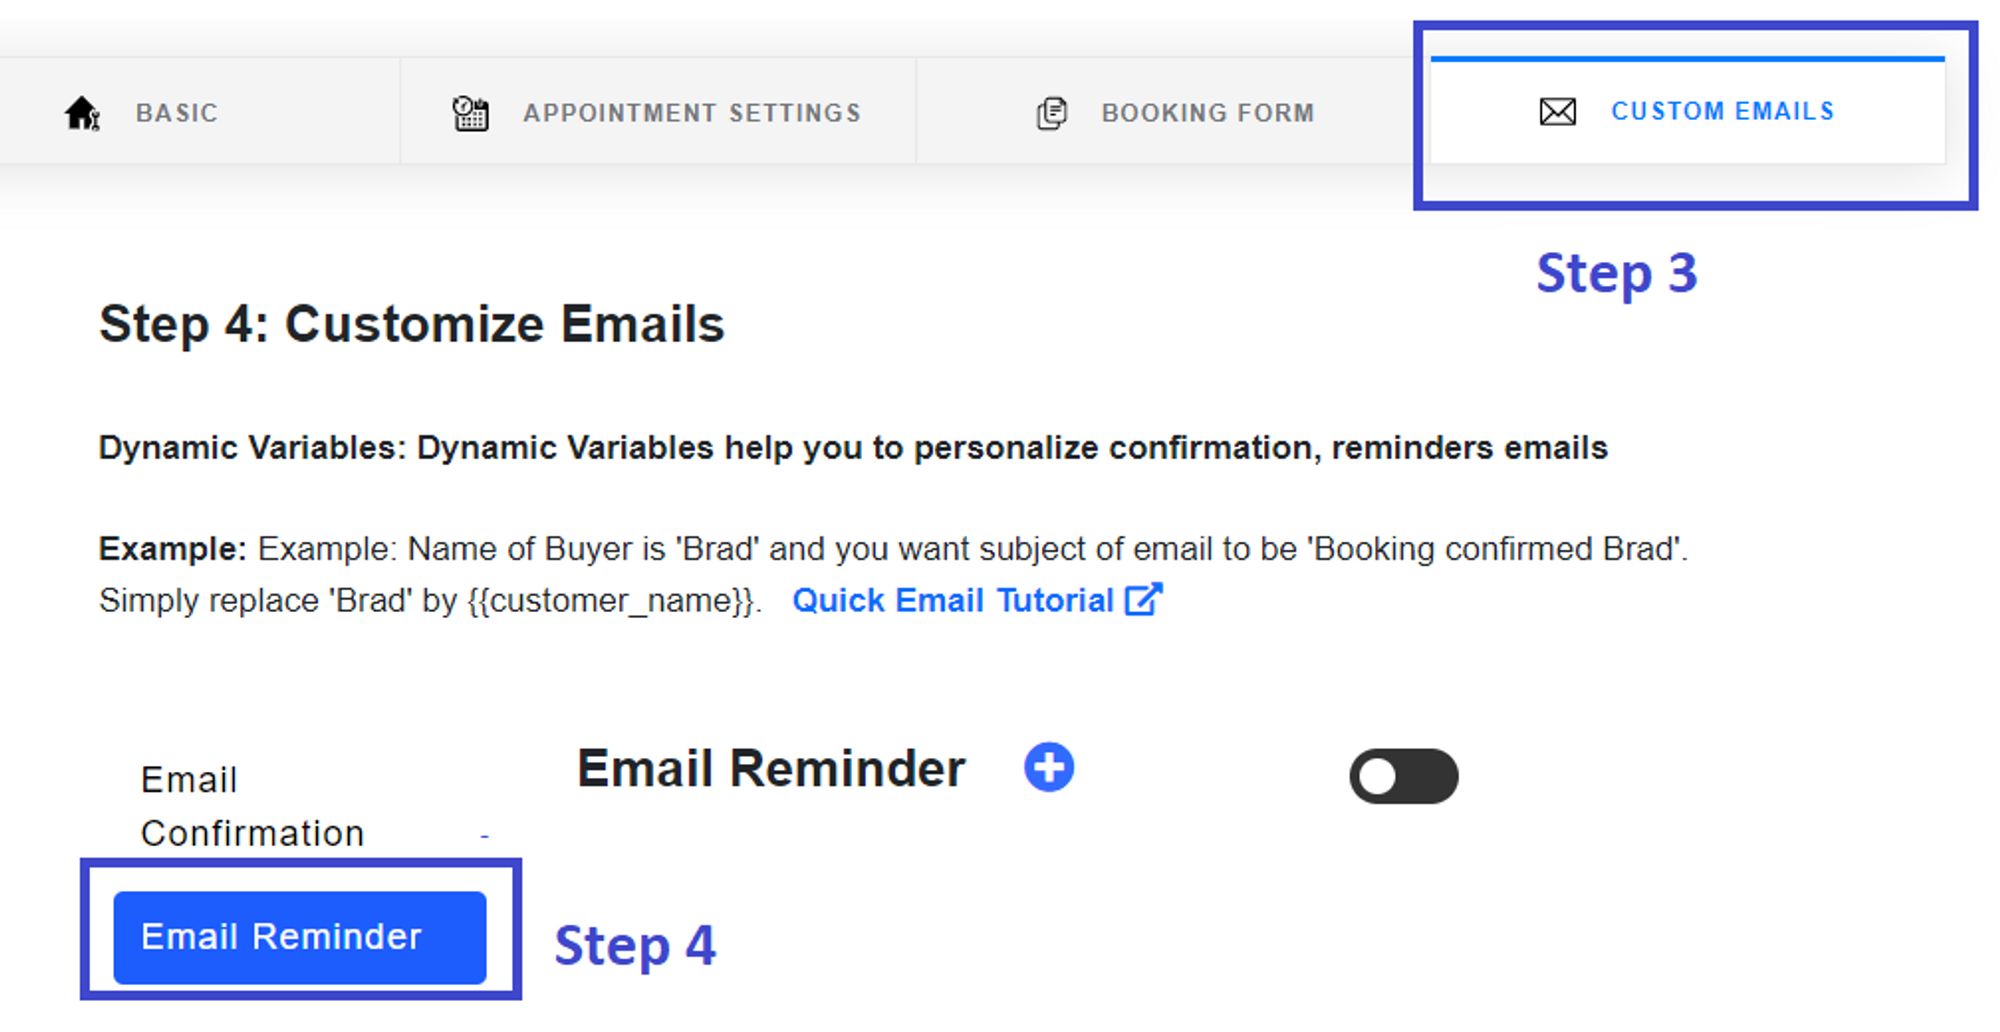
Step 3: Switch on email reminder and click on "+" to add multiple reminder times

Final Step: Customize the email reminder subject and body then save

Go to "Booking Form" tab

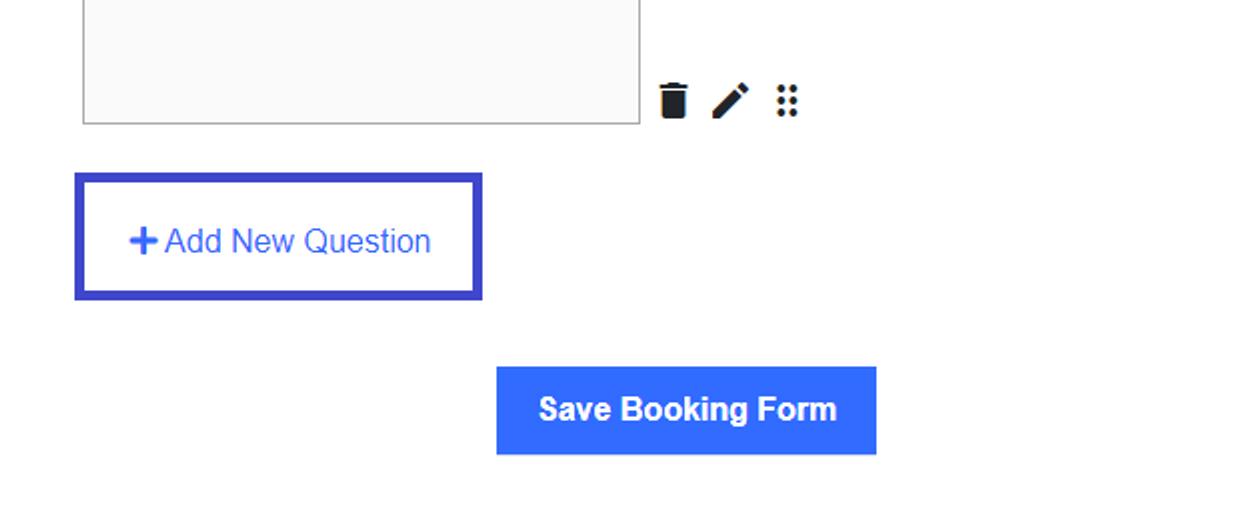
To add new question click on "+ Add new questions"
Type the question, Select the question type
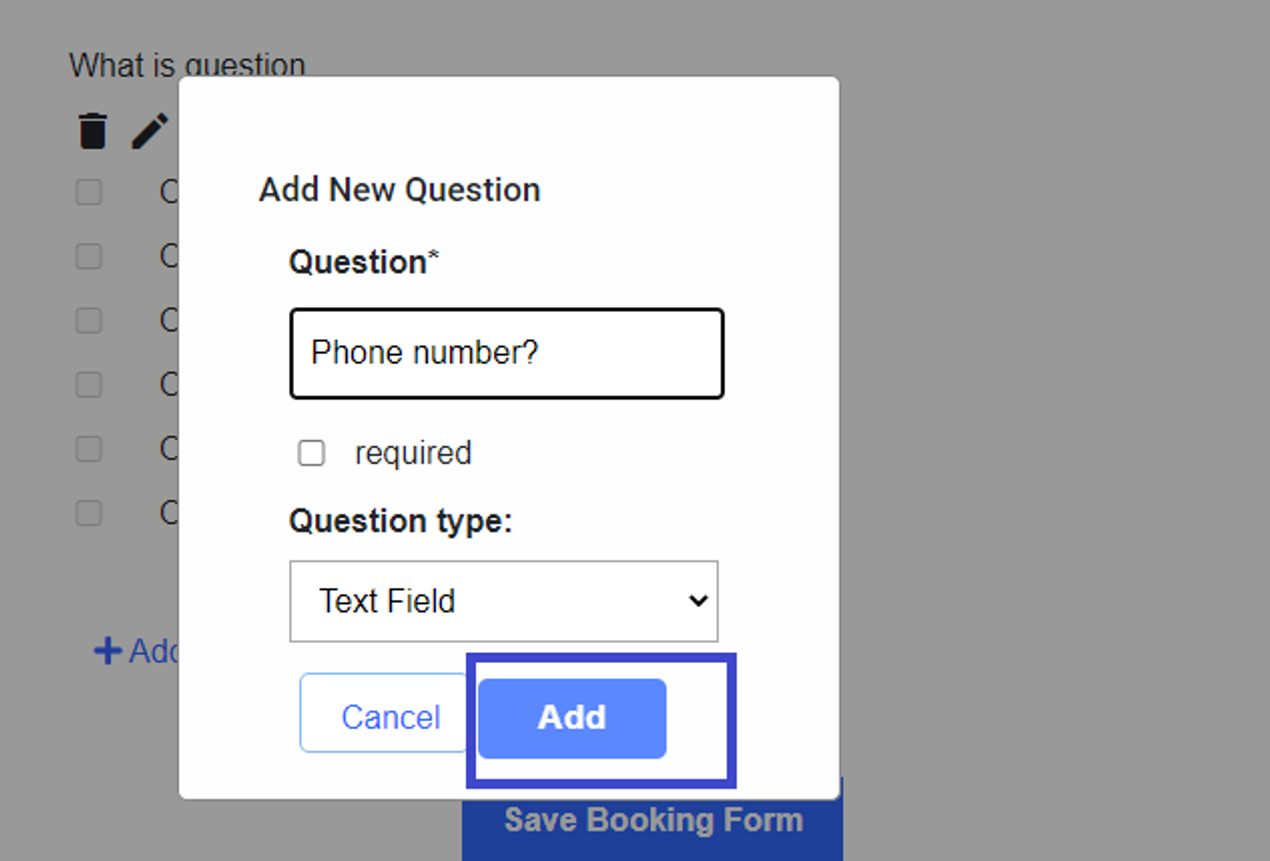
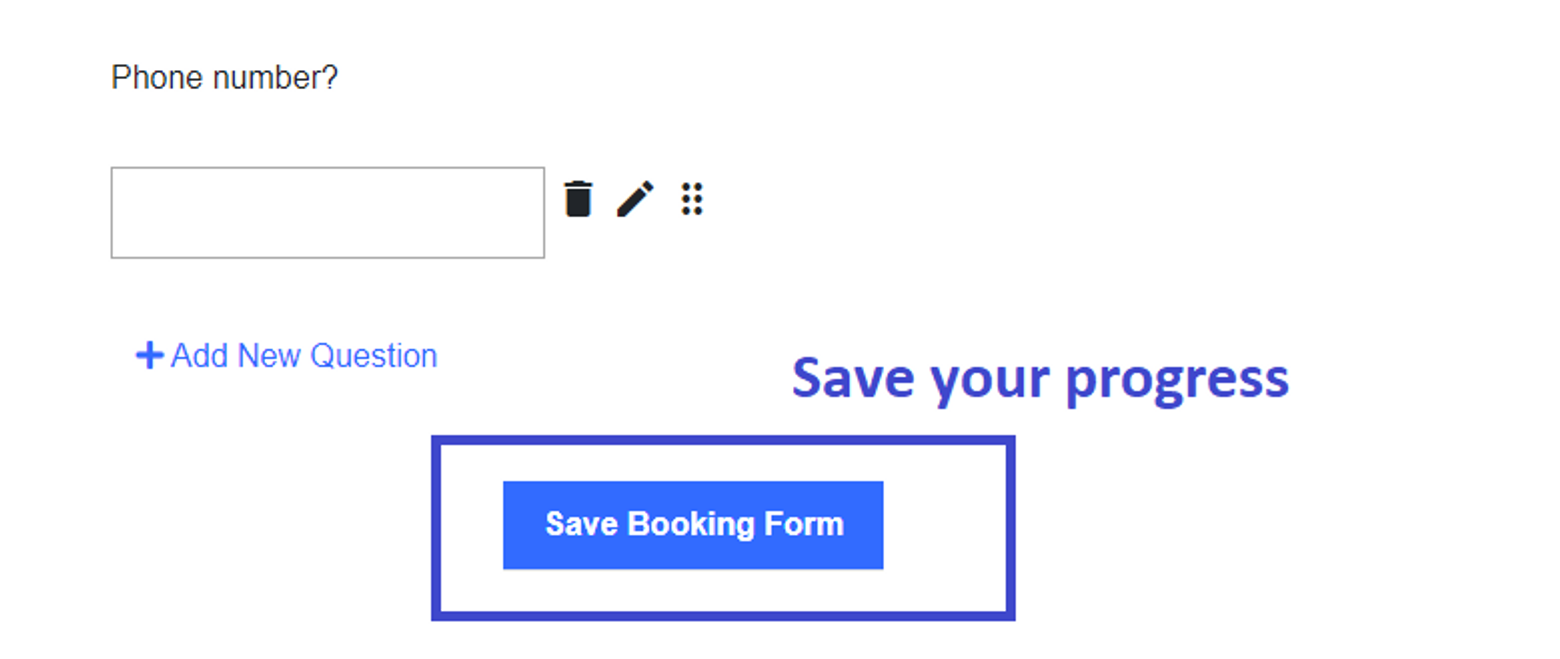
Now click on add and save your progress
Step 1: Go to the appointment types tab
Step 2: Select an existing appointment type or create a new one
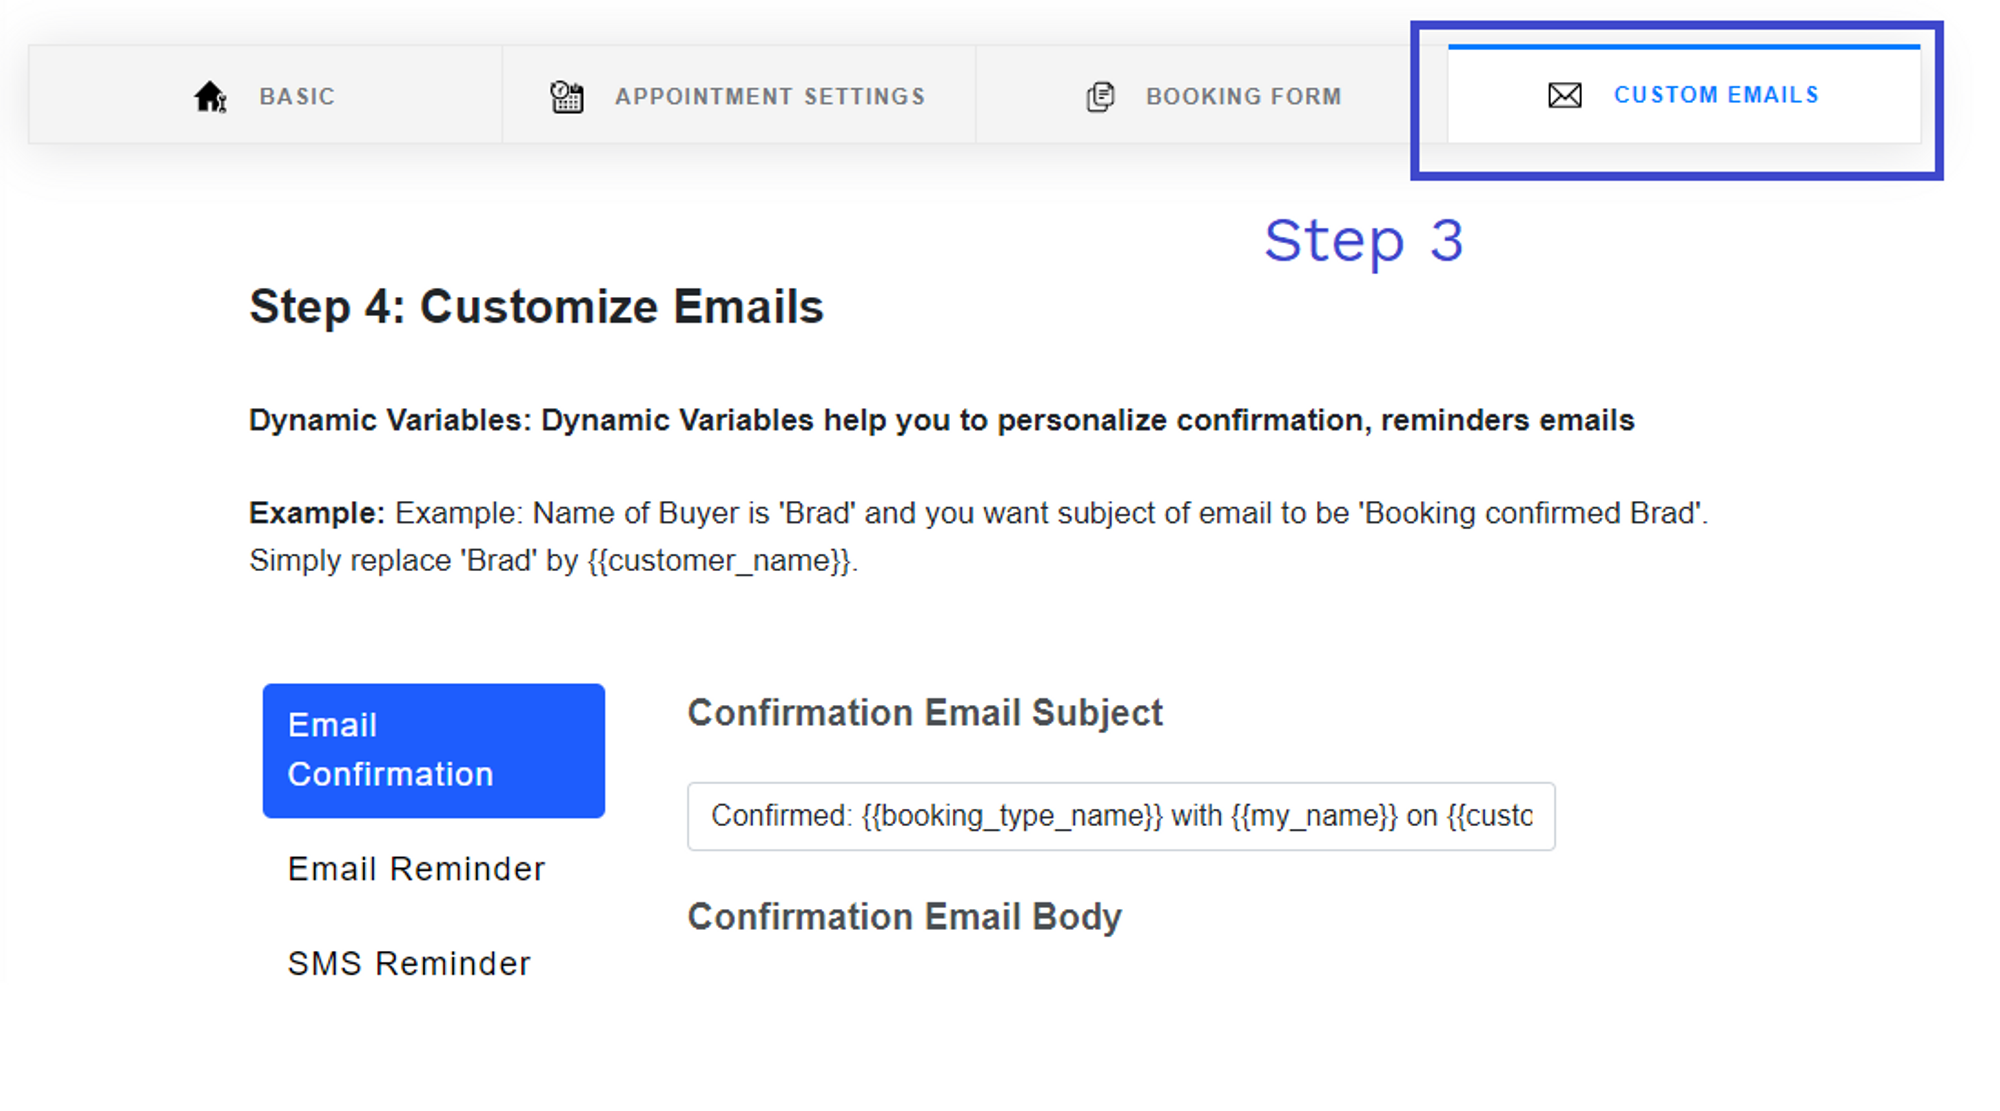
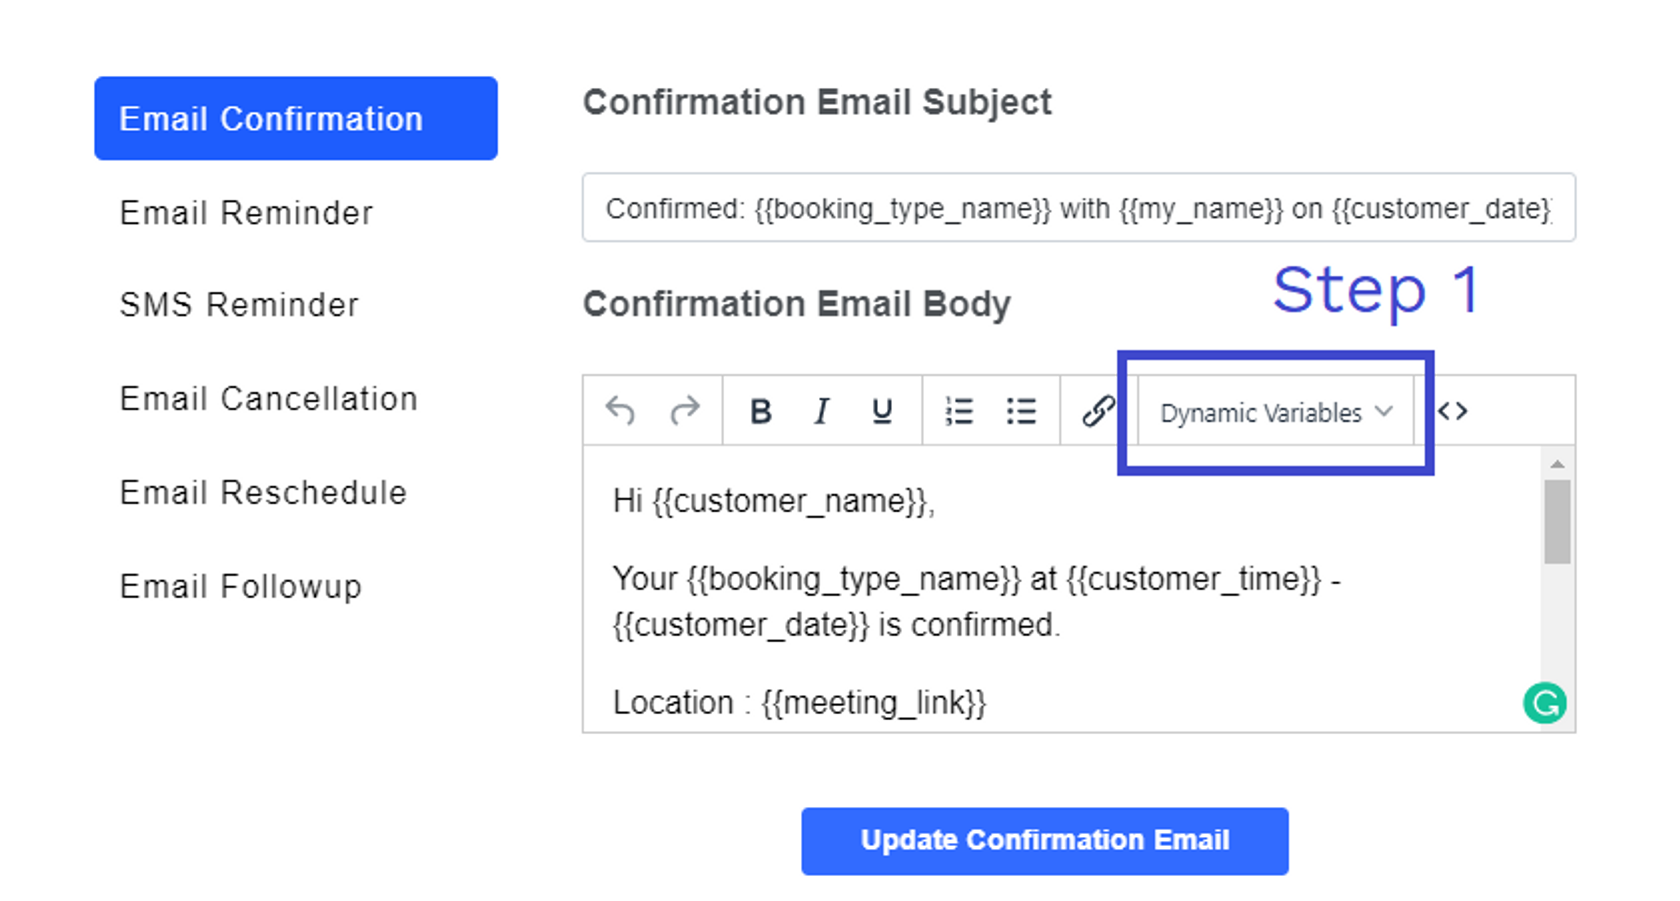
Now simply select the email you want to customize

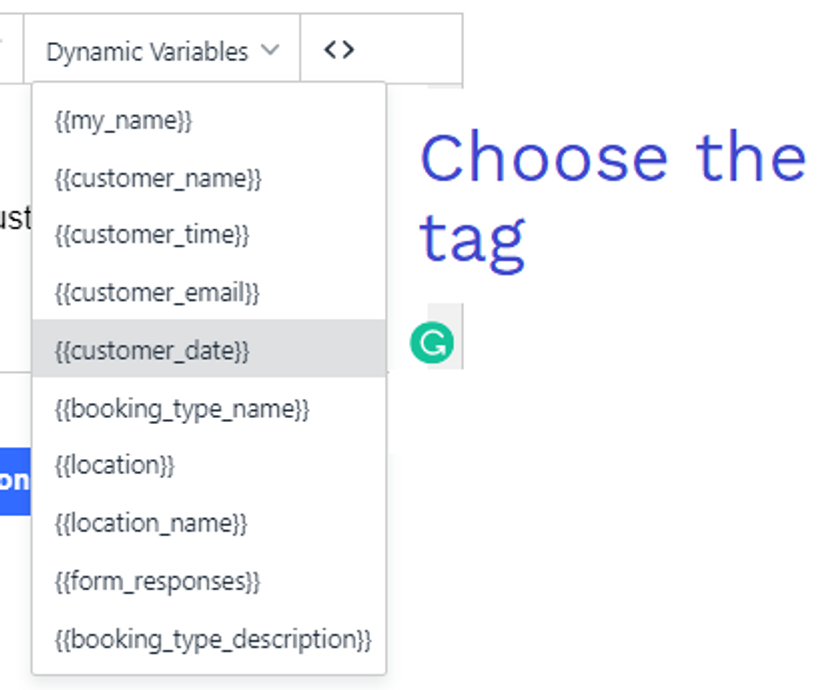
You can personalize emails with your customer name, booking types, etc
To do this use tags
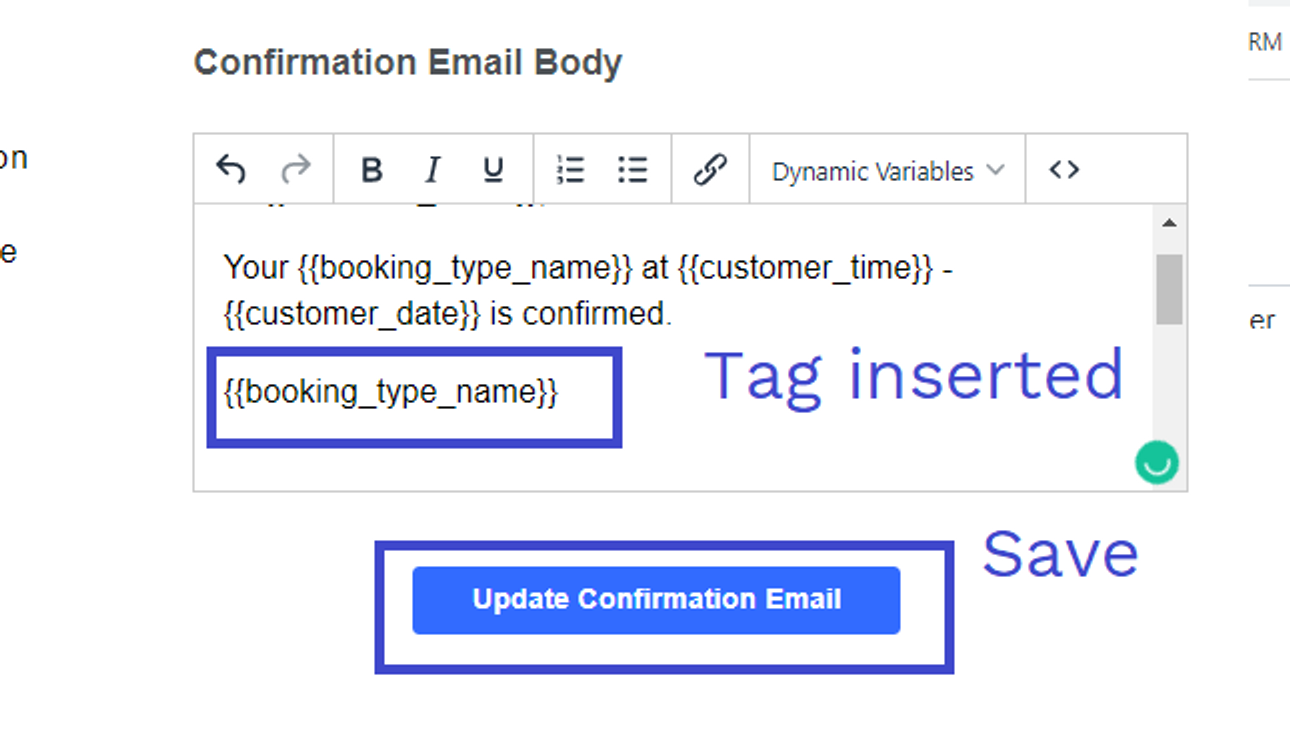
And you have successfully customized your email! 😎
Step 1: Select the appointment type

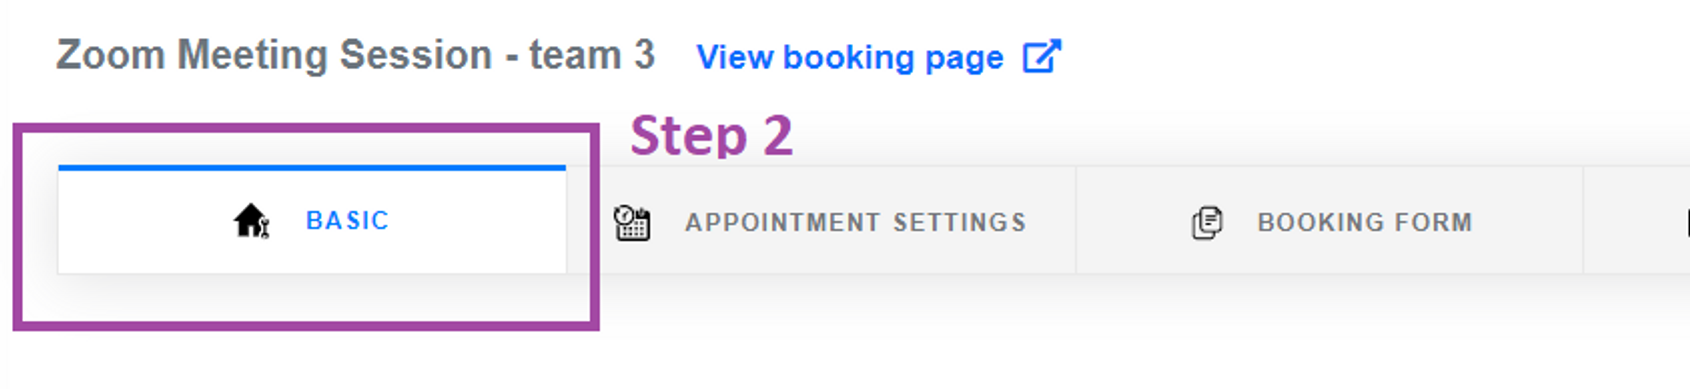
Step 2: Select tab 1 and scroll to the bottom
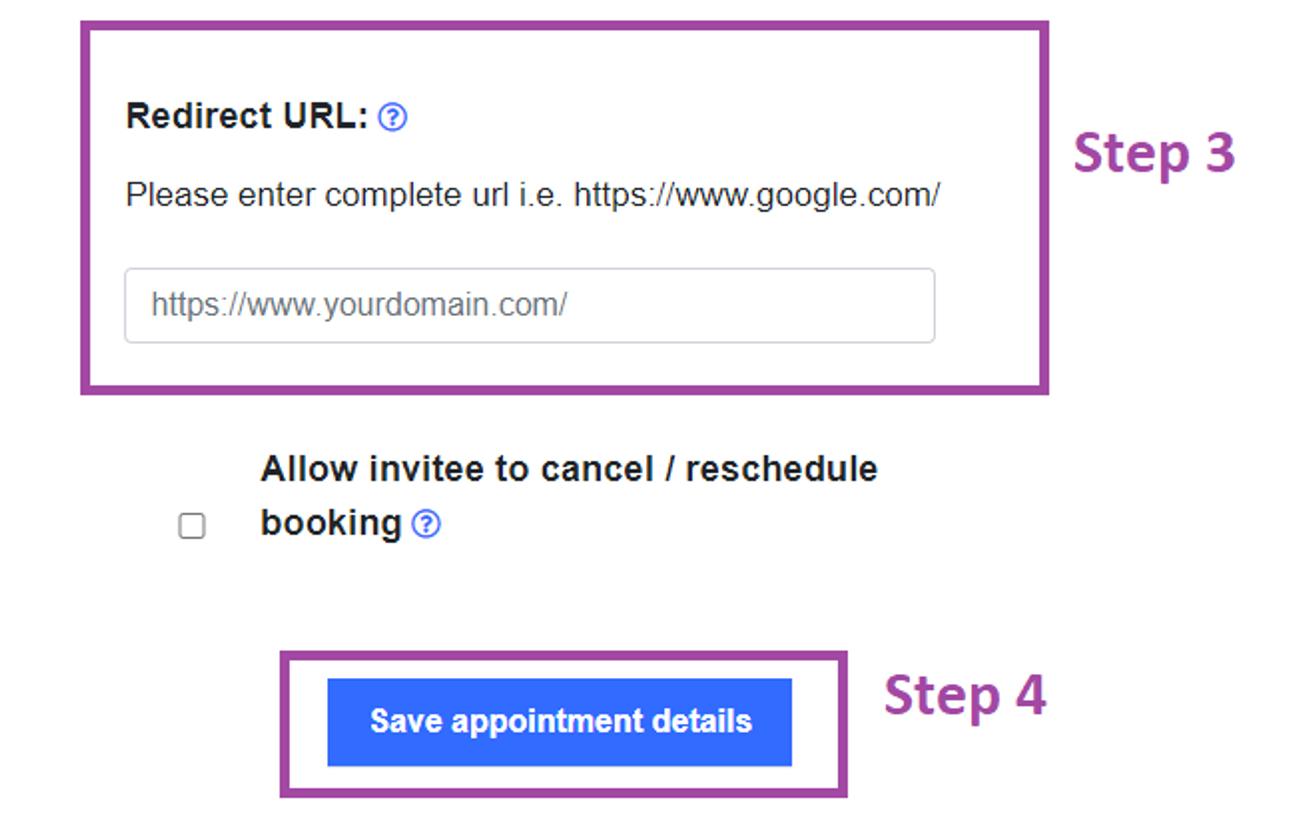
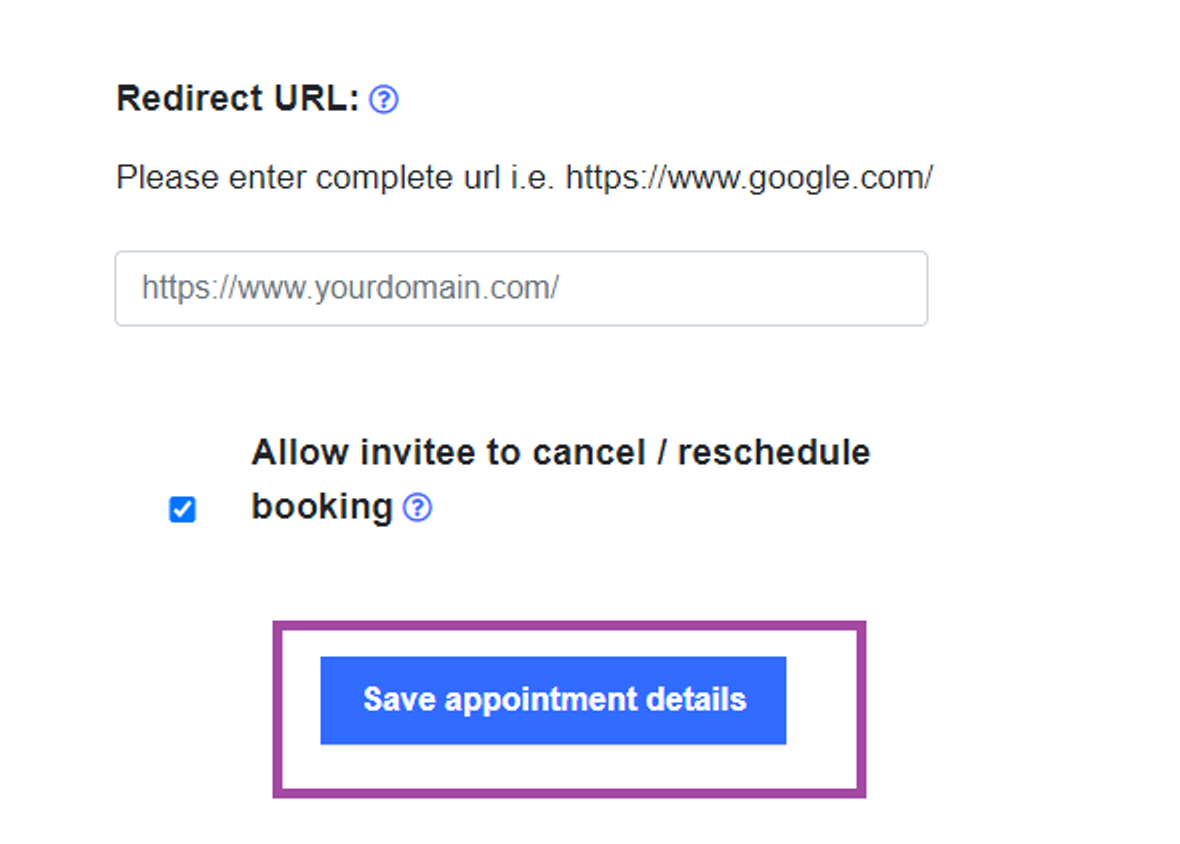
Step 3: Enter full URL (with https/http)
example: https://getprobooking.com/
Step 4: Save
Step 1: Select the appointment type

Step 2: Check the "Secret meeting"
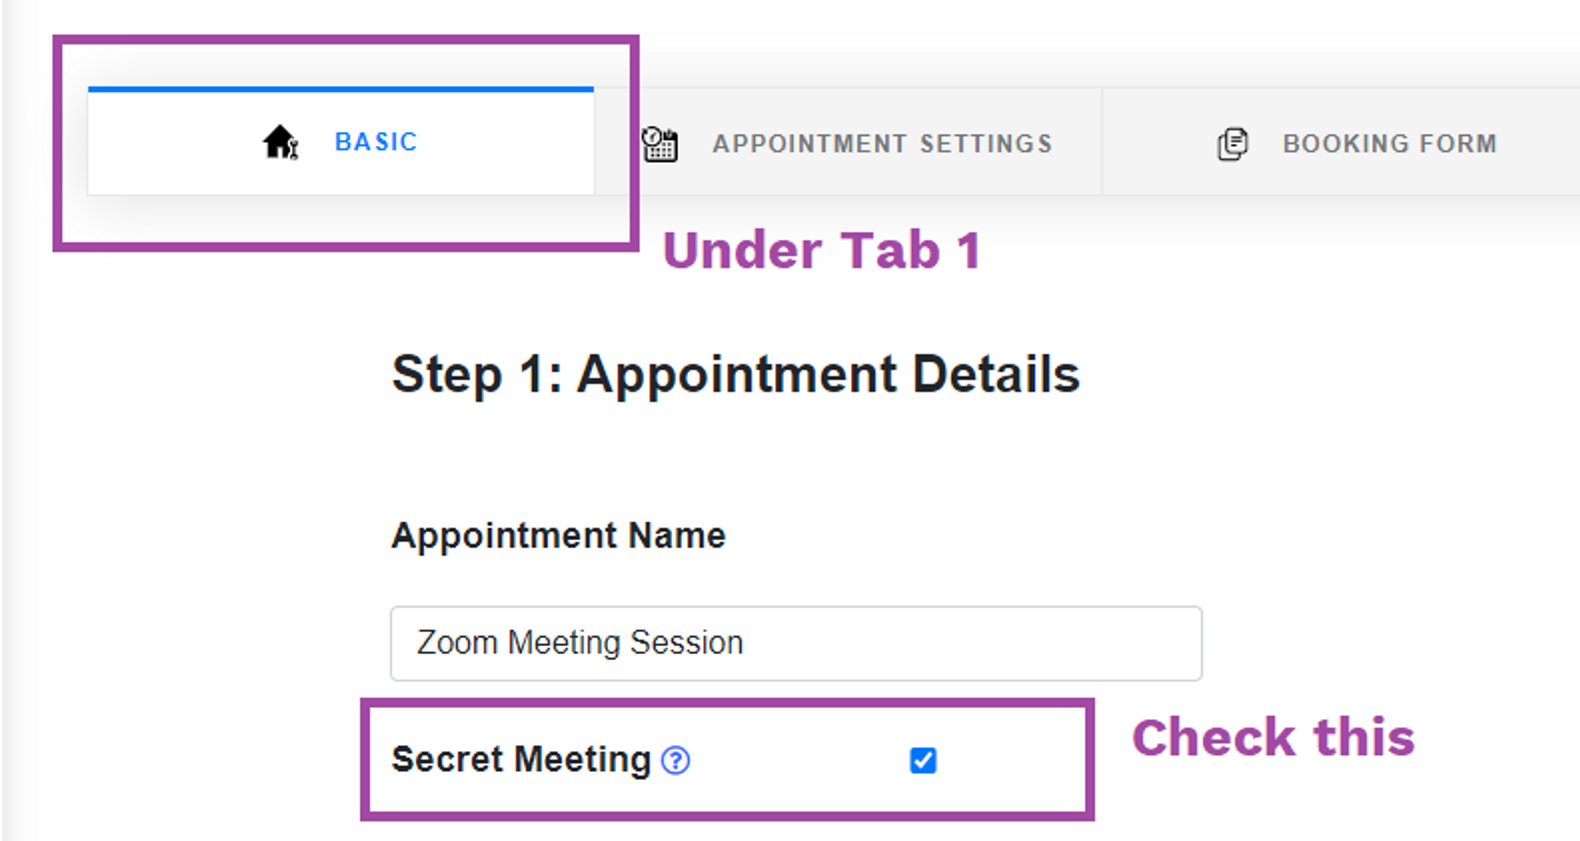
Step 3: Scroll to bottom and save it
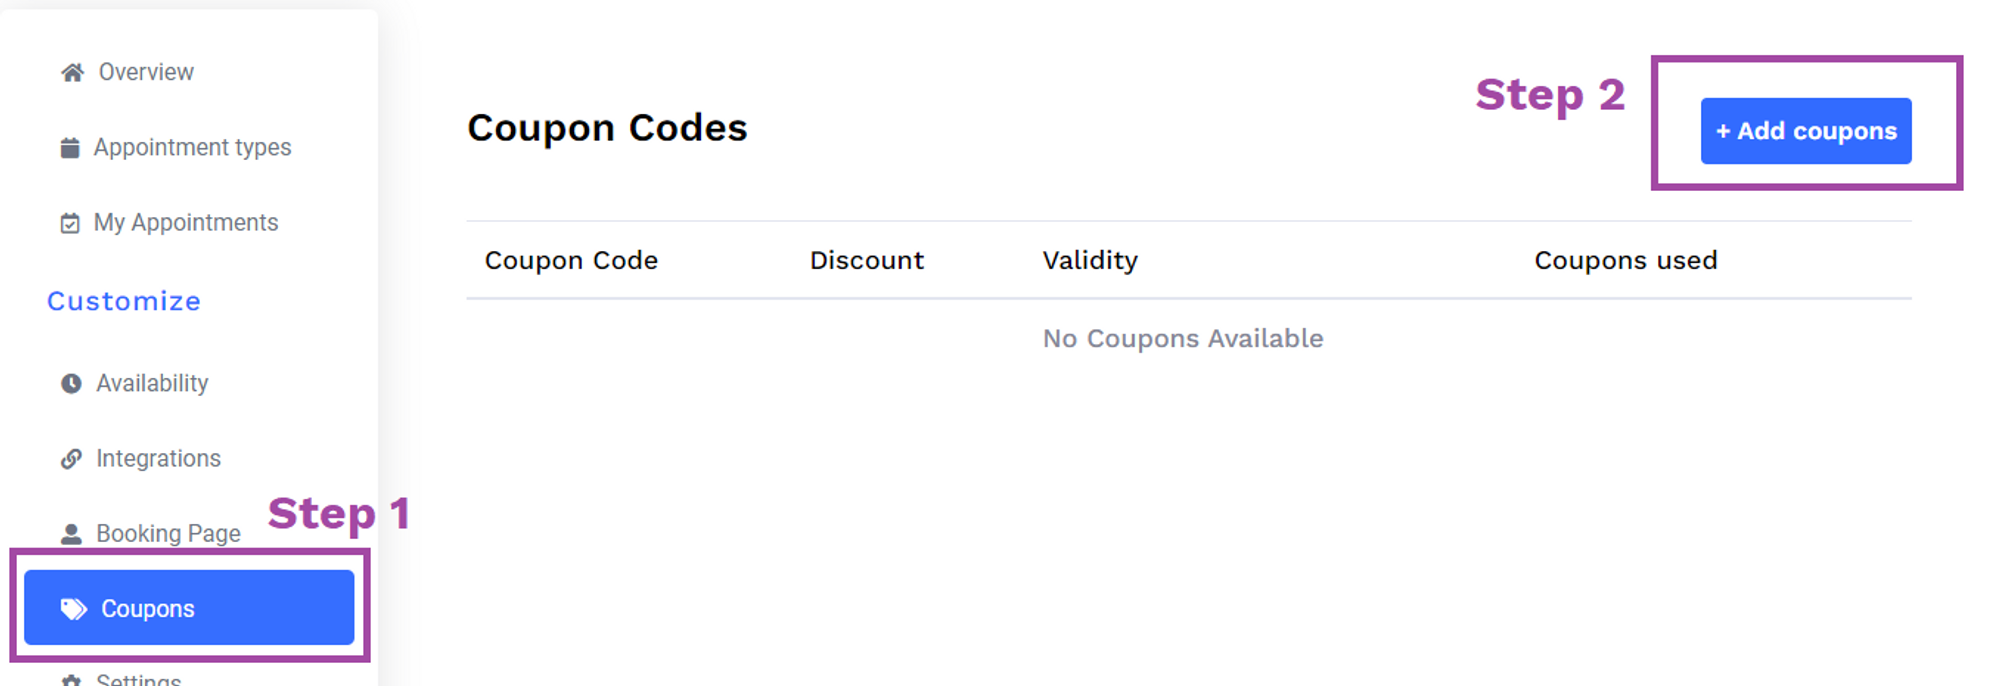
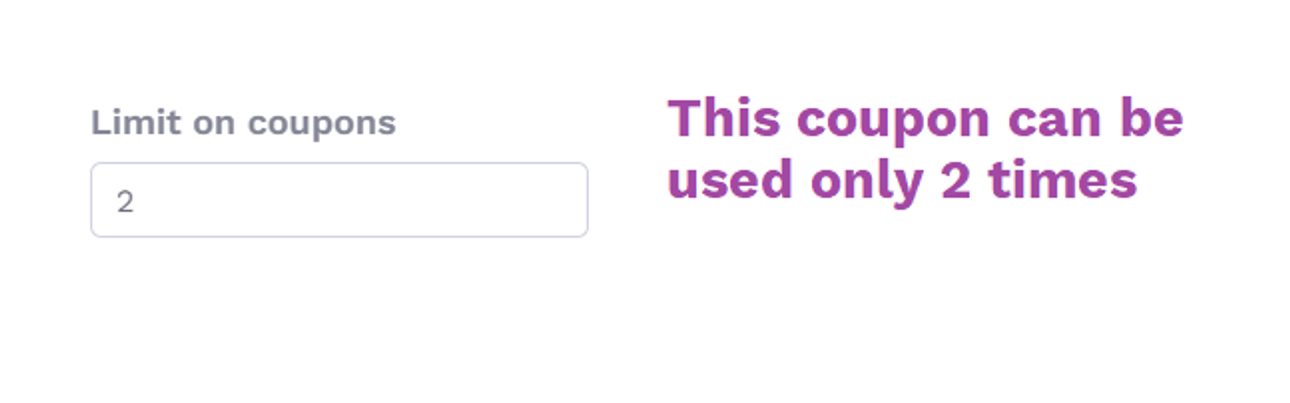
Step 1: Create a new coupon
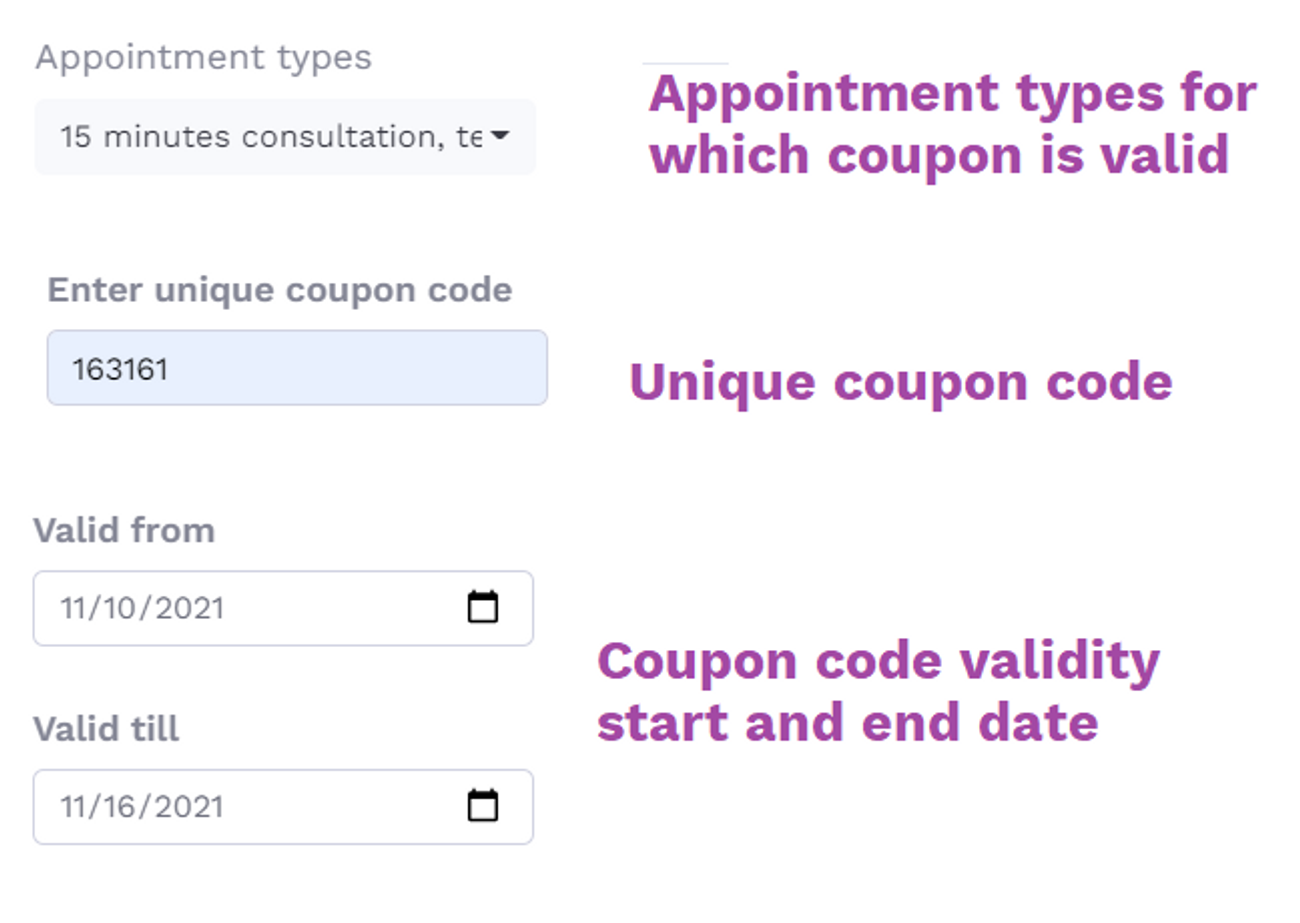
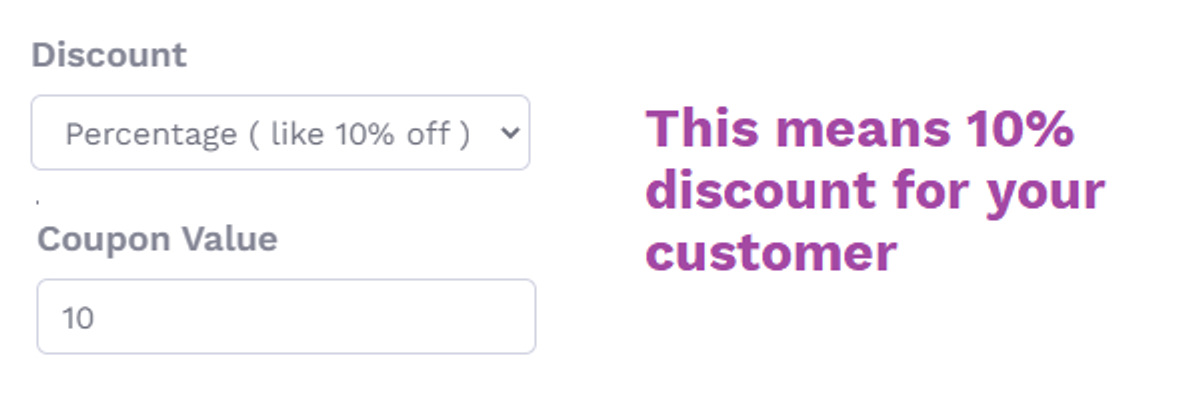
Modal opens up - fill the details as explained below
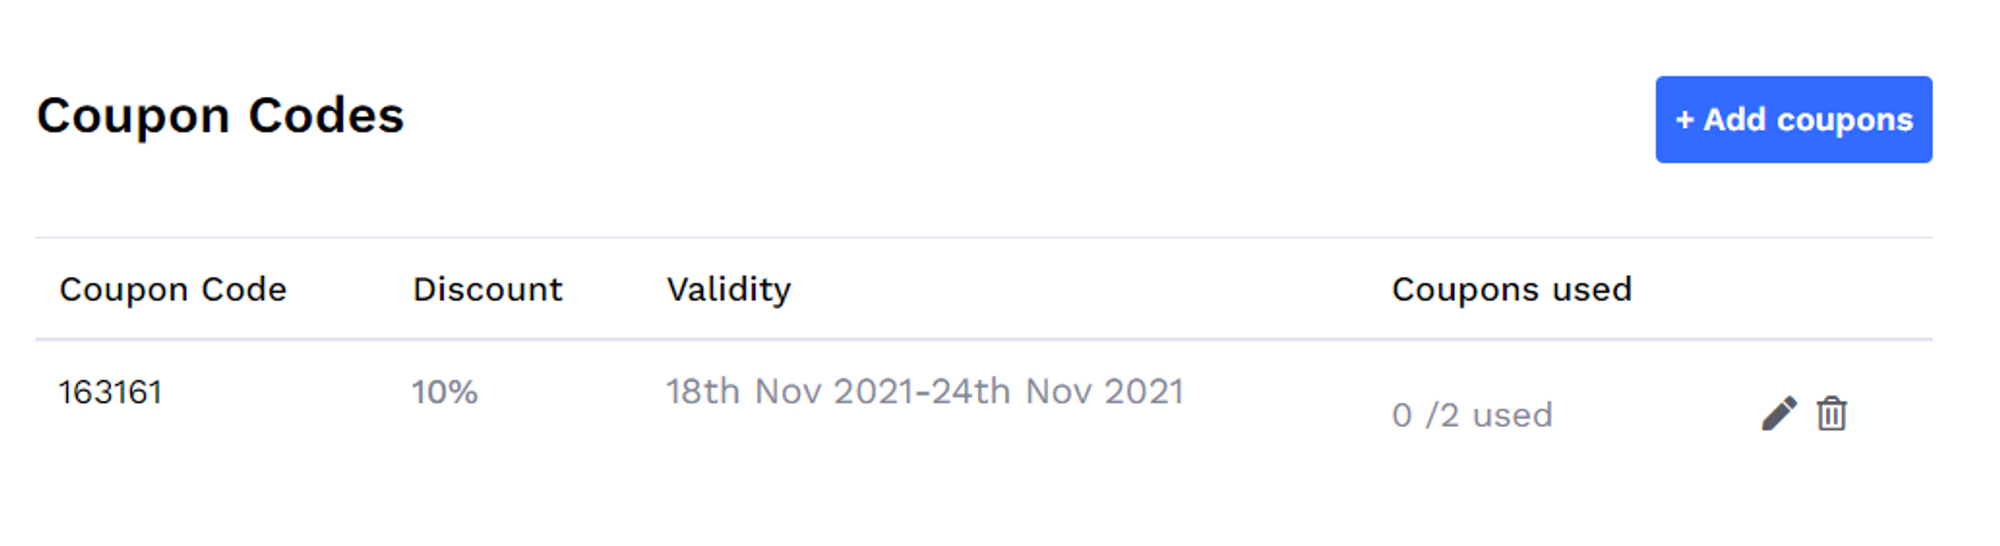
After saving it looks like below
Step 2: Go to integrations tab and connect Stripe or PayPal
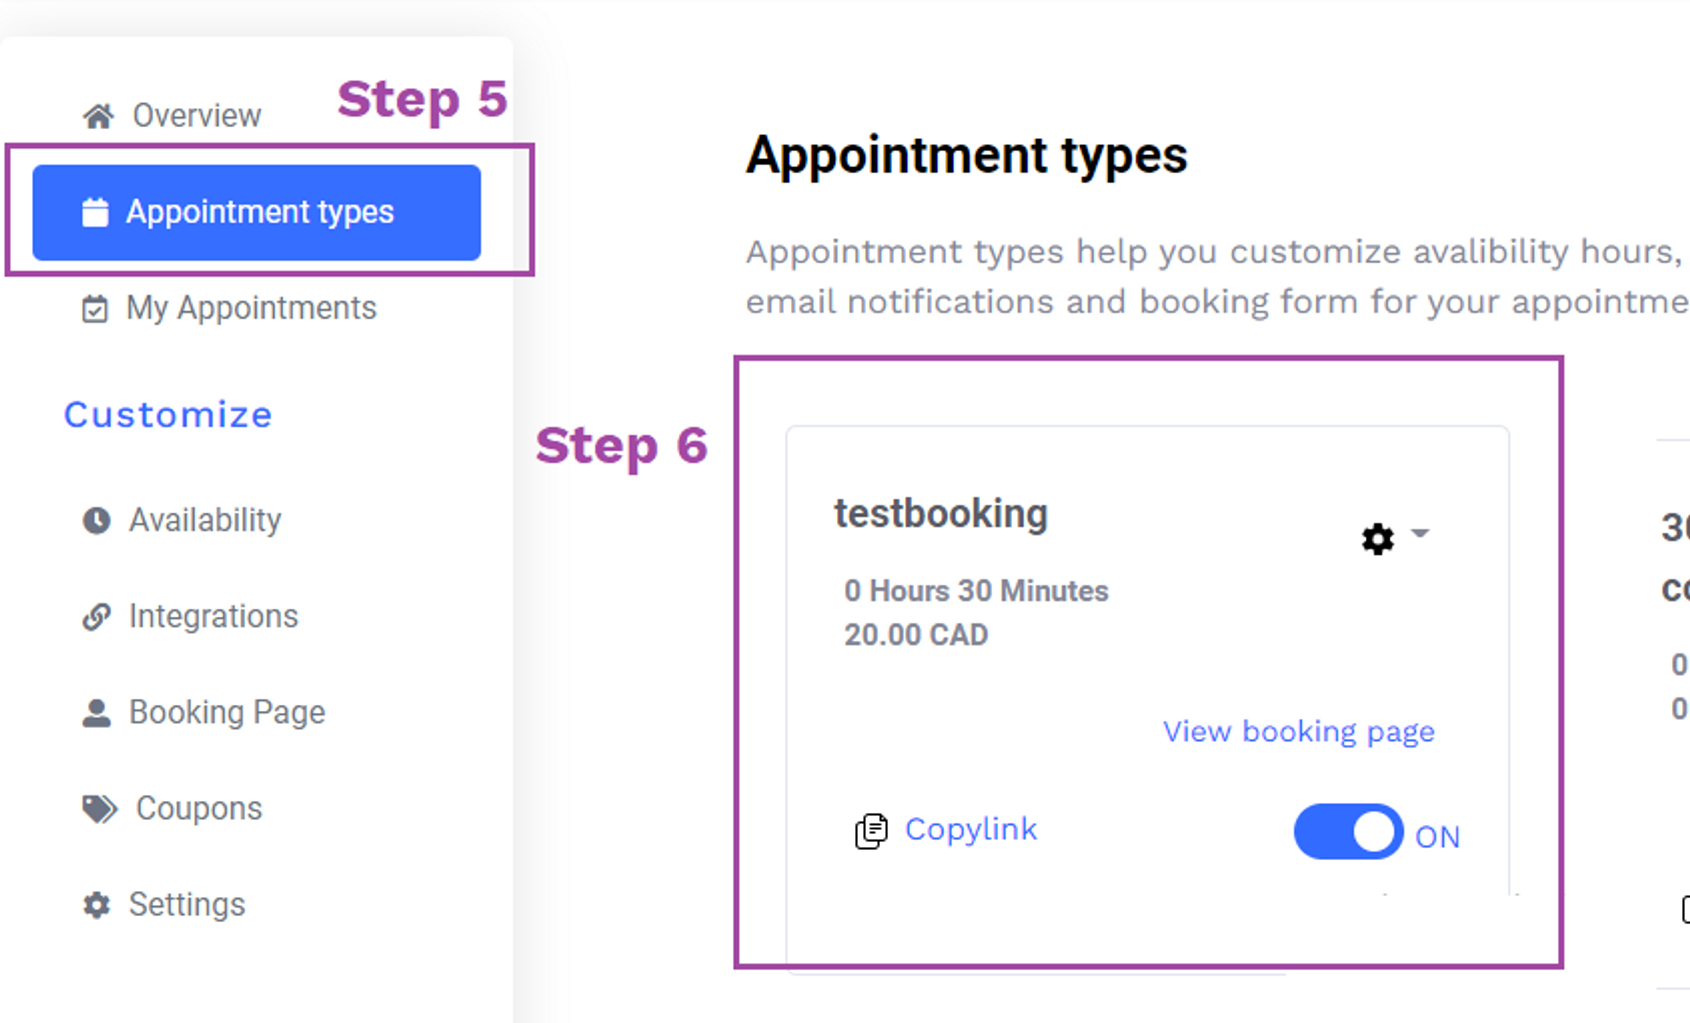
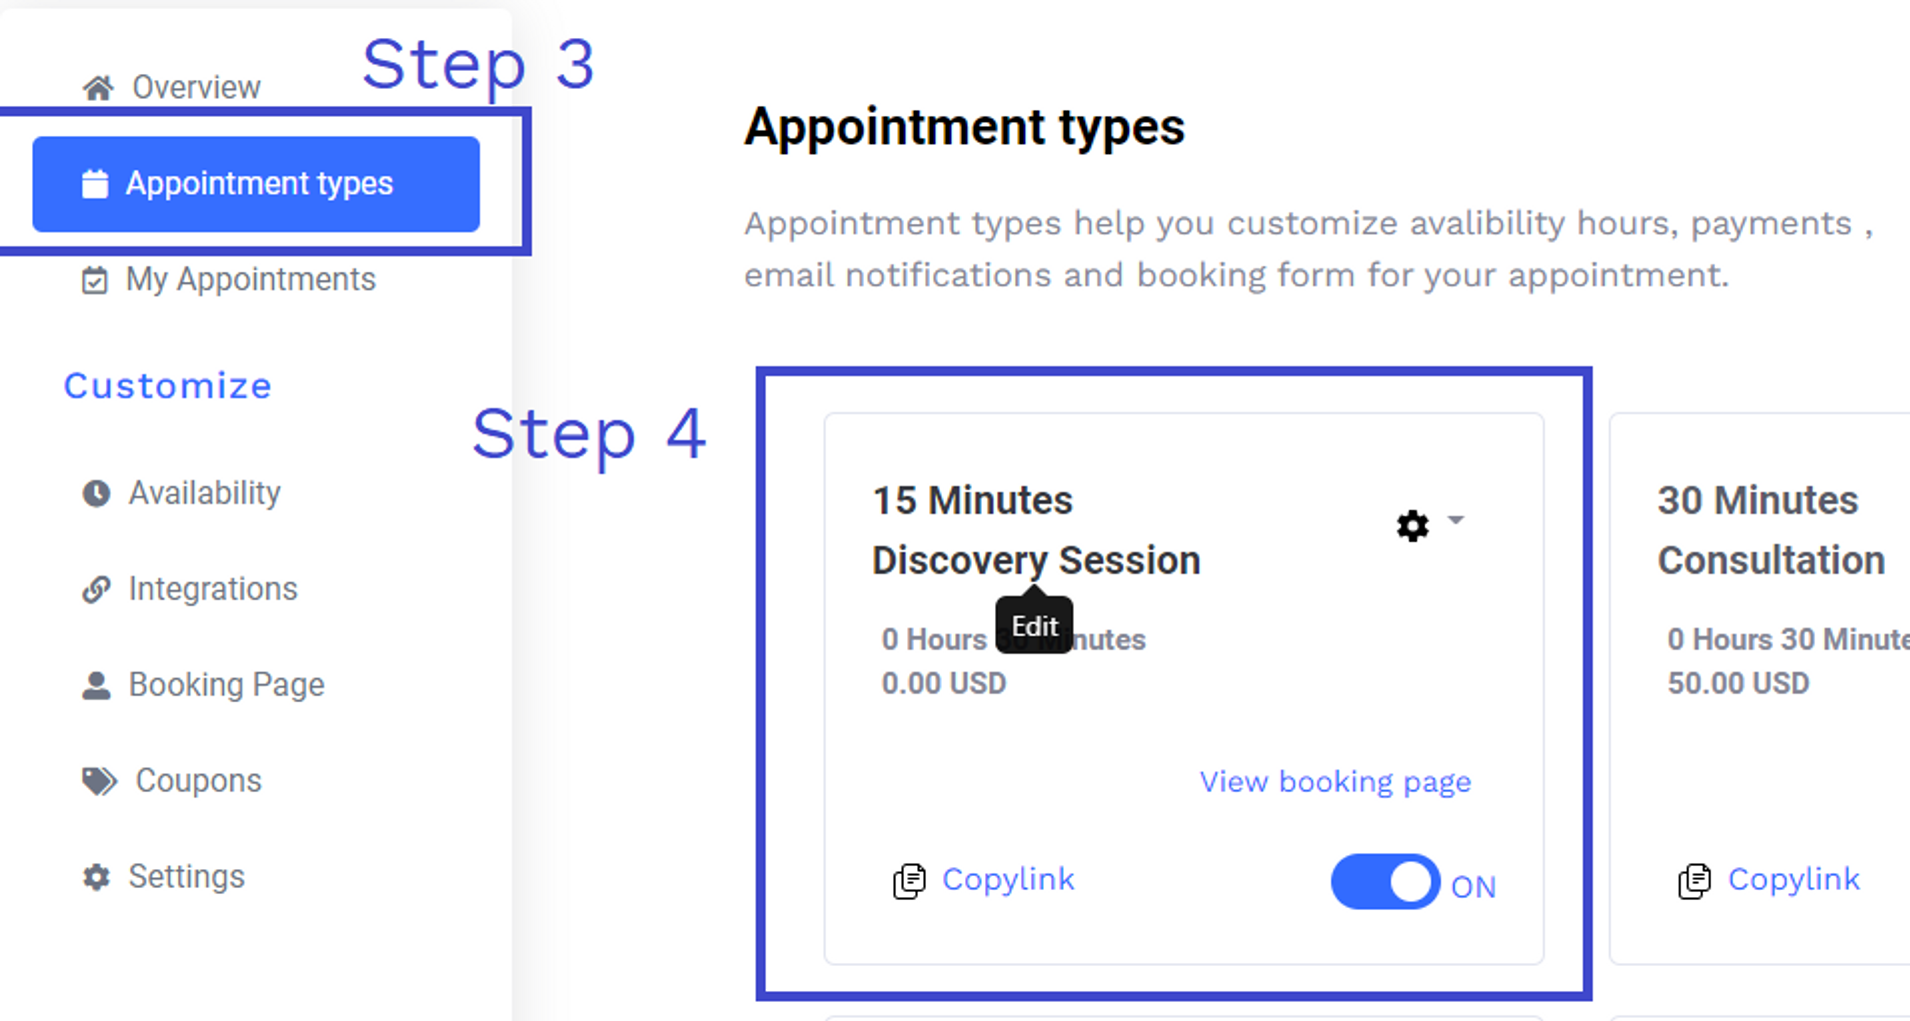
Step 3: Go to "Appointment types" and edit the appointment type of your choice

Scroll below in the first tab
There you will find Payment settings
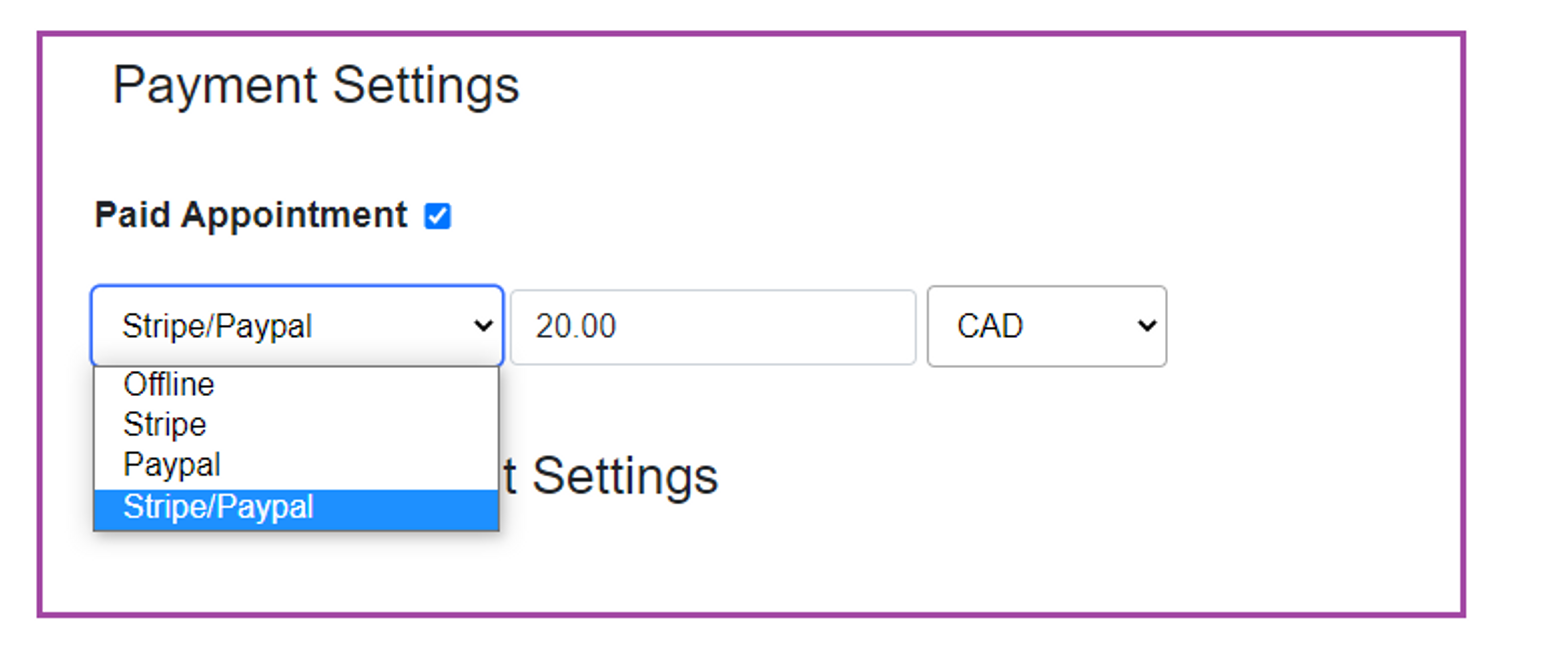
Select your desired payment gateway
Options explained:

Result:
your client will see the following when booking
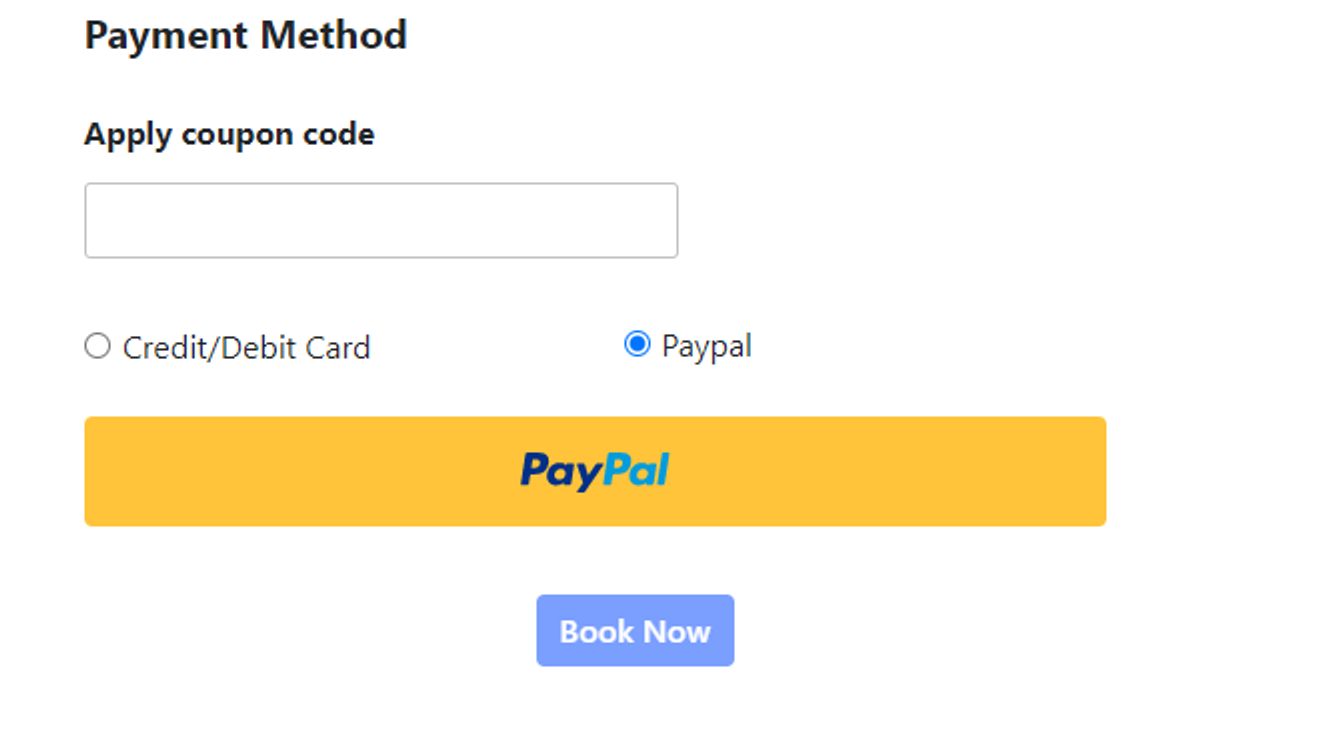
Your client will apply the coupon code and pay according to their preference.
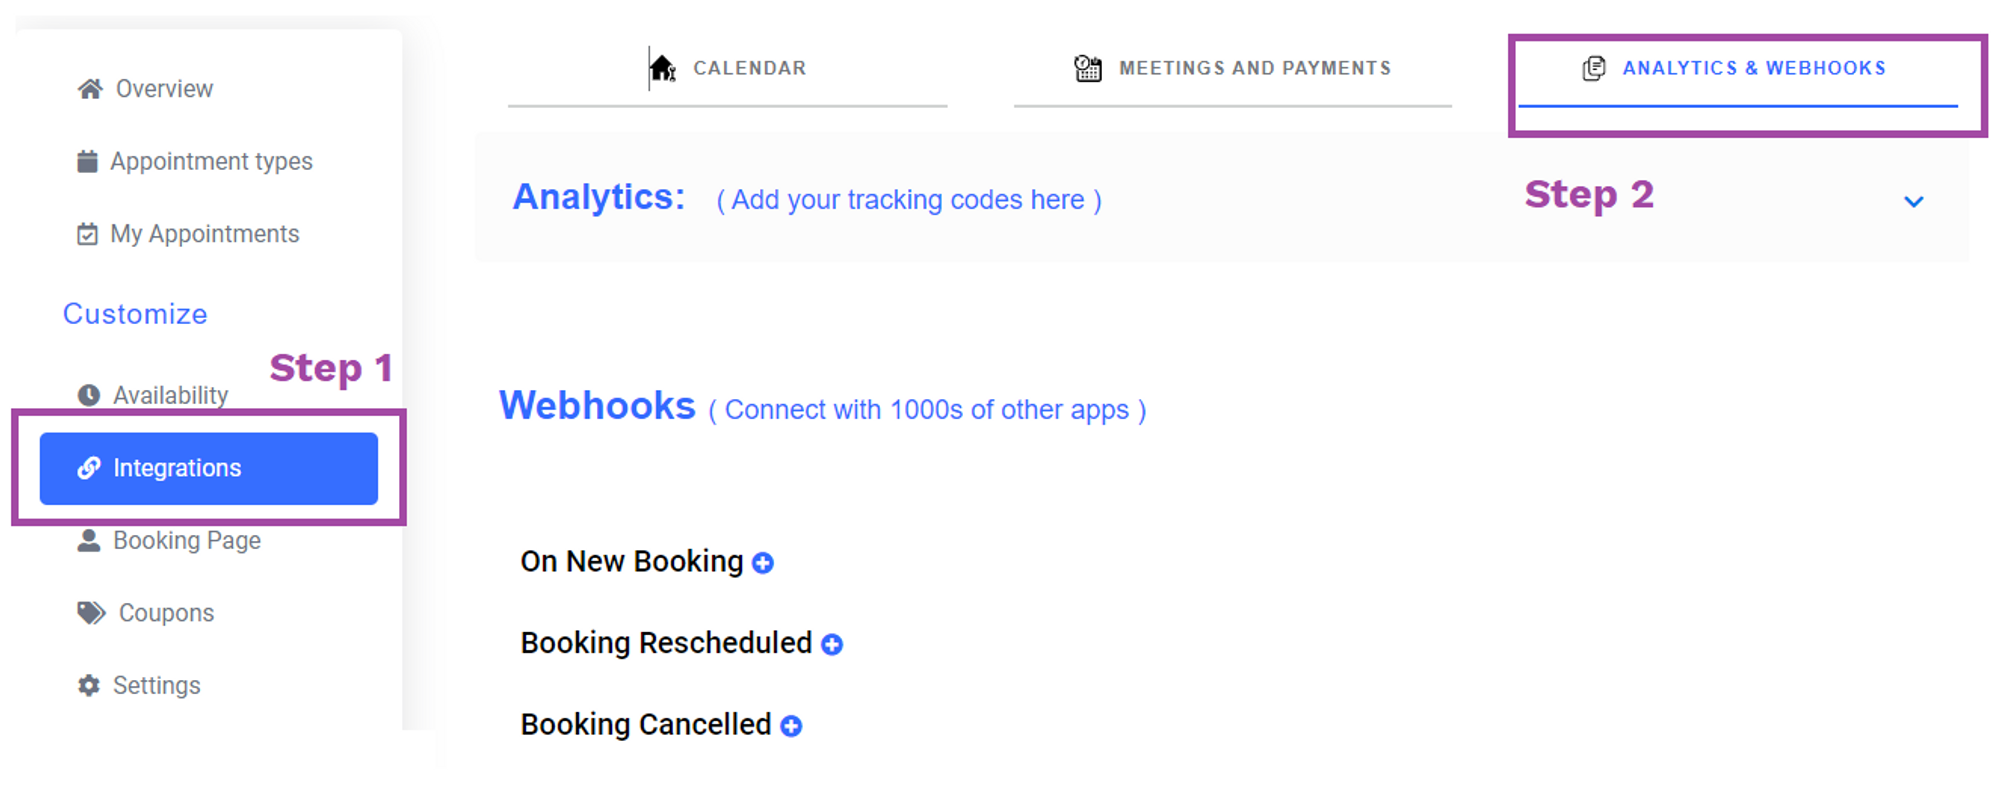
Now you have 3 options for webhook links:
Now you've 3 options for webhook links:

Now enter your webhook link and click on the "Test & save" button
Result: On new booking, your webhook will be excited!

In the second tab.
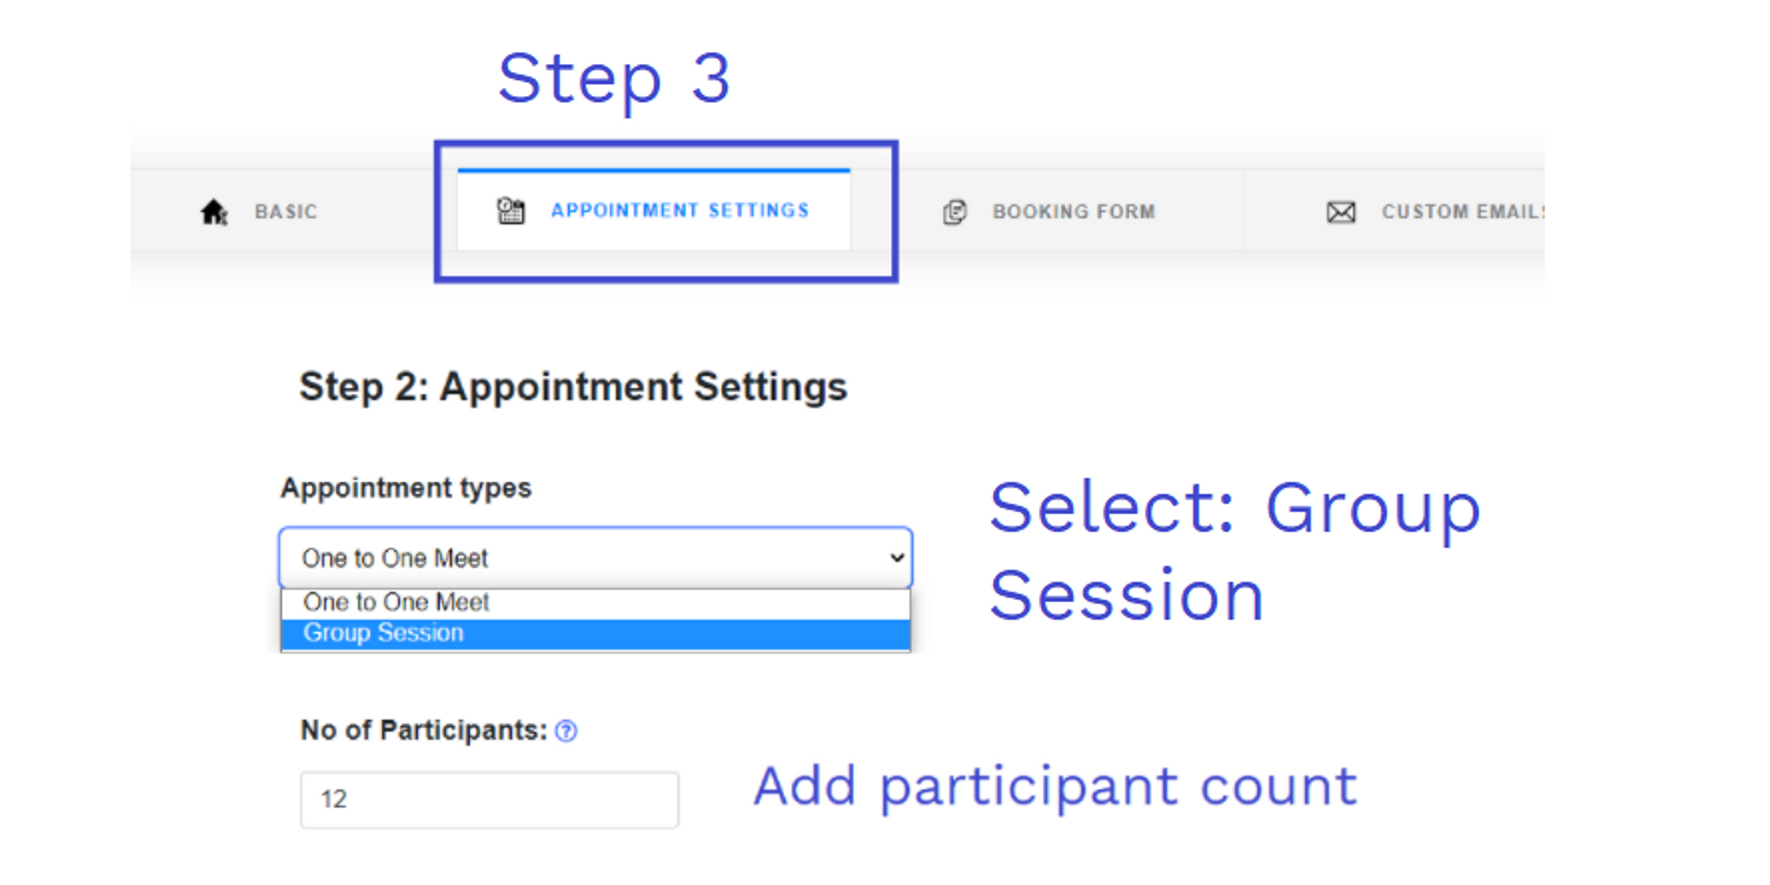
Scroll to the bottom and save

Hooray group session setup is complete! 🙂
With Cname: Your clients will see your domain instead of the Probooking URL
In Probooking dashboard
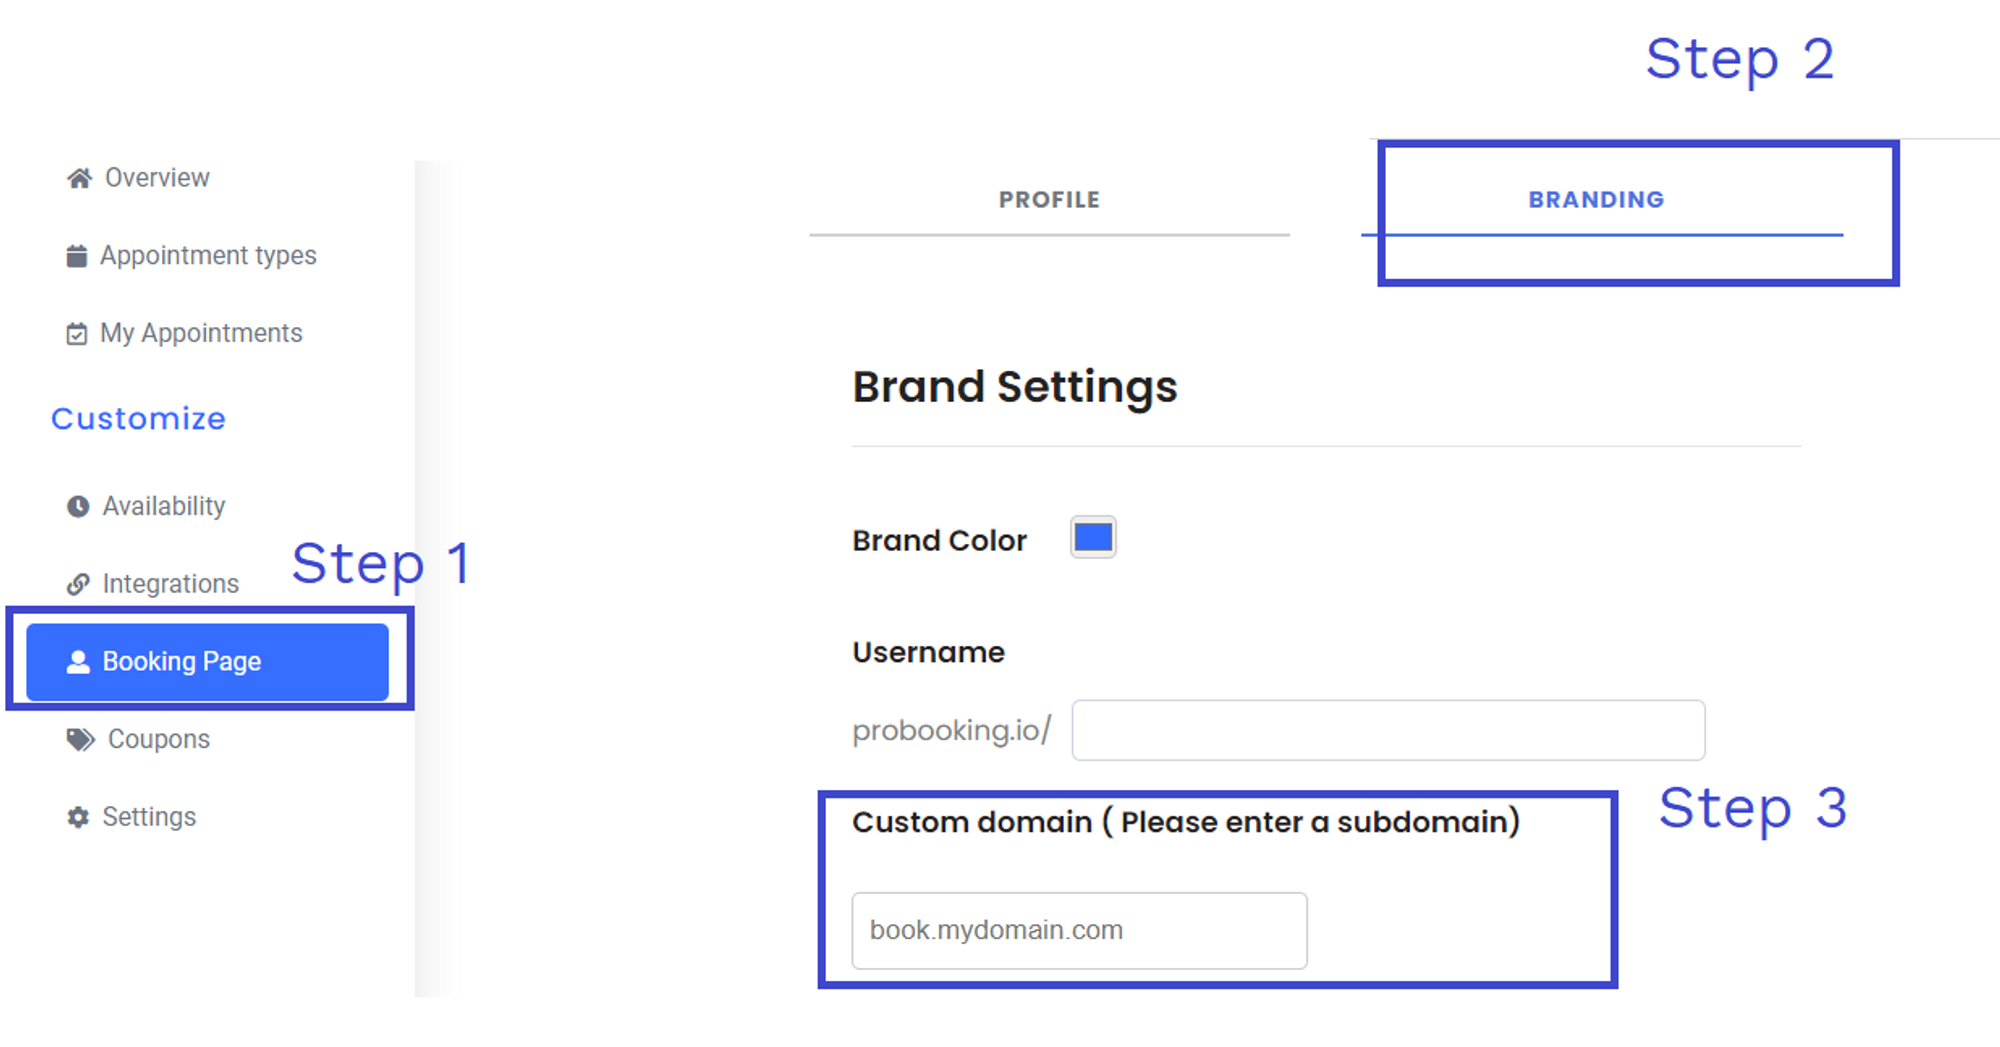

Create CNAME record in your hosting provider

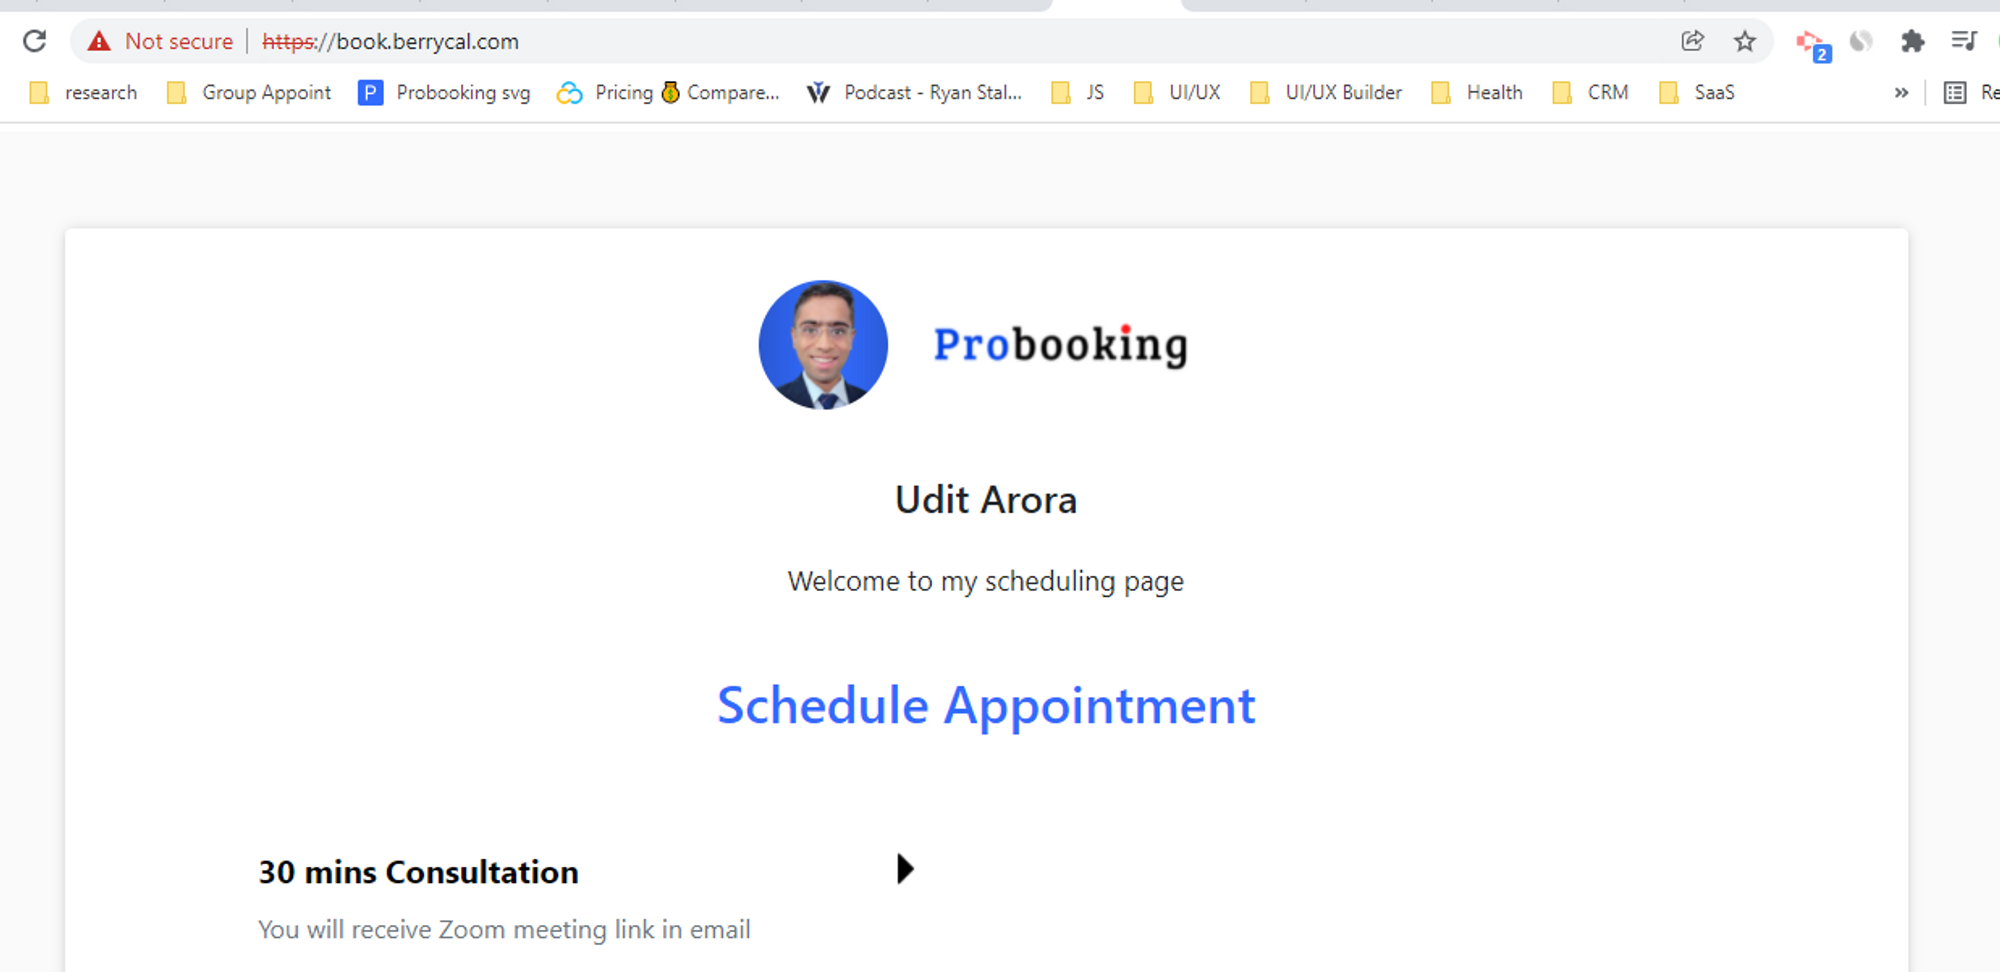
How it looks like:

Result: your CNAME will redirect to your Probooking page with "Not Secure"
SSL:
To get SSL activated please support email: [email protected]
SSL is generally in around 24 - 48 hrs time
Step 1&2: Go to booking page > branding
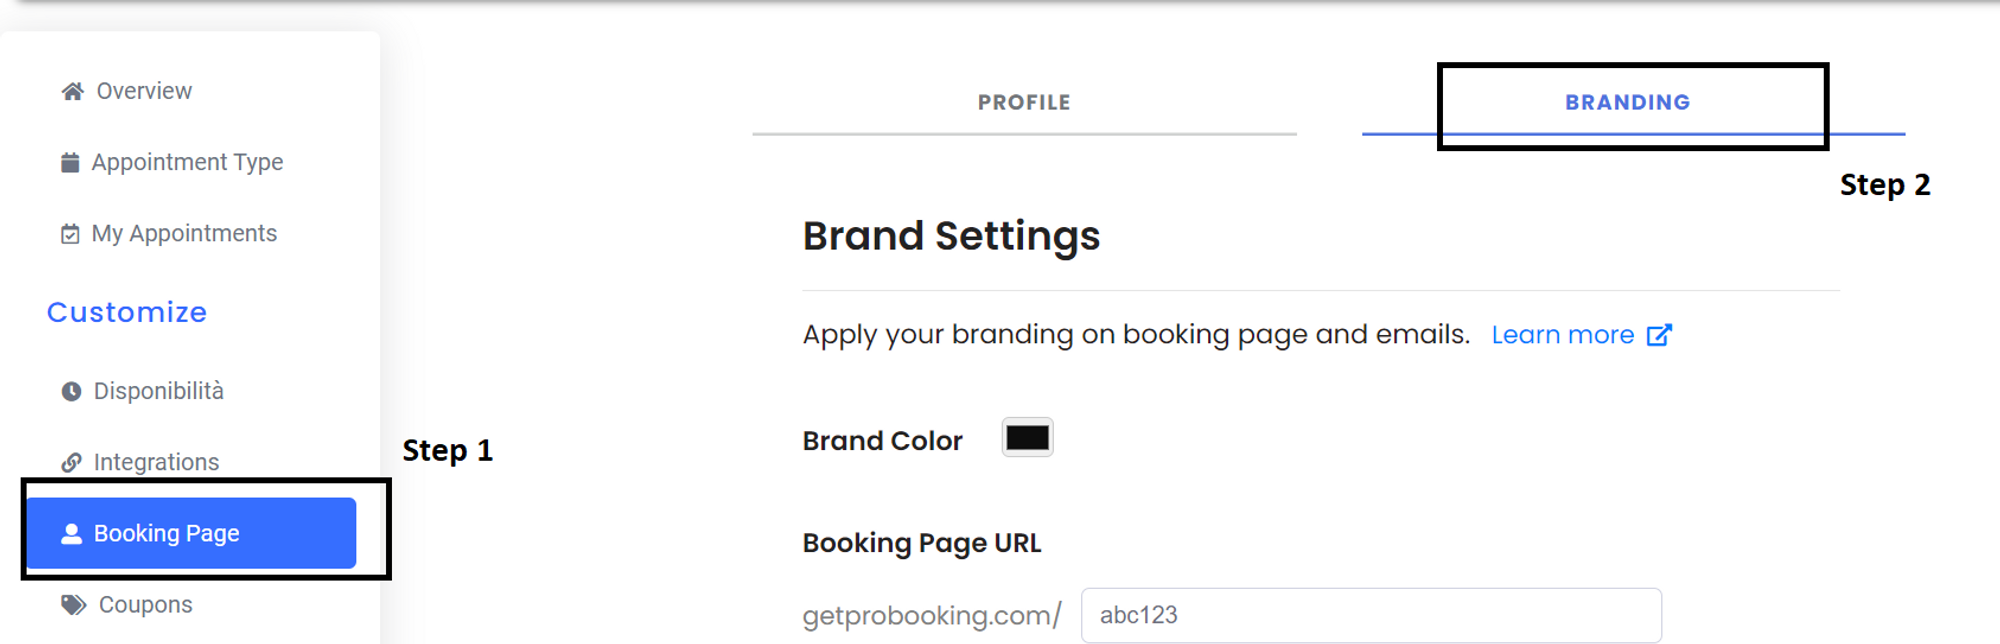
Step 3: Scroll to the bottom

Step 4: Enter your SMTP details
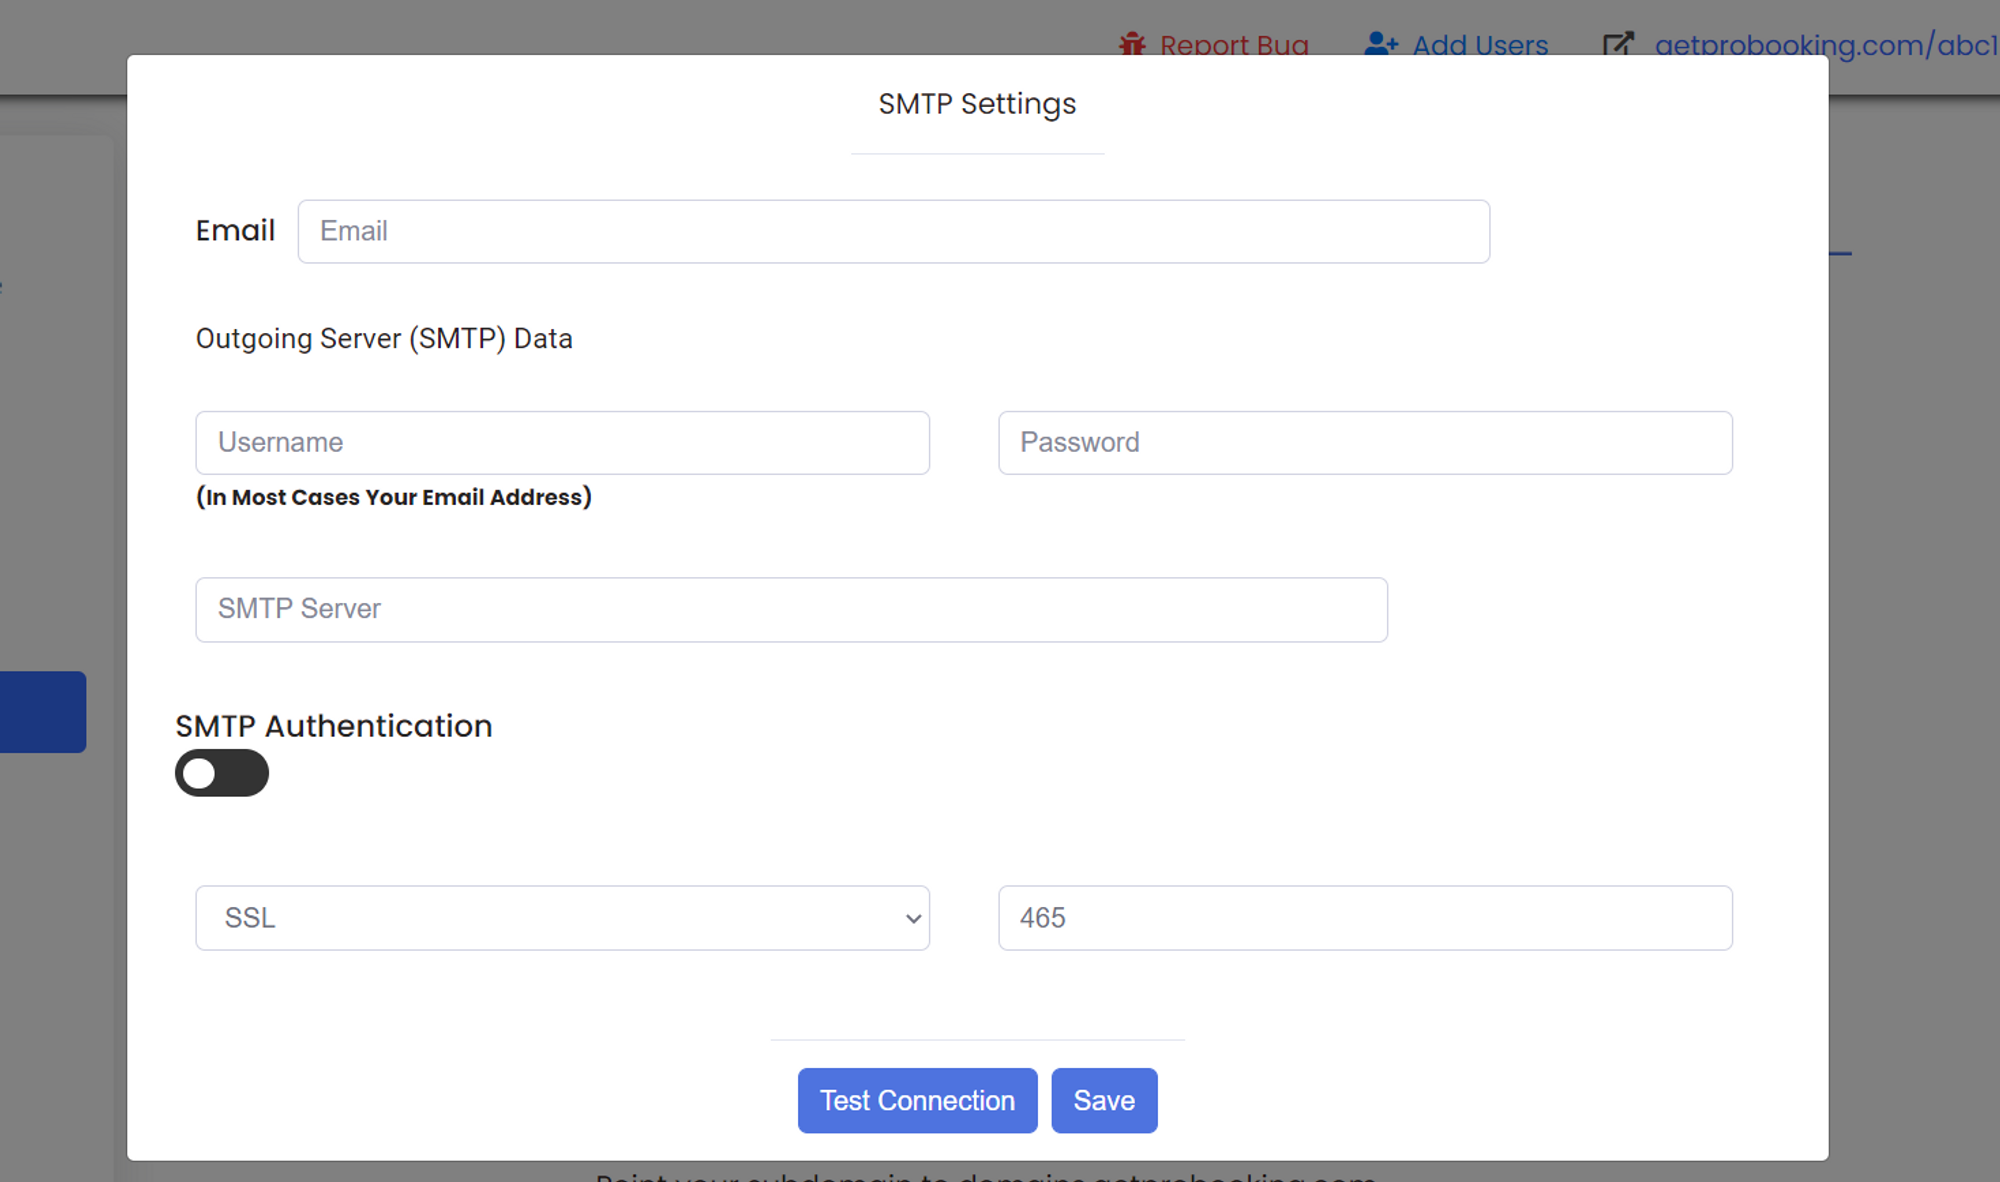
Step 5: After successfully adding you will see your email added > click on save brand settings
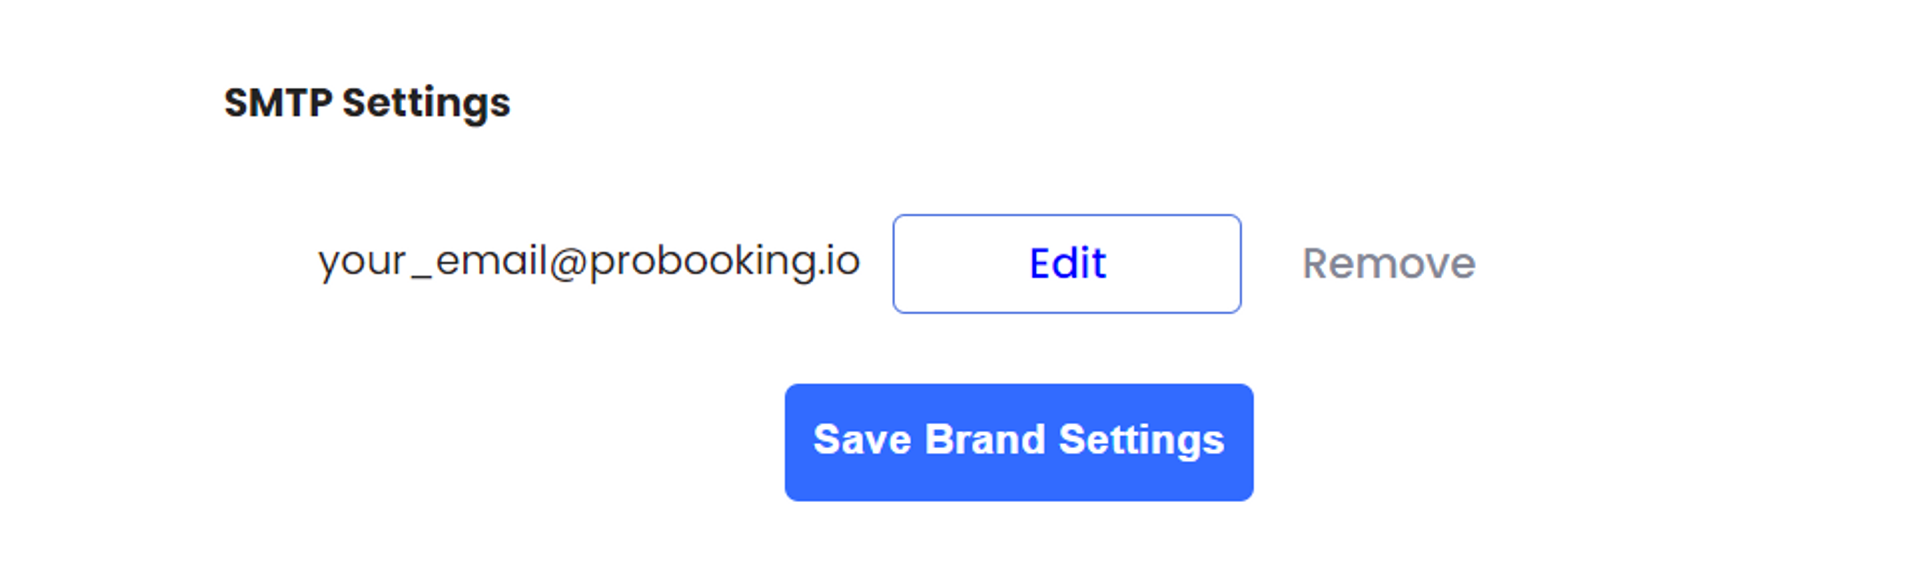
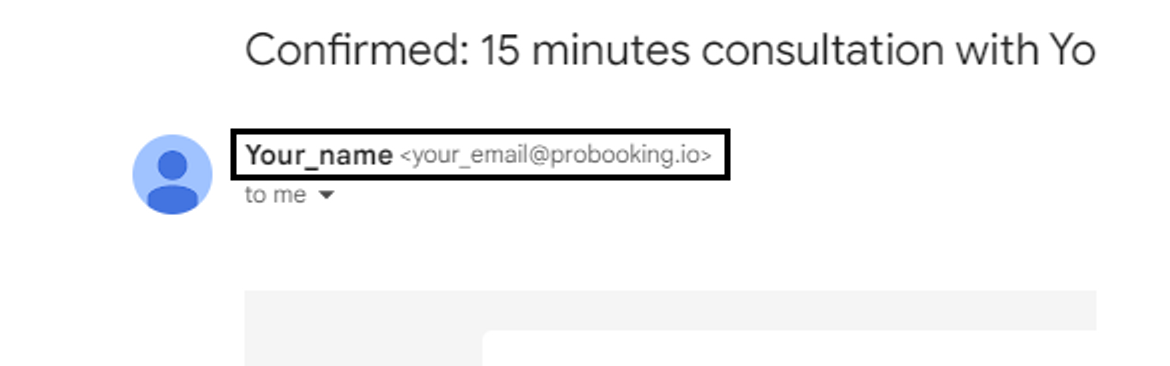
Final result
To get Gmail SMTP: kinsta.com/blog/gmail-smtp-server/
To get Outlook SMTP: smallbusiness.chron.com/determine-smtp-server-outlook-54154.html
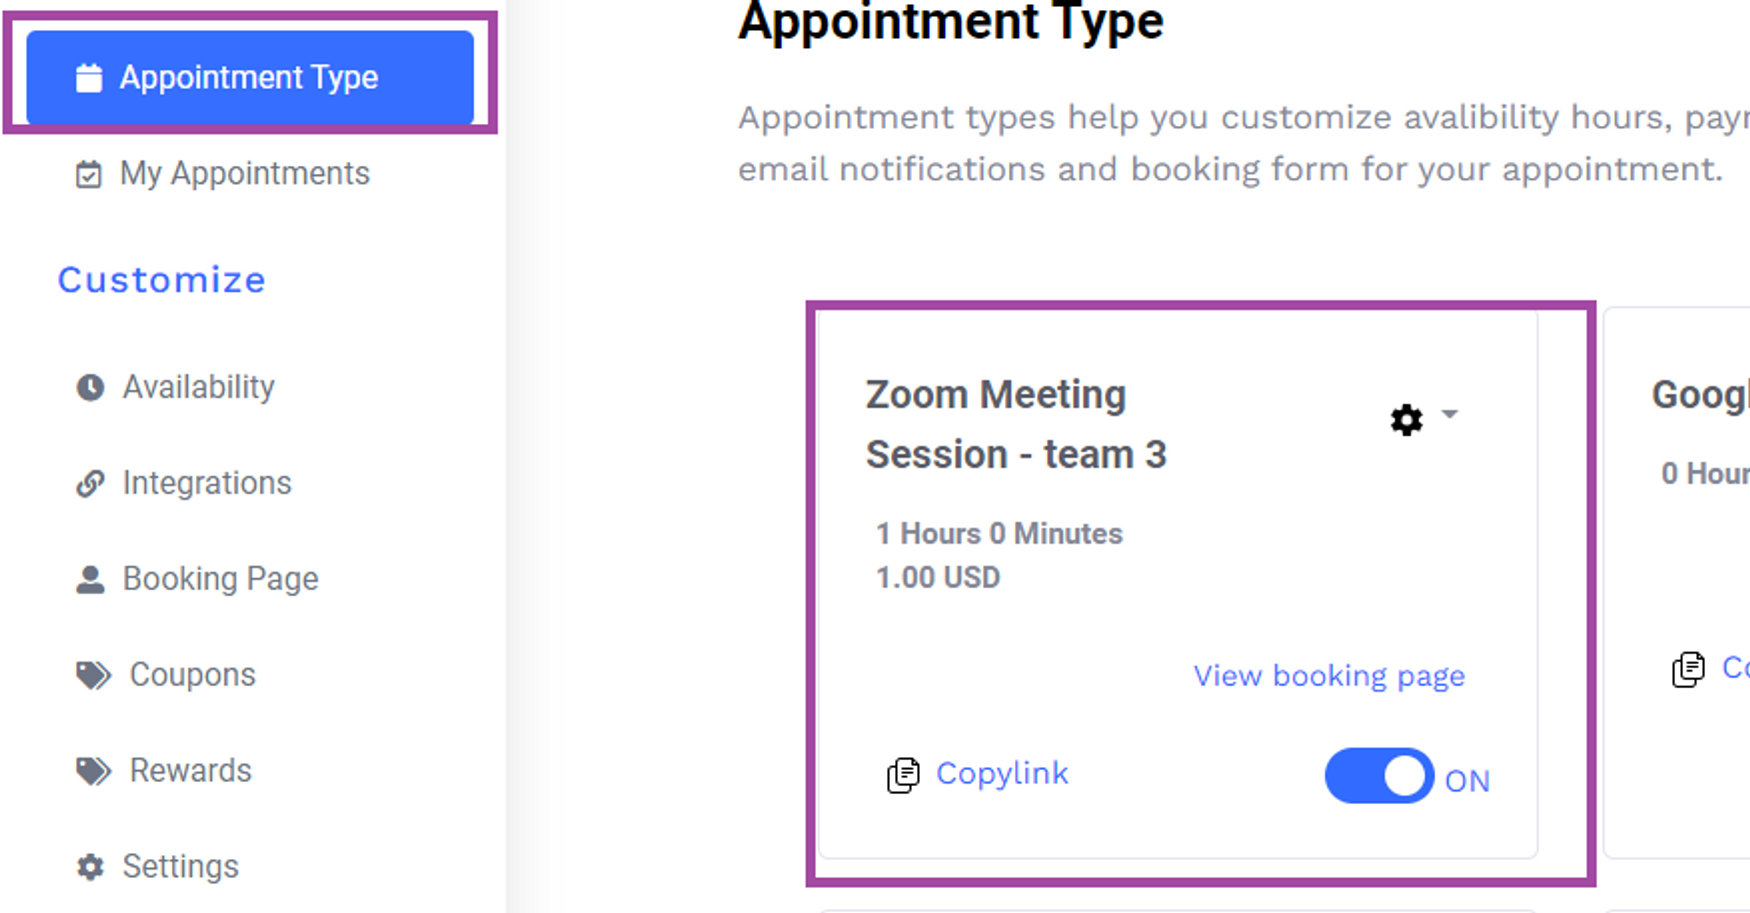
Step 1: Go to appointment type > Select the particular appointment type
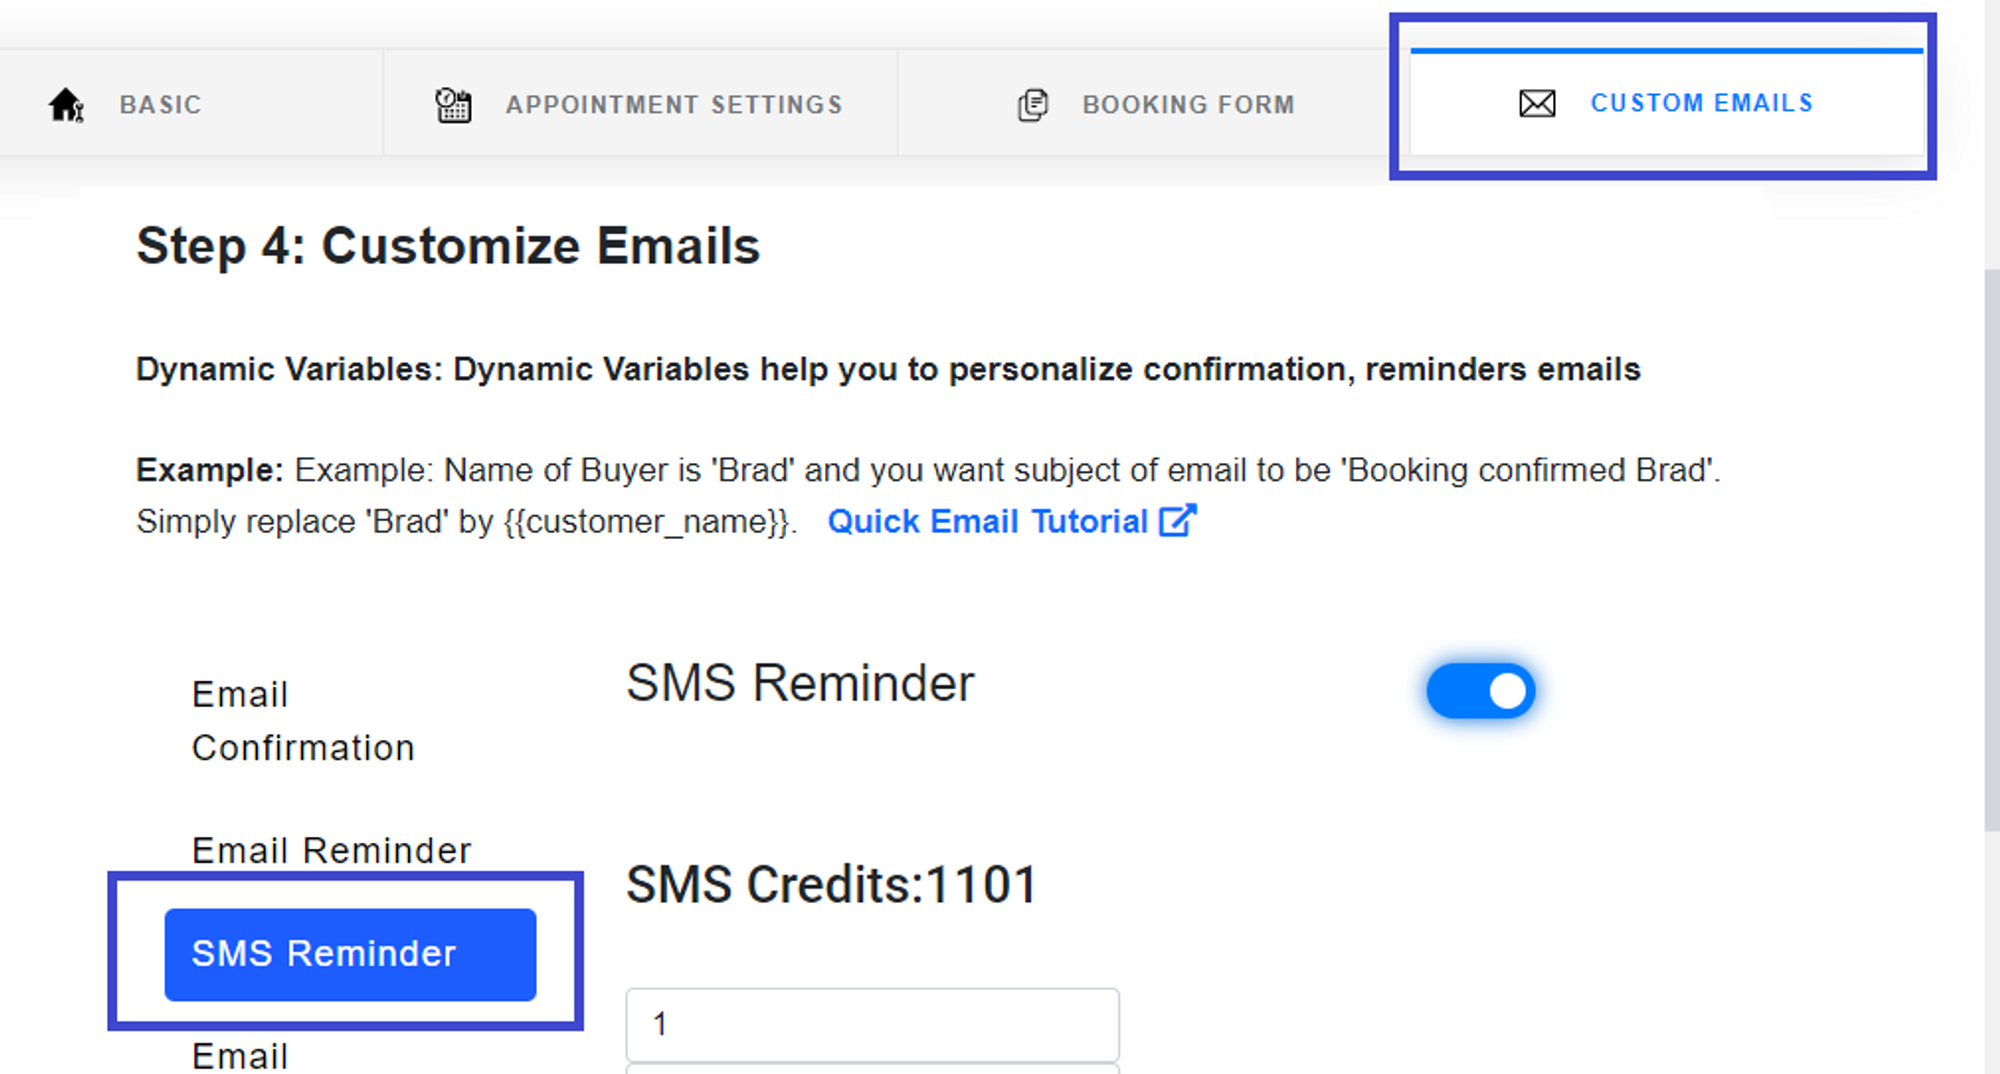
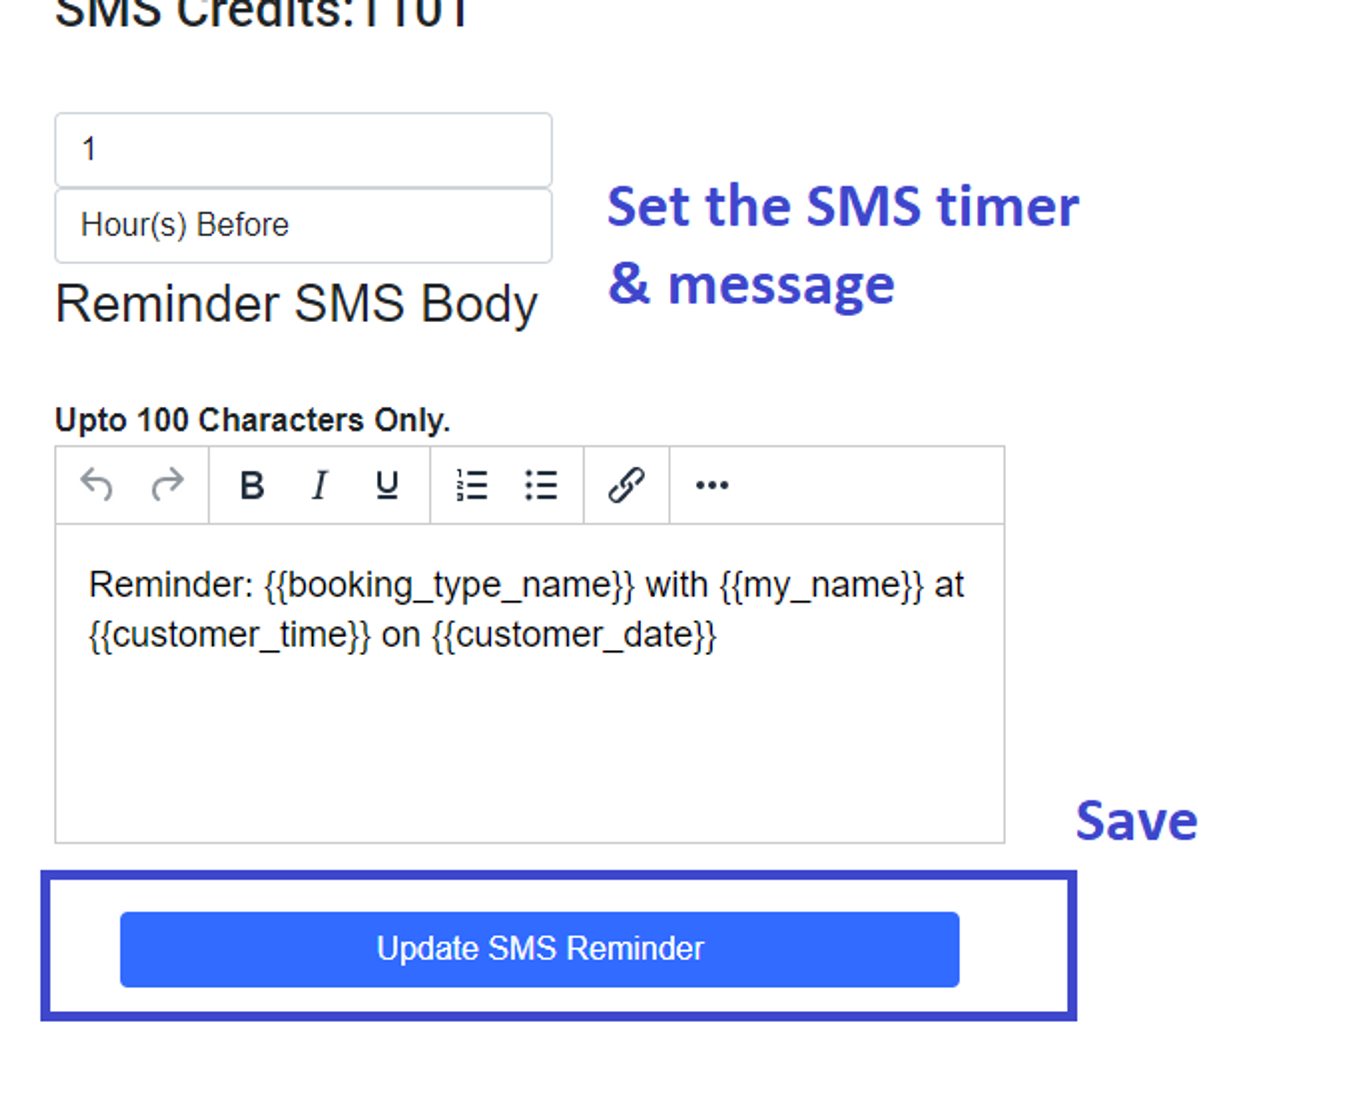
Step 2: Navigate to "Custom Email" and select "SMS reminder"
Step 3: Set the timer and message > Save
Result:
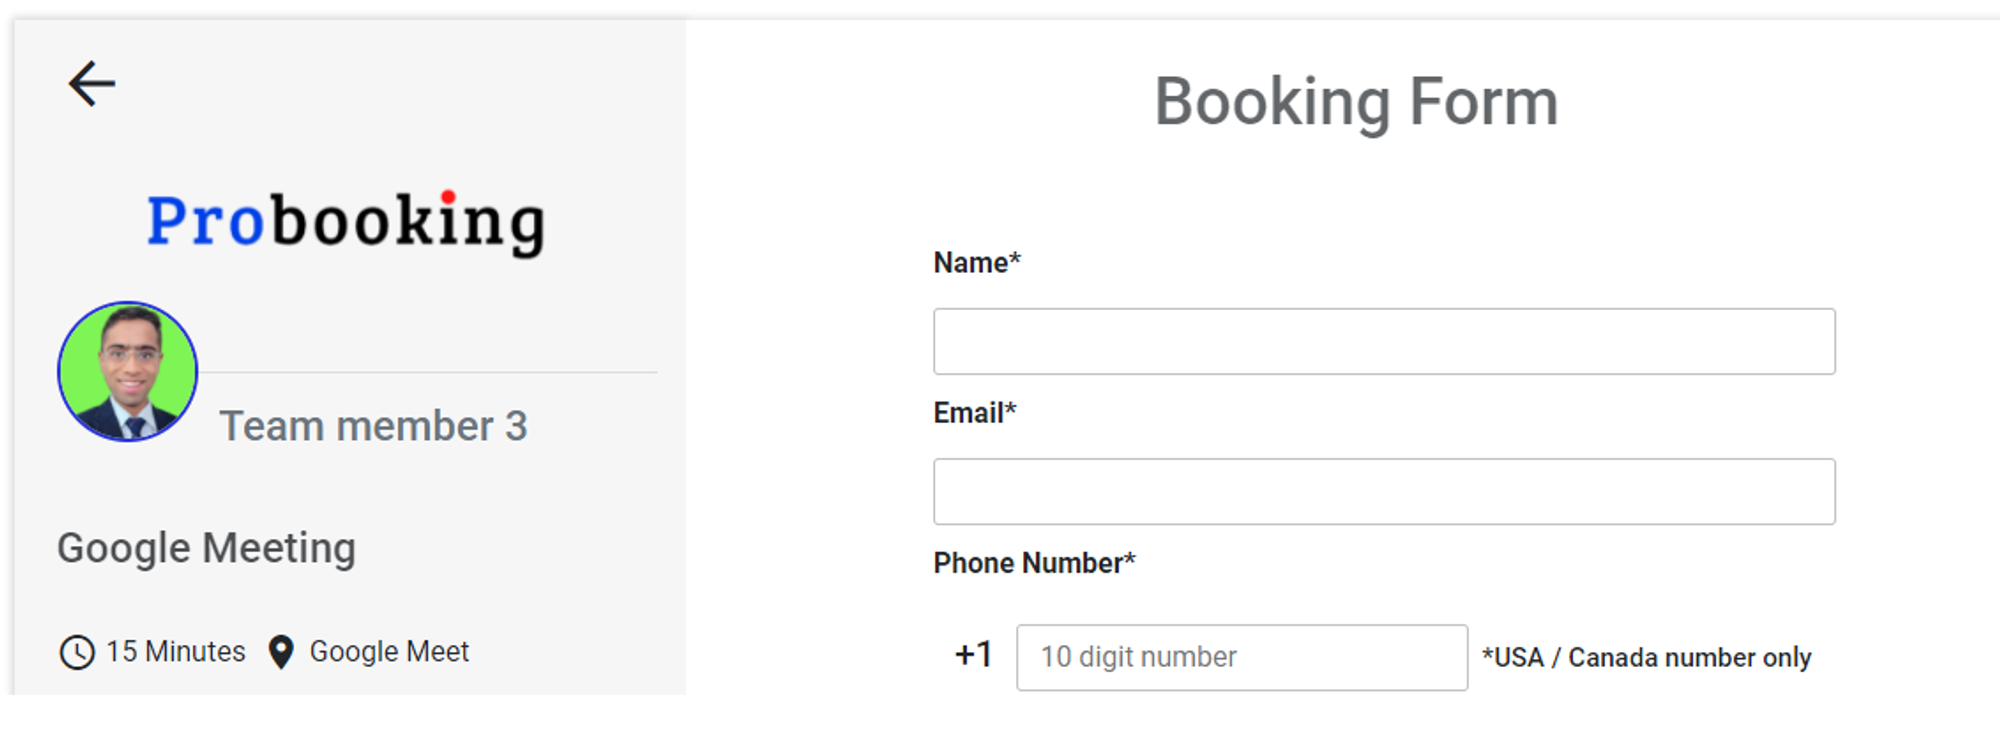
Invitee will see "Phone number" field in booking form and will receive reminder at given number before the meeting
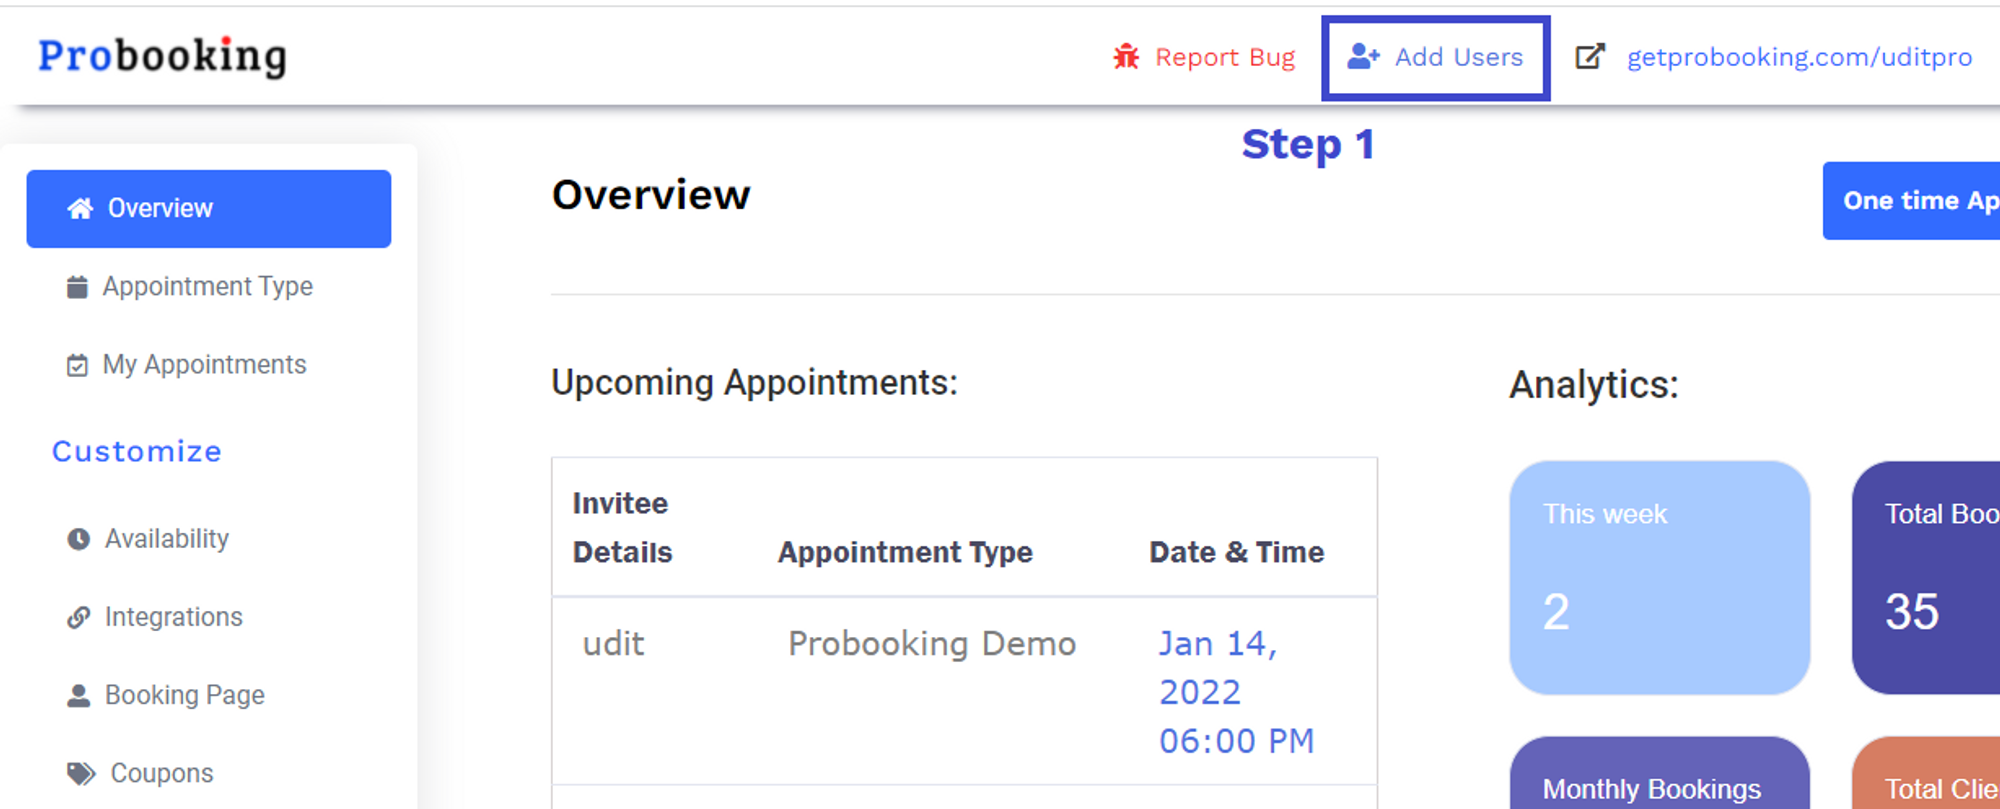
Step 1: Add user
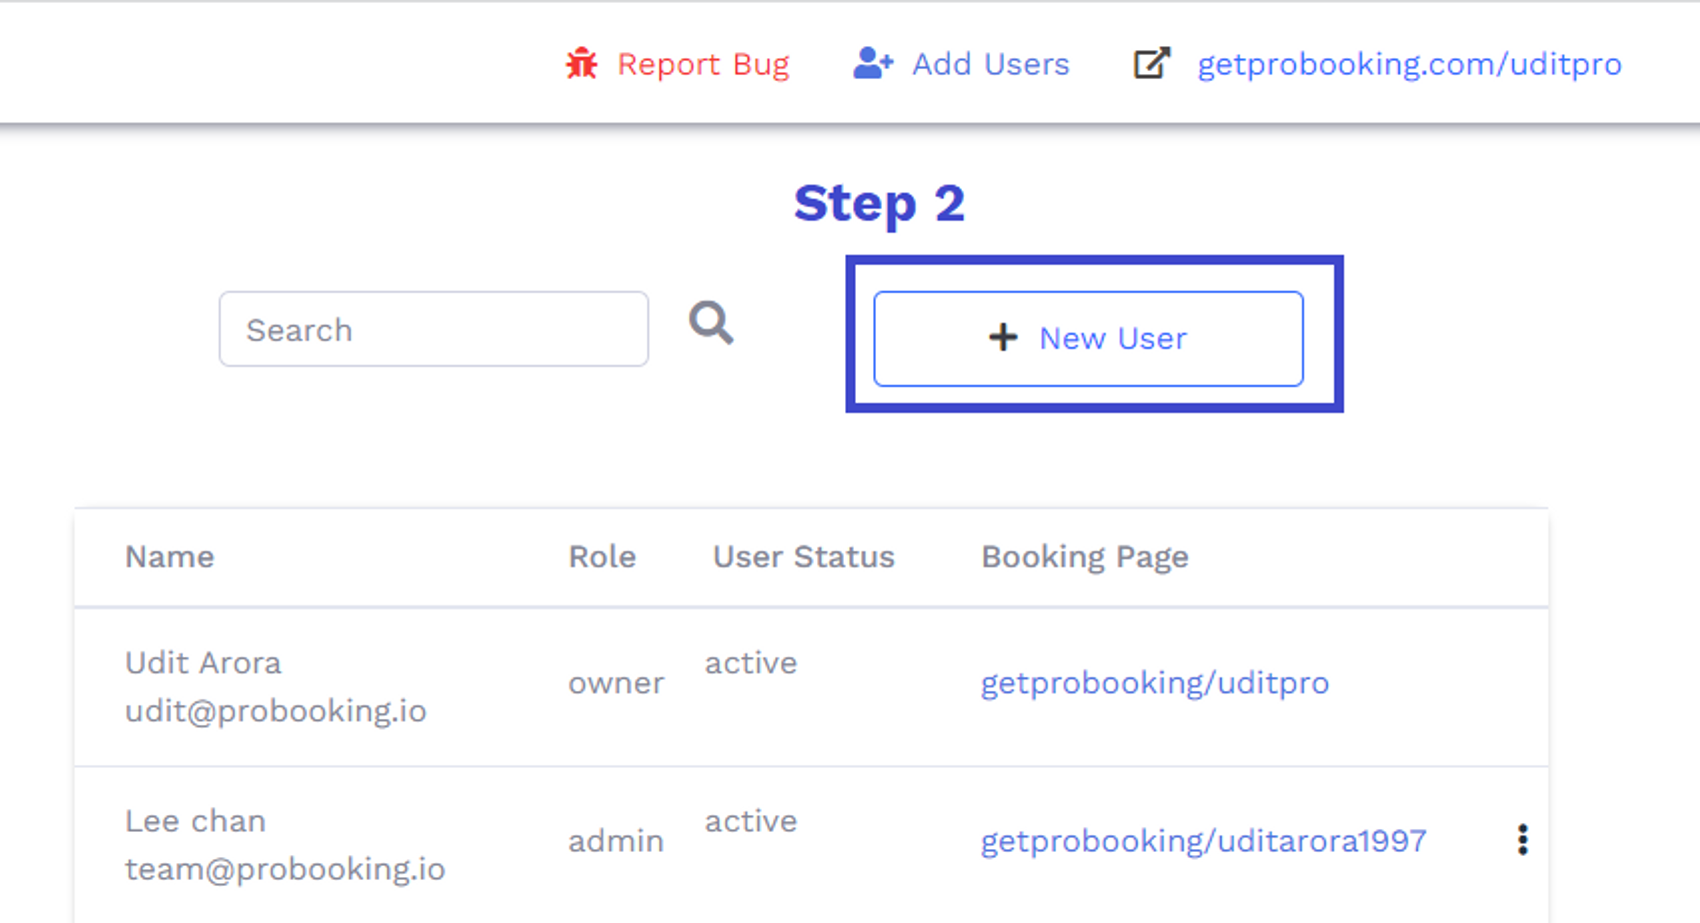
Step 2: Click on "New user"
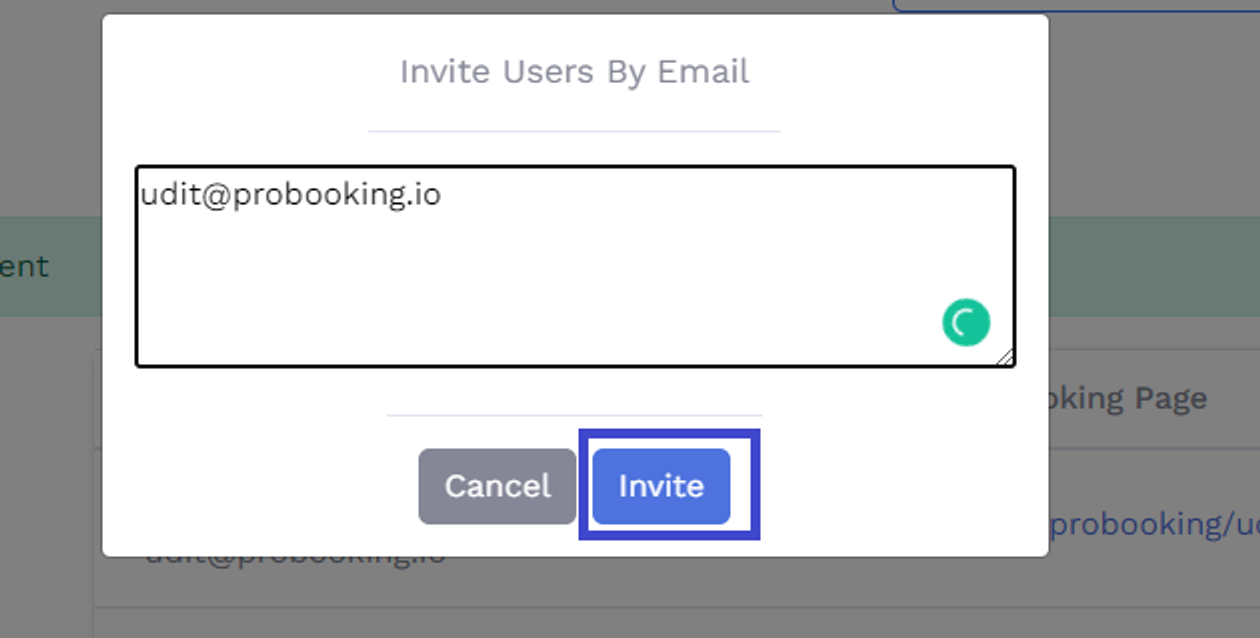
Step 3: Enter emails of your team members and invite
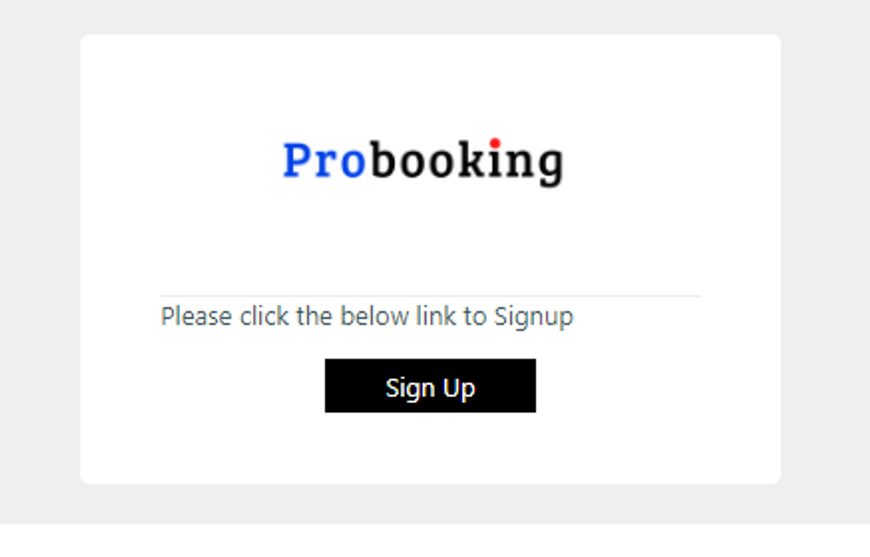
Now your team member will receive an email to signup
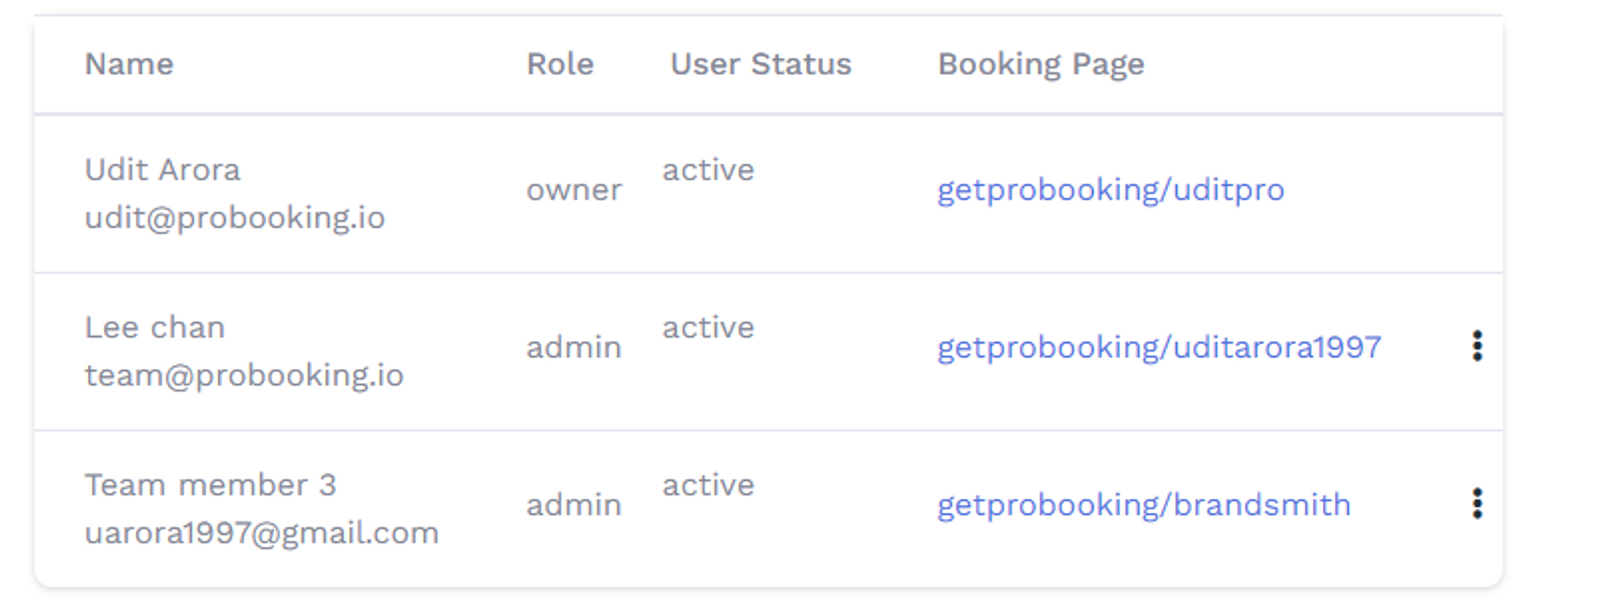
After signup, they will be added to your team members list
Owners:
With the admin panel, team members can view/edit all team members information like:
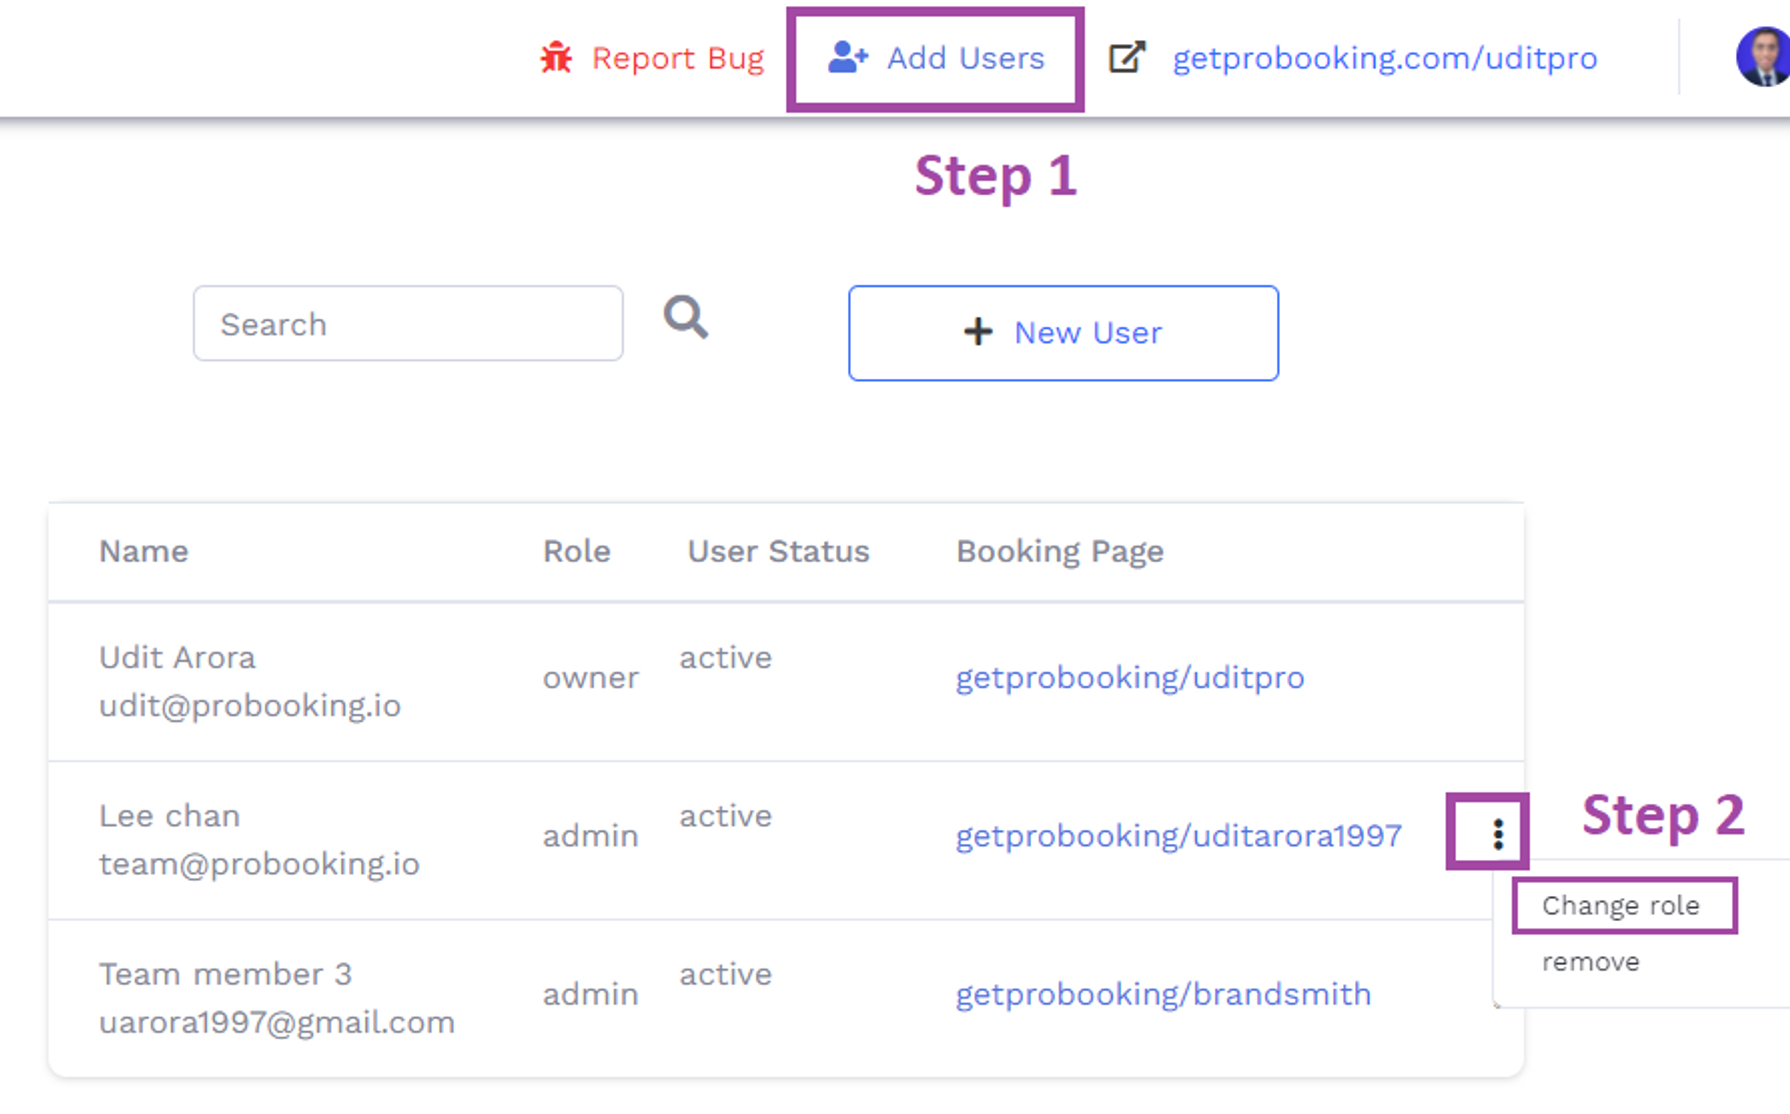
To set roles and permissions
Go to "add users" > Click on 3 dot icon > "change role"
assign role and save
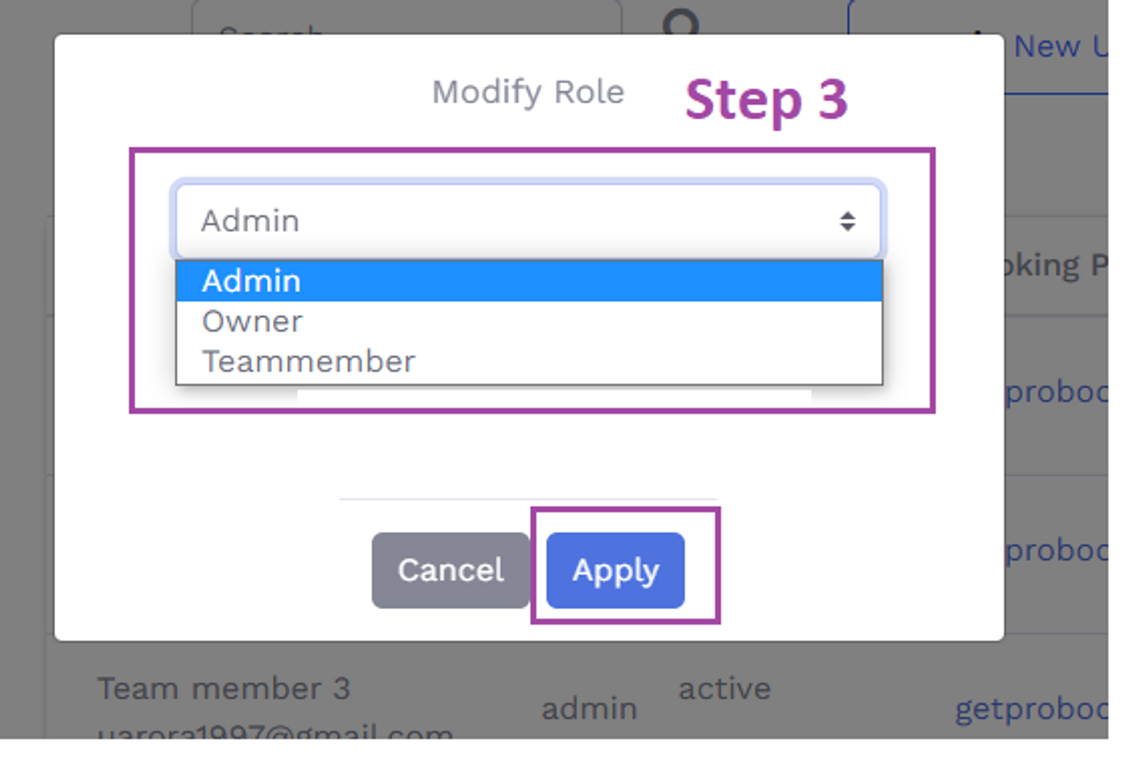
Please noteL account with admin/owner permission will be able to use this feature
Cheers
Please note: account with admin/owner permission will be able to use this feature
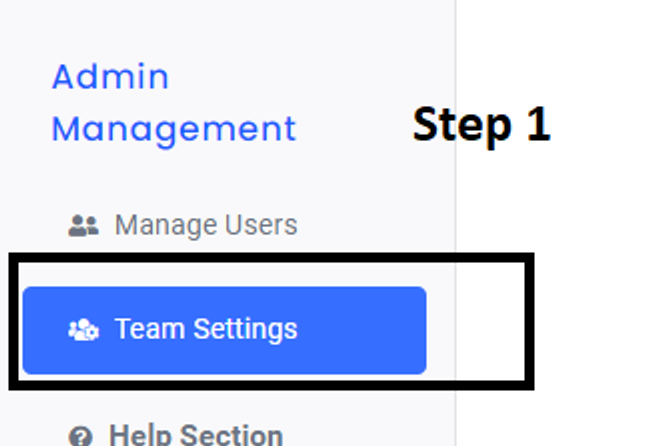
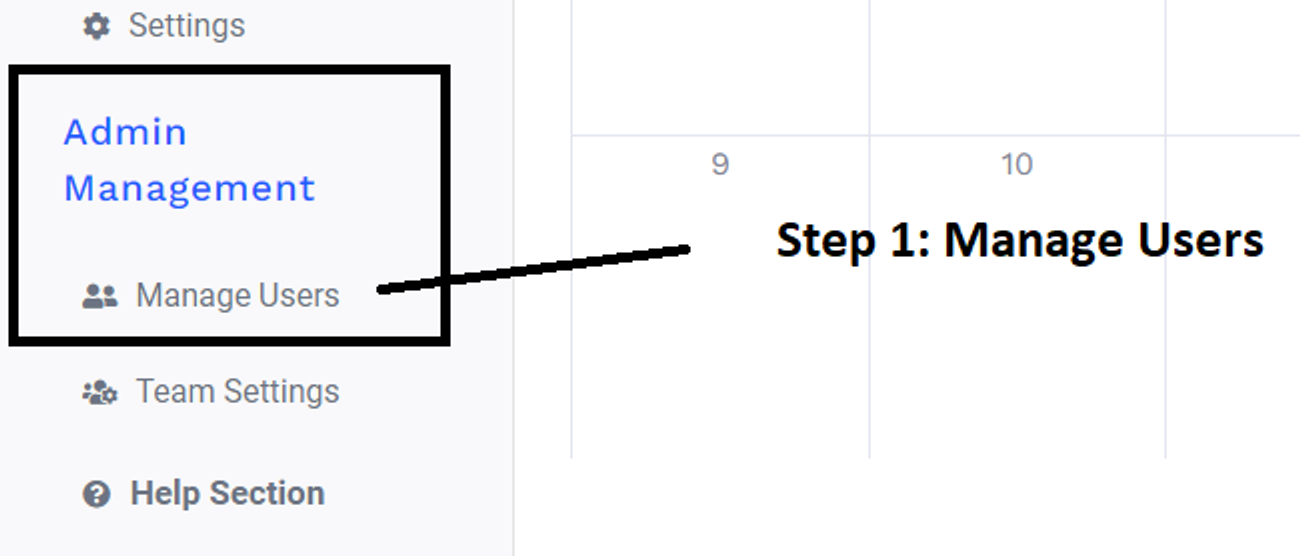
Step 1: In the sidebar > under admin management > Go to manage users
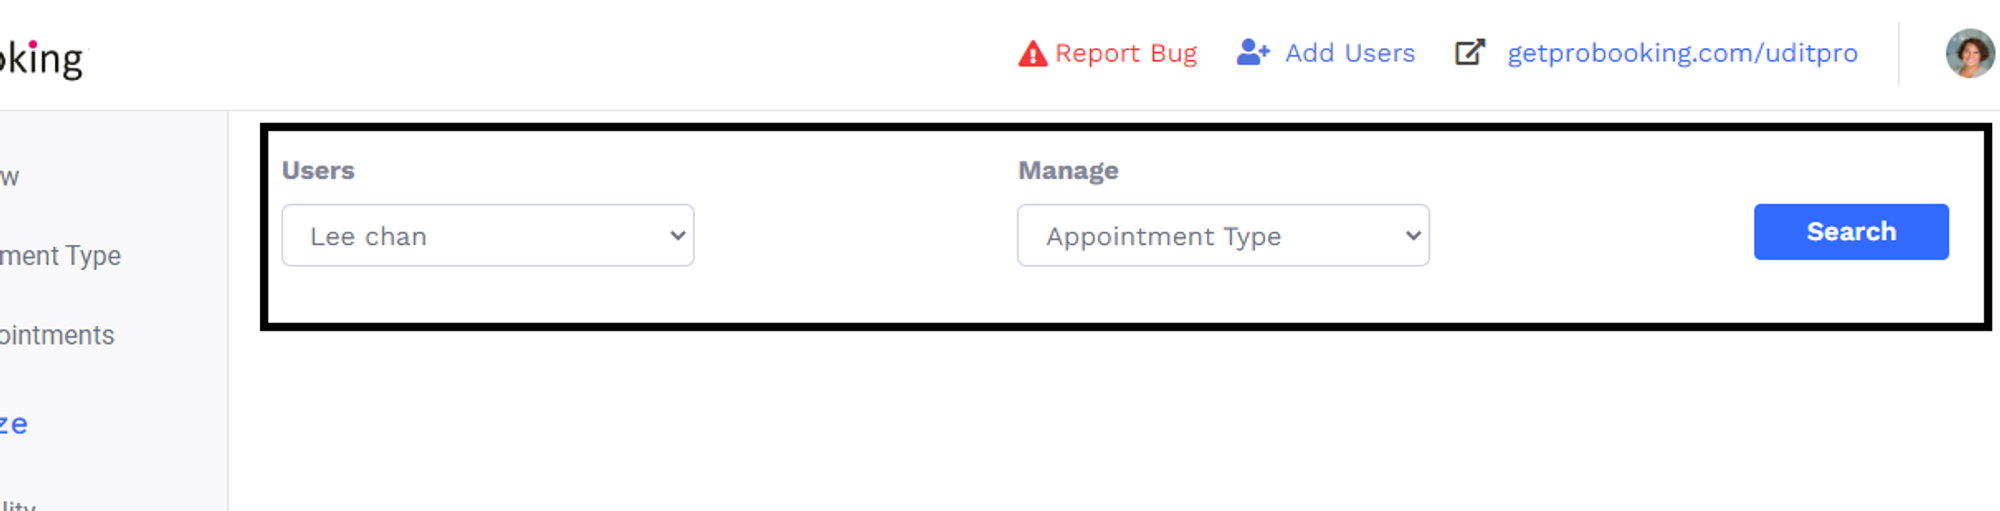
Step 2: Now here you get the option to → Select the team member and the feature you want to access for that particular team member/client
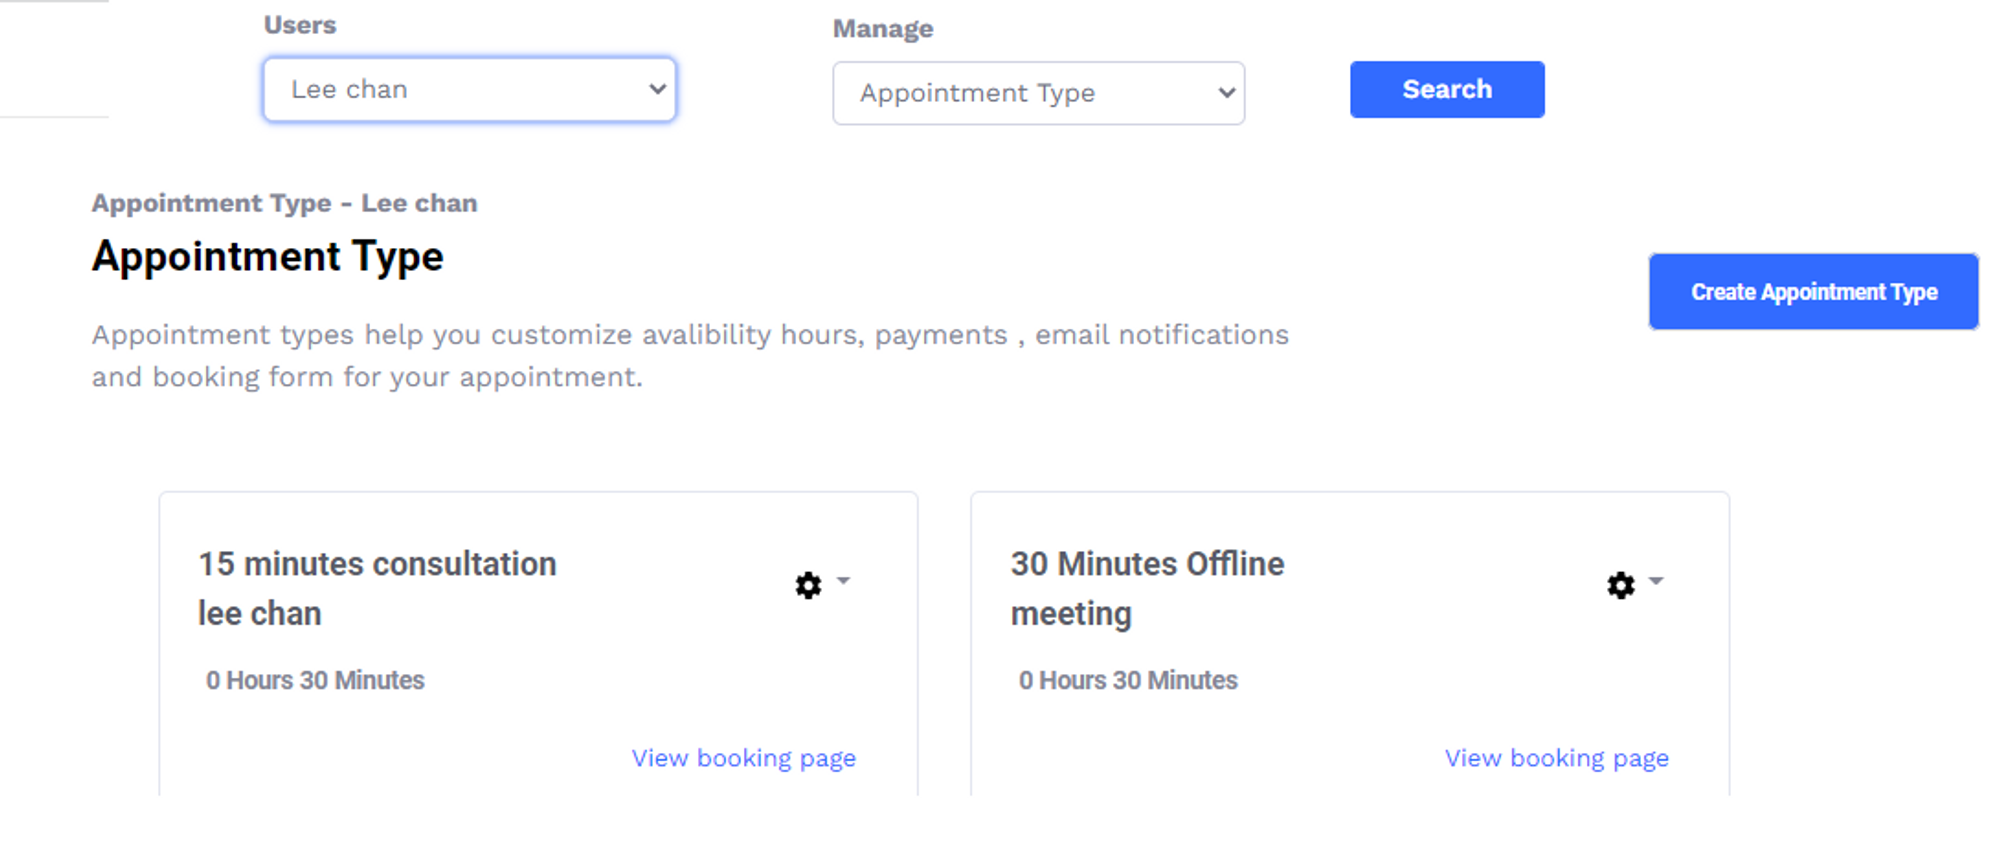
Step 3: Now from this admin dashboard you are able to manage the users
Step 1: Go to appointment types tab
Step 2: Select an existing appointment type or create a new one
In the first tab scroll to the bottom
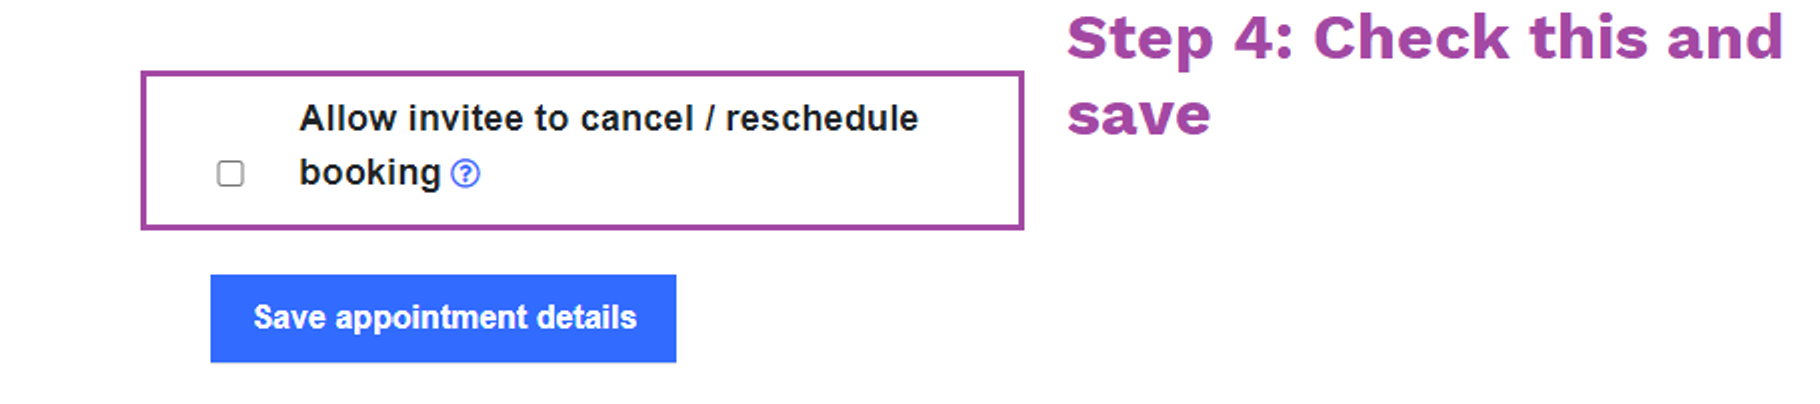
Step 3: Check the option and save it

Select the appointment type which you want to accept payments for
Scroll below in the first tab
There you will find payment settings
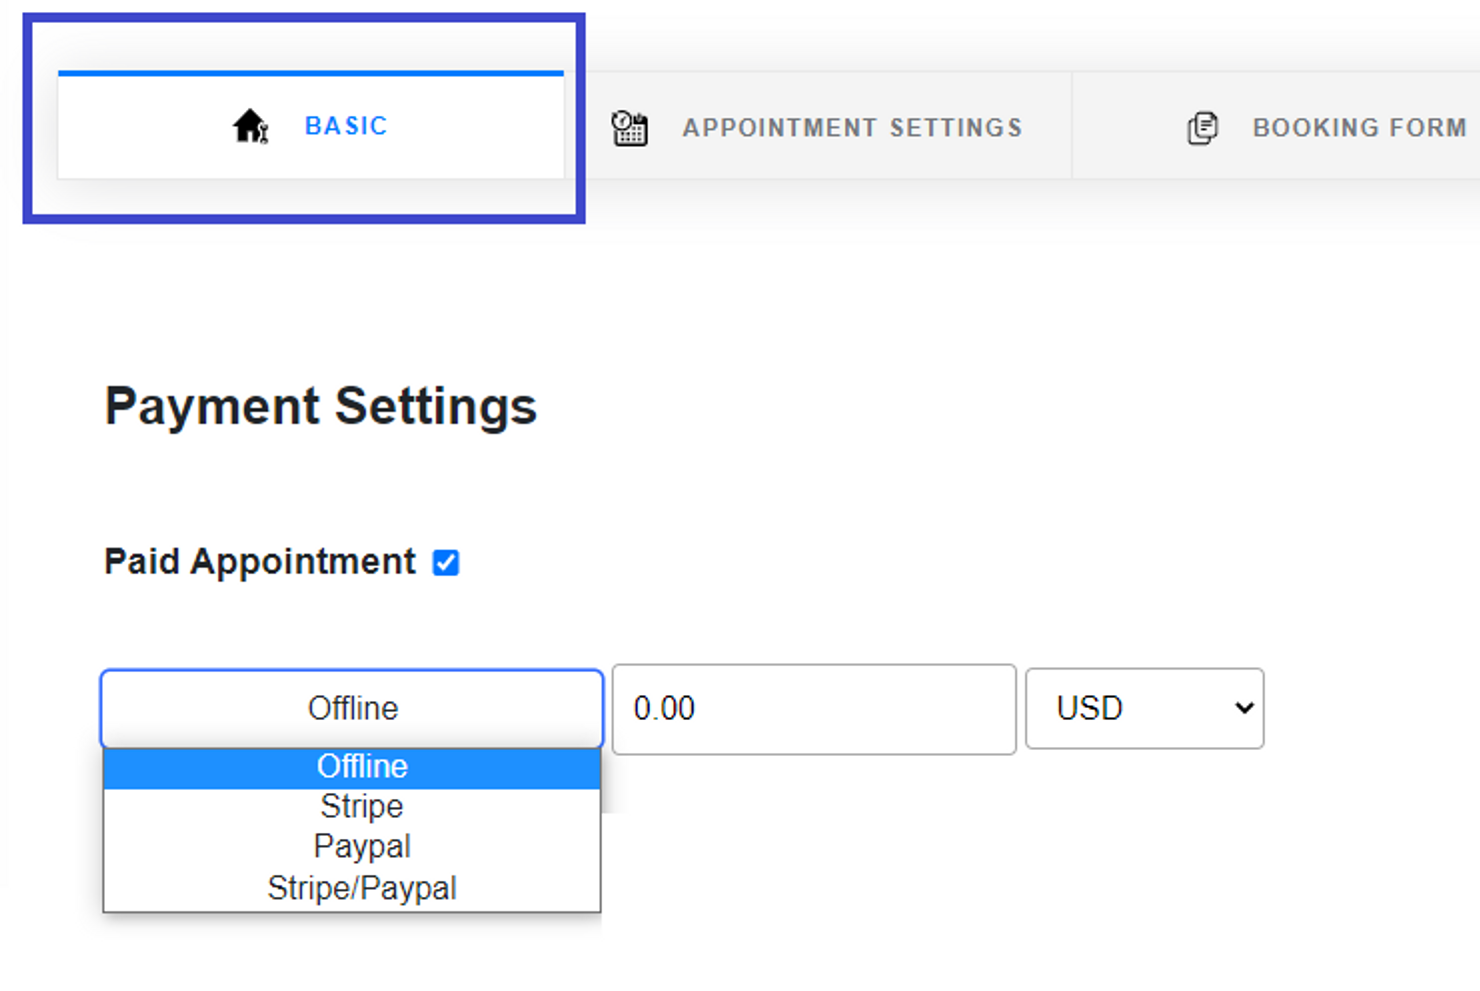
Select your desired payment gateway
Options explained:
Result: Your client will see payment options according to the payment option selected
Full video:
Go to availability > edit/create schedule
Click on "Add"
Select your dates & click on delete icon
Result: Time off added
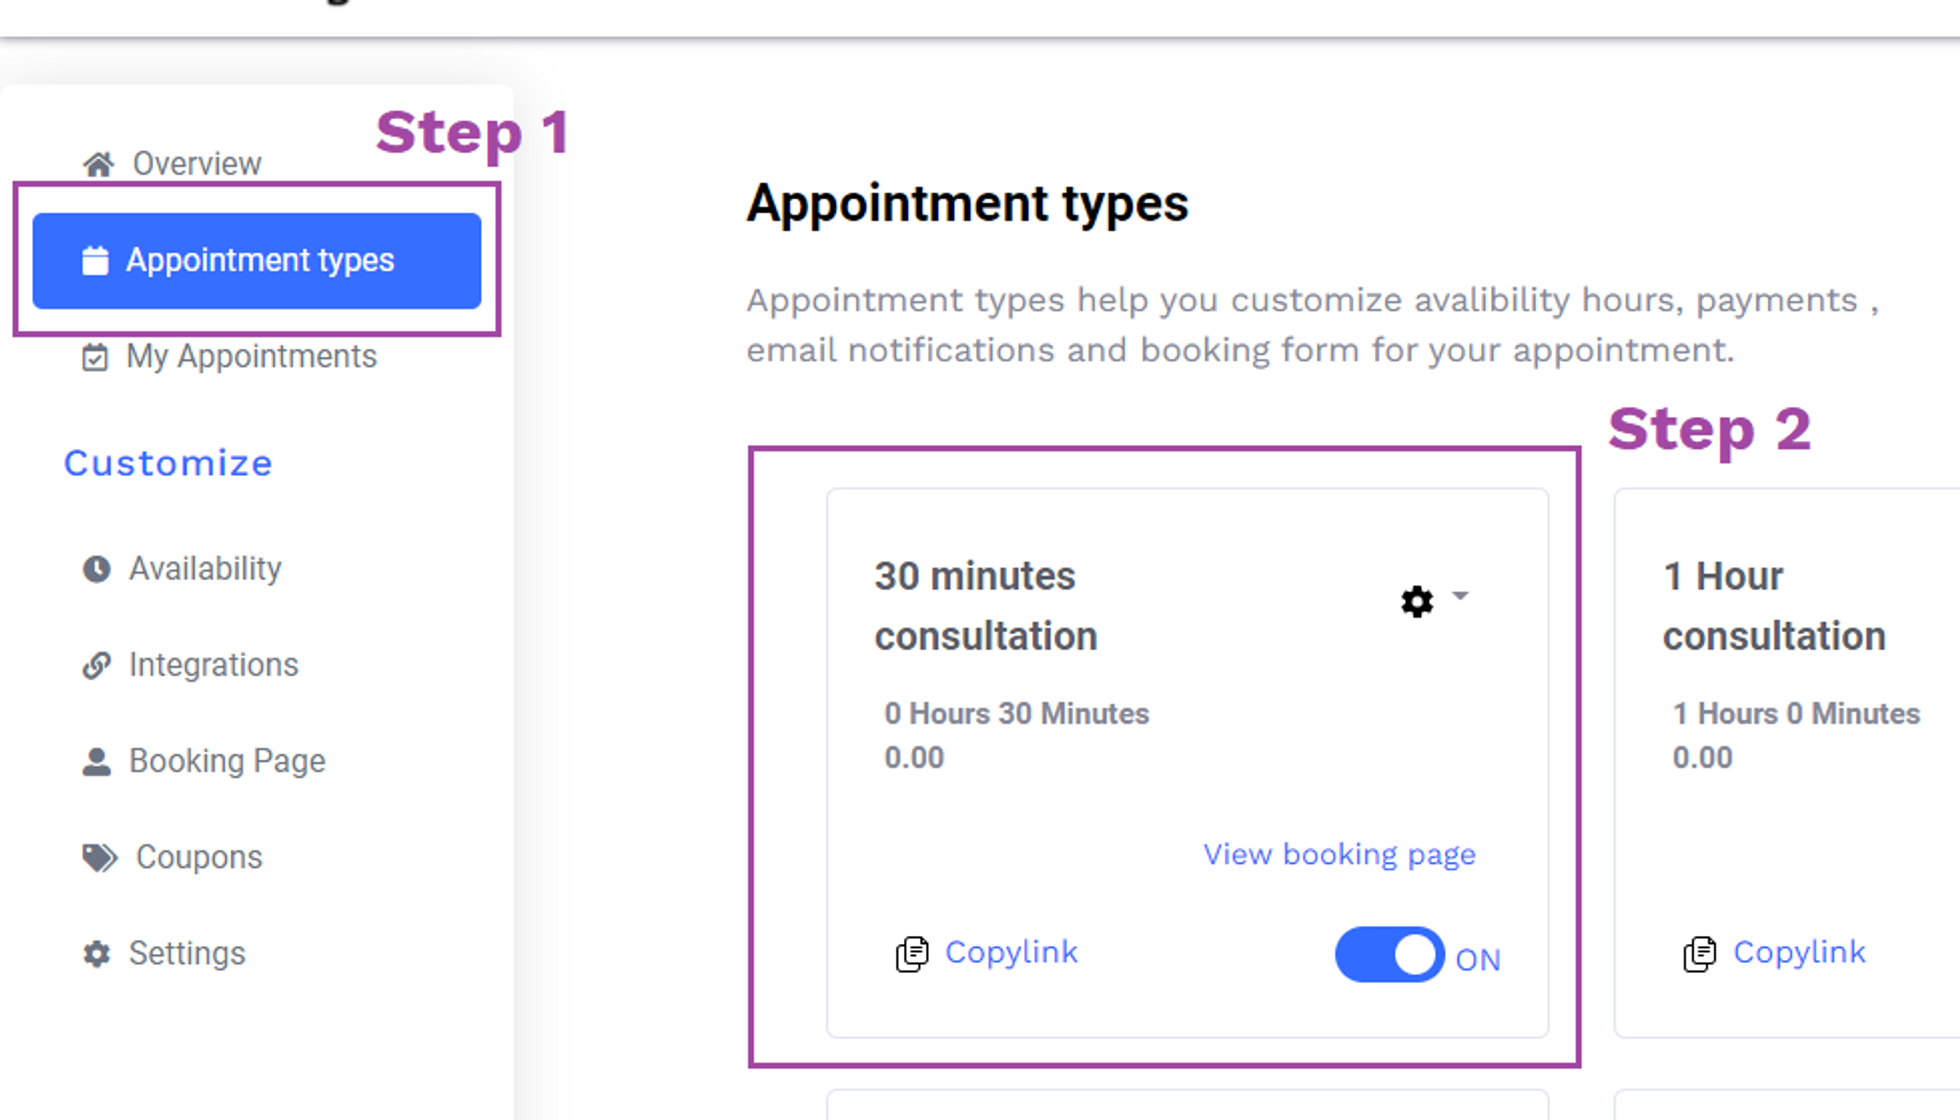
Step 1: Make sure your appointment type is ON
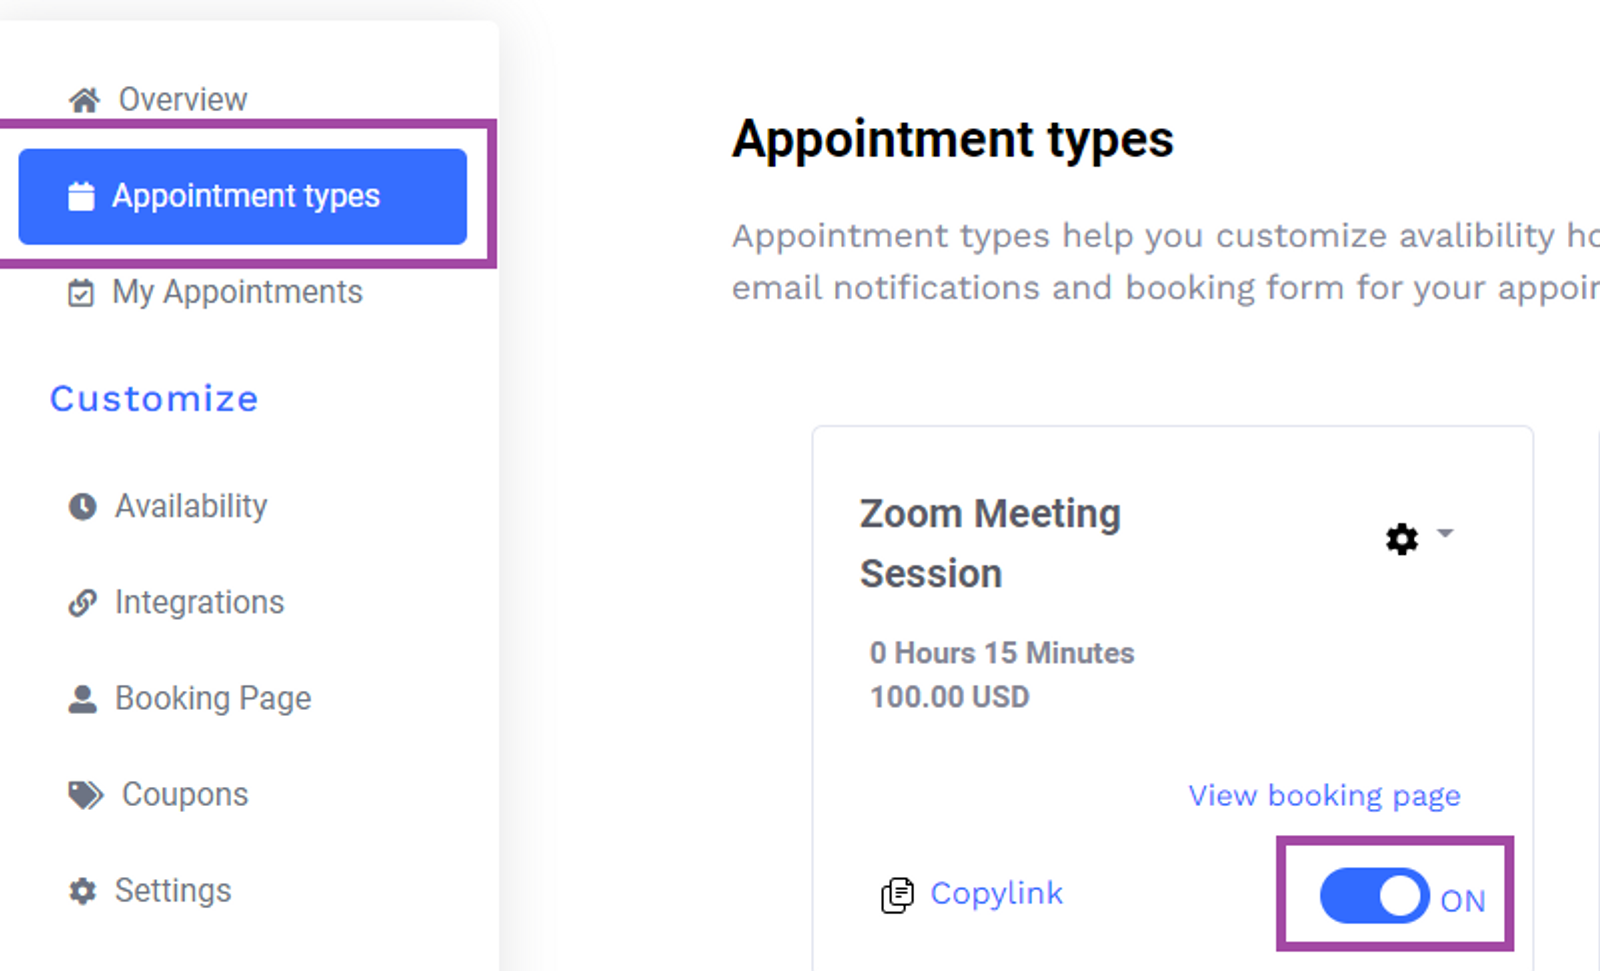
Step 2: Make sure appointment type isn't - PRIVATE

Manage multiple team members/clients from 1 single dashboard
Sell it to your clients
Probooking is now 2 times faster, easier & more professional.
Coupon Codes:
Now you can run promotions for services you offer.
Use cases: First-time discounts, black Friday discount, etc
Send follow-up emails thanking your clients or sending them
Helpful content.
Meeting Notes:
Add meeting notes so you know what the meeting is all about and are fully confident
Cancel / Reschedule Note
Add cancel/ reschedule note so you and your client know why the meeting got cancelled
Multiple Google Calendar
Sync with your both personal and professional google calendar
Google Meet
KonnectzIT, Pabbly, Integrately
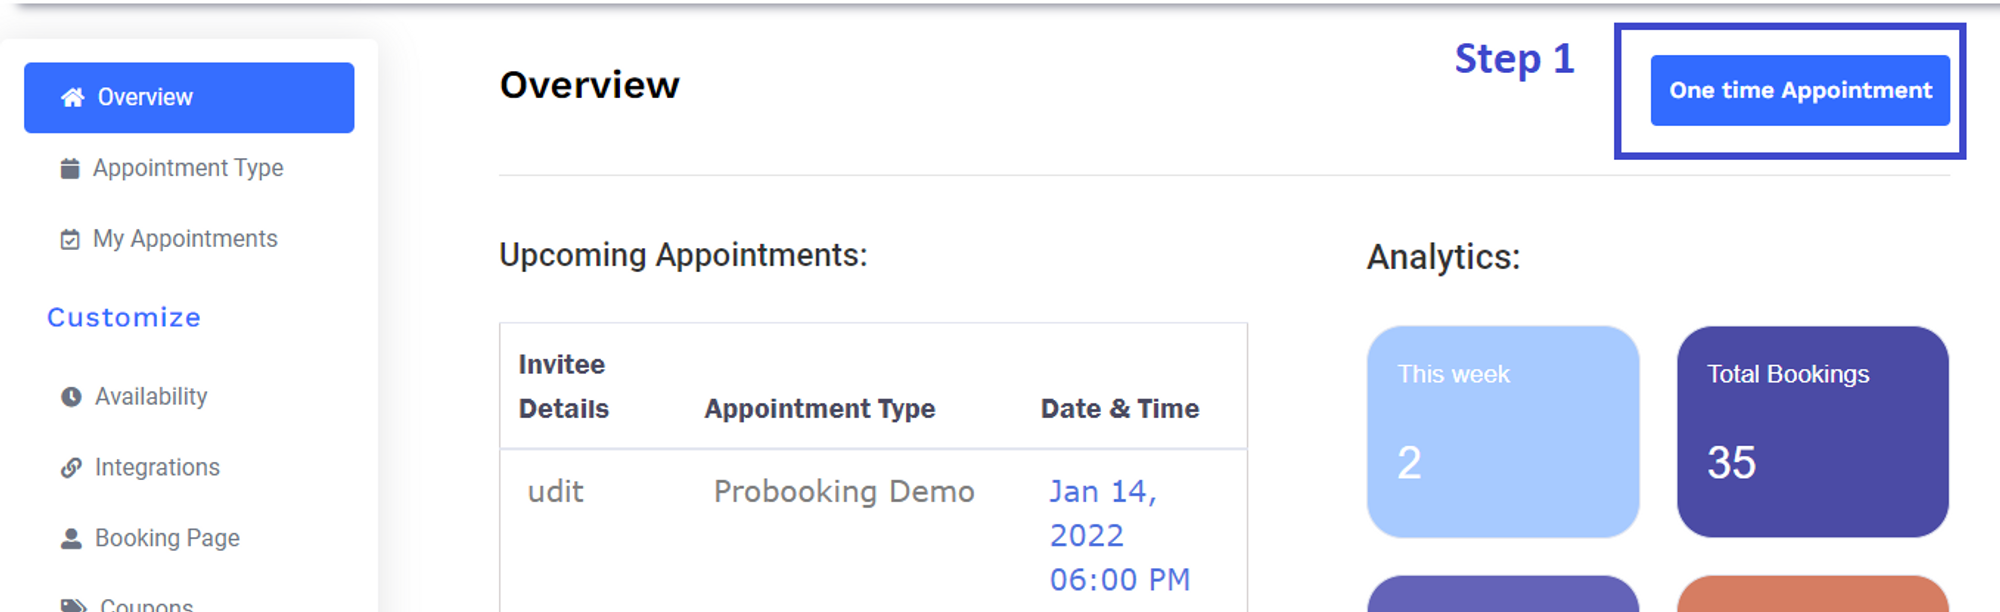
Step 1: Login > “One time Appointment”
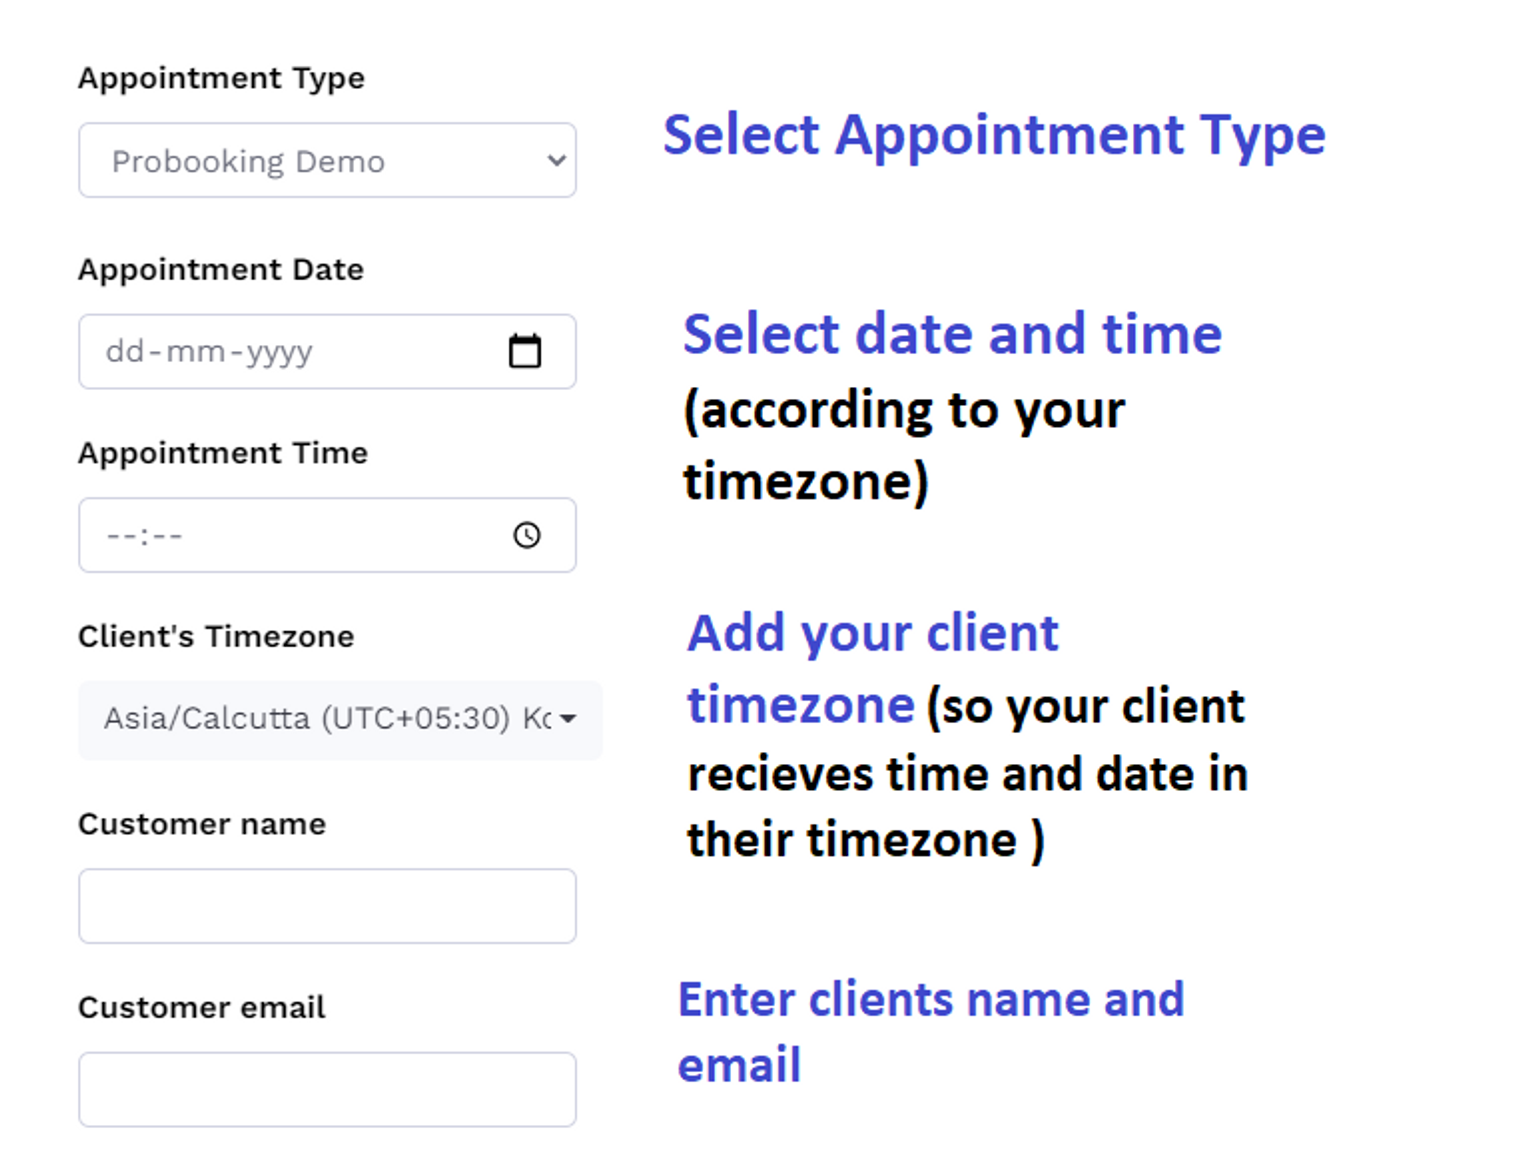
Step 2: Fill in the details as shown below
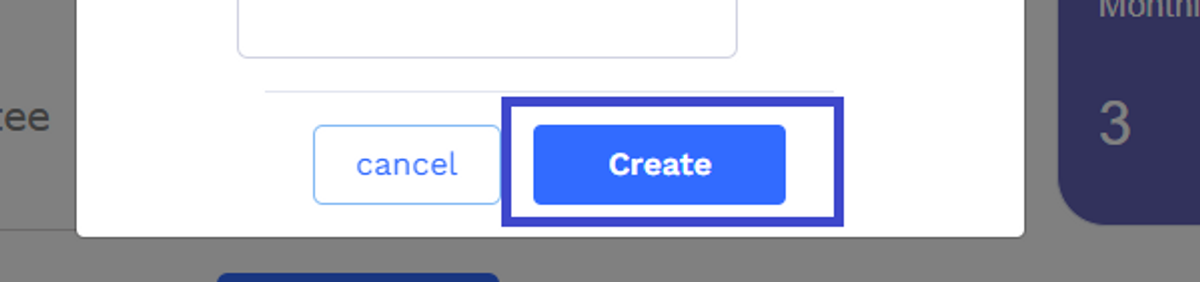
Step 3: Click “create” to finalize the appointment
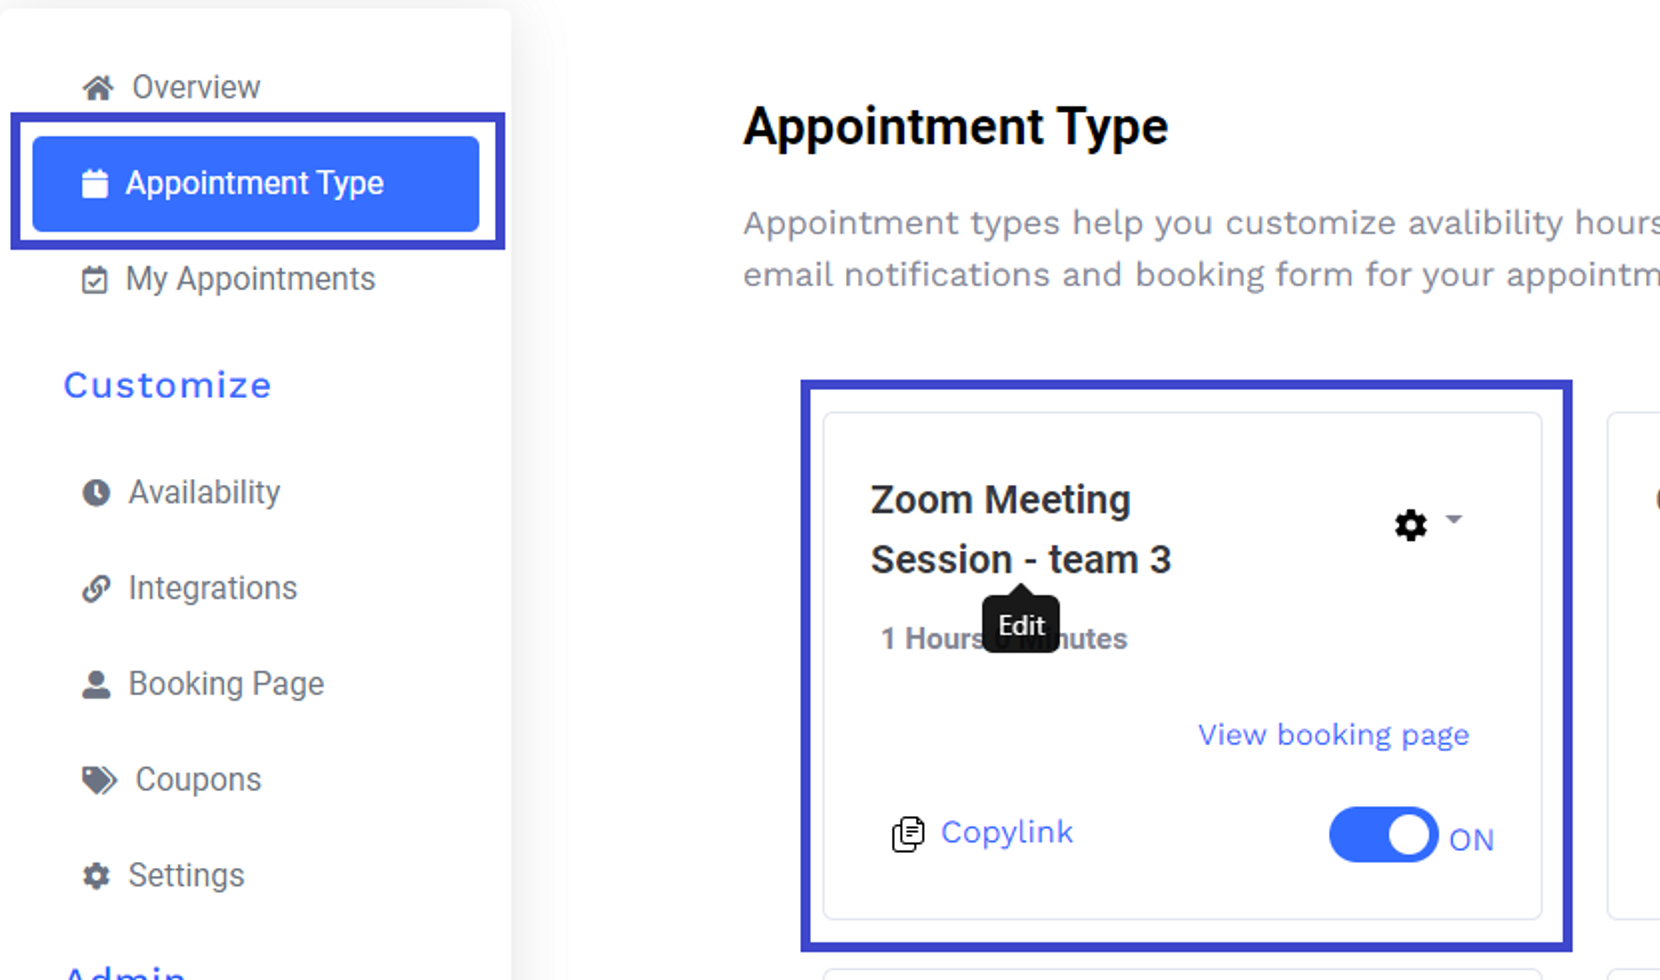
Step 1: Go to Appointment Type tab
Select the particular appointment type
Step 2: In tab 1 scroll below
Add VadooTv link and save
2-way Google Sync so you are never double booked
Click "Allow"
Step 3: Check calendar conflicts
Select calendars which you want Probooking to check for blocking availability
Final check - In Google calendar
Note: Only busy events are blocked from your Google calendar
Now your Google calendar is set up, you are ready to start scheduling appointments!
Click "Yes"
Check calendar conflicts
Step 4: Select calendars which you want Probooking to check blocking availability
Final check - In outlook calendar
Note: Only busy events are blocked from your outlook calendar
Now your outlook calendar is set up, you are ready to start scheduling availability!
Click on integrations
Go to meetings and payments
Click connect in Twilio
Enter your:
Click 'check and save'
Step 1: Go to appointment type
Select the appointment type want to apply reminders on
Step 2: Select "Custom Emails"
Select email reminders option
Step 3: Switch on email reminder and click on "+" to add multiple reminder times
Final Step: Customize the email reminder subject and body then save
Go to "Booking Form" tab
To add new question click on "+ Add new questions"
Type the question, Select the question type
Now click on add and save your progress
Step 1: Go to the appointment types tab
Step 2: Select an existing appointment type or create a new one
Now simply select the email you want to customize
You can personalize emails with your customer name, booking types, etc
To do this use tags
And you have successfully customized your email! 😎
Step 1: Select the appointment type
Step 2: Select tab 1 and scroll to the bottom
Step 3: Enter full URL (with https/http)
example: https://getprobooking.com/
Step 4: Save
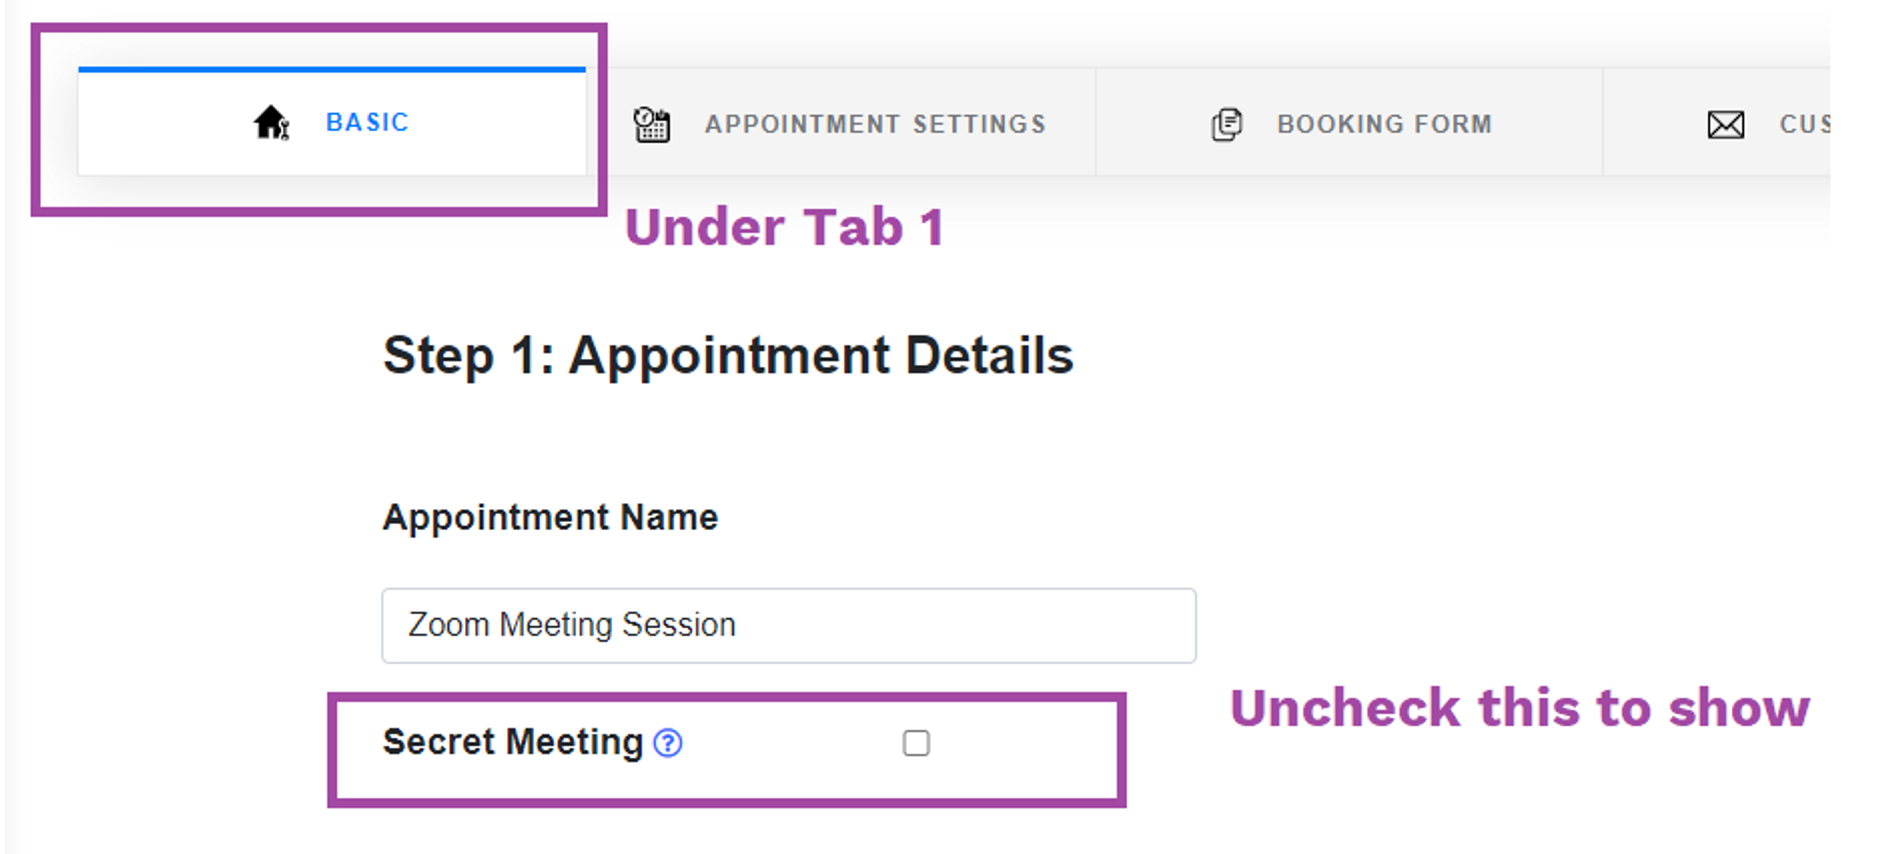
Step 1: Select the appointment type
Step 2: Check the "Secret meeting"
Step 3: Scroll to bottom and save it
Step 1: Create a new coupon
Modal opens up - fill the details as explained below
After saving it looks like below
Step 2: Go to integrations tab and connect Stripe or PayPal
Step 3: Go to "Appointment types" and edit the appointment type of your choice
Scroll below in the first tab
There you will find Payment settings
Select your desired payment gateway
Options explained:
Result:
your client will see the following when booking
Your client will apply the coupon code and pay according to their preference.
Now you have 3 options for webhook links:
Now you've 3 options for webhook links:
Now enter your webhook link and click on the "Test & save" button
Result: On new booking, your webhook will be excited!
In the second tab.
Scroll to the bottom and save
Hooray group session setup is complete! 🙂
With Cname: Your clients will see your domain instead of the Probooking URL
In Probooking dashboard
Create CNAME record in your hosting provider
How it looks like:
Result: your CNAME will redirect to your Probooking page with "Not Secure"
SSL:
To get SSL activated please support email: [email protected]
SSL is generally in around 24 - 48 hrs time
Step 1&2: Go to booking page > branding
Step 3: Scroll to the bottom
Step 4: Enter your SMTP details
Step 5: After successfully adding you will see your email added > click on save brand settings
Final result
To get Gmail SMTP: kinsta.com/blog/gmail-smtp-server/
To get Outlook SMTP: smallbusiness.chron.com/determine-smtp-server-outlook-54154.html
Step 1: Go to appointment type > Select the particular appointment type
Step 2: Navigate to "Custom Email" and select "SMS reminder"
Step 3: Set the timer and message > Save
Result:
Invitee will see "Phone number" field in booking form and will receive reminder at given number before the meeting
Step 1: Add user
Step 2: Click on "New user"
Step 3: Enter emails of your team members and invite
Now your team member will receive an email to signup
After signup, they will be added to your team members list
Owners:
With the admin panel, team members can view/edit all team members information like:
To set roles and permissions
Go to "add users" > Click on 3 dot icon > "change role"
assign role and save
Please noteL account with admin/owner permission will be able to use this feature
Cheers
Please note: account with admin/owner permission will be able to use this feature
Step 1: In the sidebar > under admin management > Go to manage users
Step 2: Now here you get the option to → Select the team member and the feature you want to access for that particular team member/client
Step 3: Now from this admin dashboard you are able to manage the users
Step 1: Go to appointment types tab
Step 2: Select an existing appointment type or create a new one
In the first tab scroll to the bottom
Step 3: Check the option and save it
Select the appointment type which you want to accept payments for
Scroll below in the first tab
There you will find payment settings
Select your desired payment gateway
Options explained:
Result: Your client will see payment options according to the payment option selected
Full video:
Go to availability > edit/create schedule
Click on "Add"
Select your dates & click on delete icon
Result: Time off added
Step 1: Make sure your appointment type is ON
Step 2: Make sure appointment type isn't - PRIVATE
Manage multiple team members/clients from 1 single dashboard
Sell it to your clients
Probooking is now 2 times faster, easier & more professional.
Coupon Codes:
Now you can run promotions for services you offer.
Use cases: First-time discounts, black Friday discount, etc
Send follow-up emails thanking your clients or sending them
Helpful content.
Meeting Notes:
Add meeting notes so you know what the meeting is all about and are fully confident
Cancel / Reschedule Note
Add cancel/ reschedule note so you and your client know why the meeting got cancelled
Multiple Google Calendar
Sync with your both personal and professional google calendar
Google Meet
KonnectzIT, Pabbly, Integrately
Step 1: Login > “One time Appointment”
Step 2: Fill in the details as shown below
Step 3: Click “create” to finalize the appointment
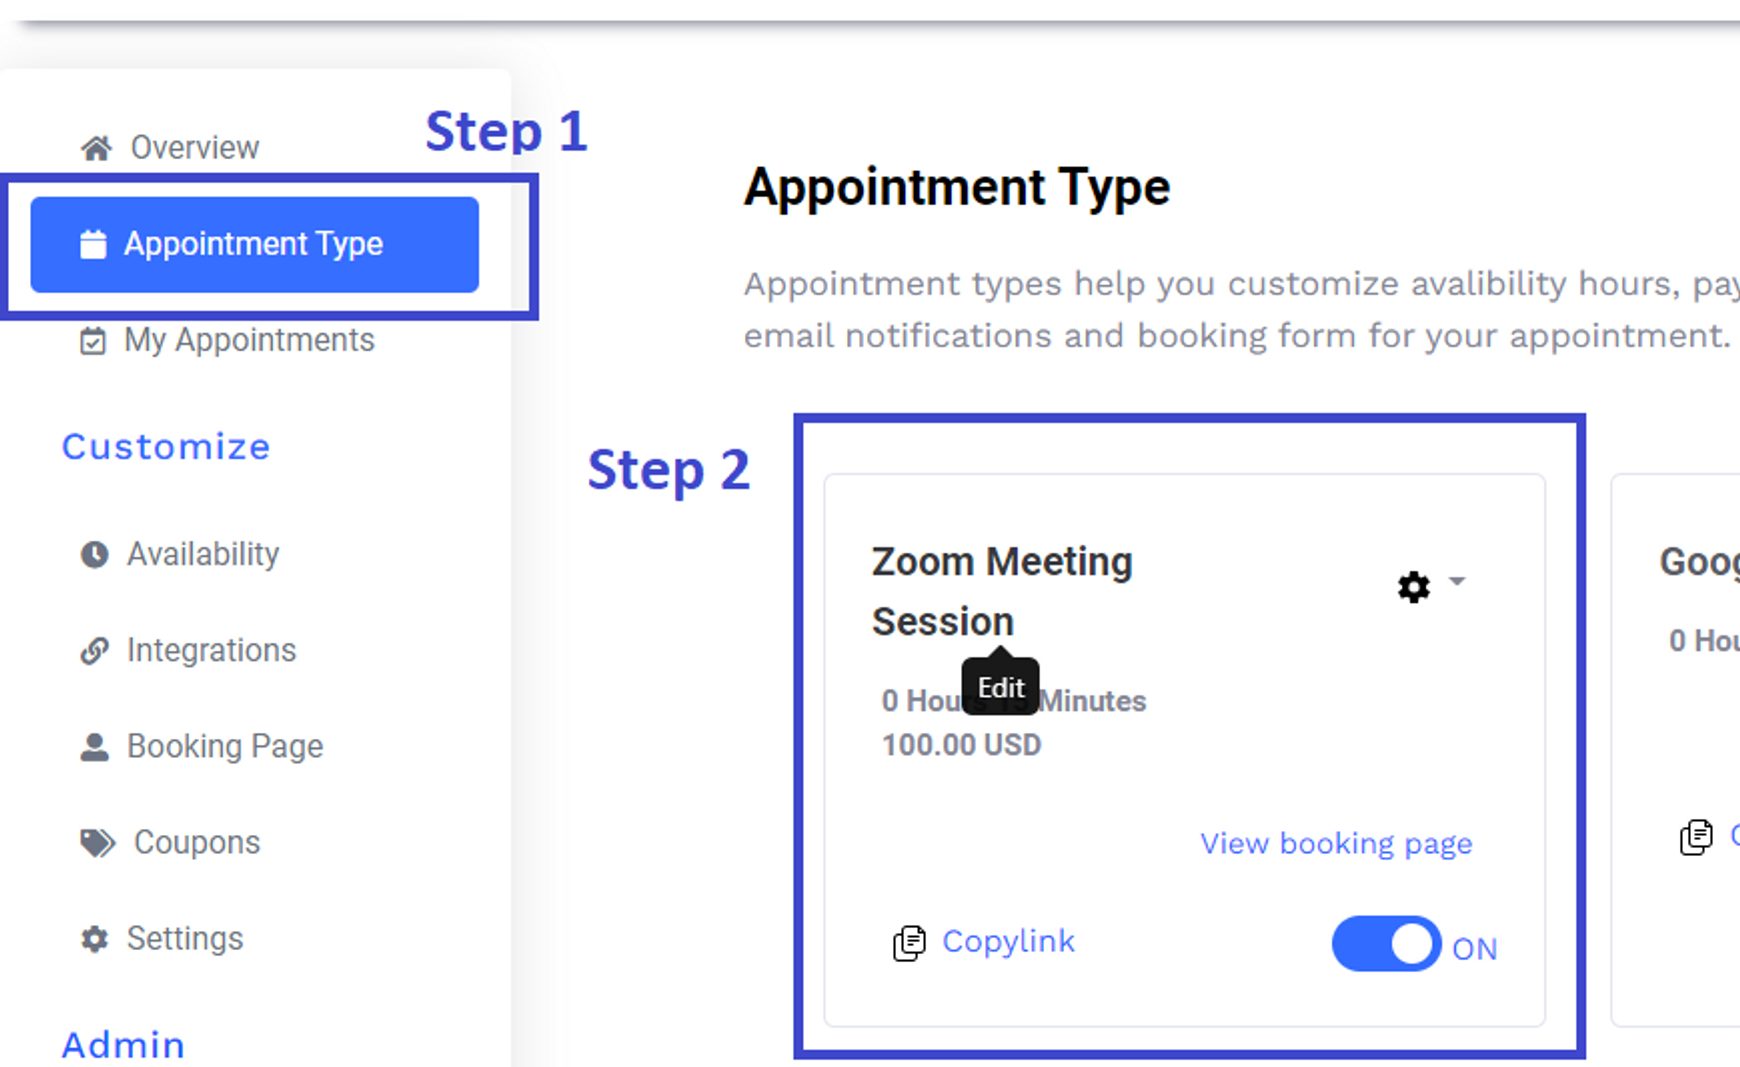
Step 1: Go to Appointment Type tab
Select the particular appointment type
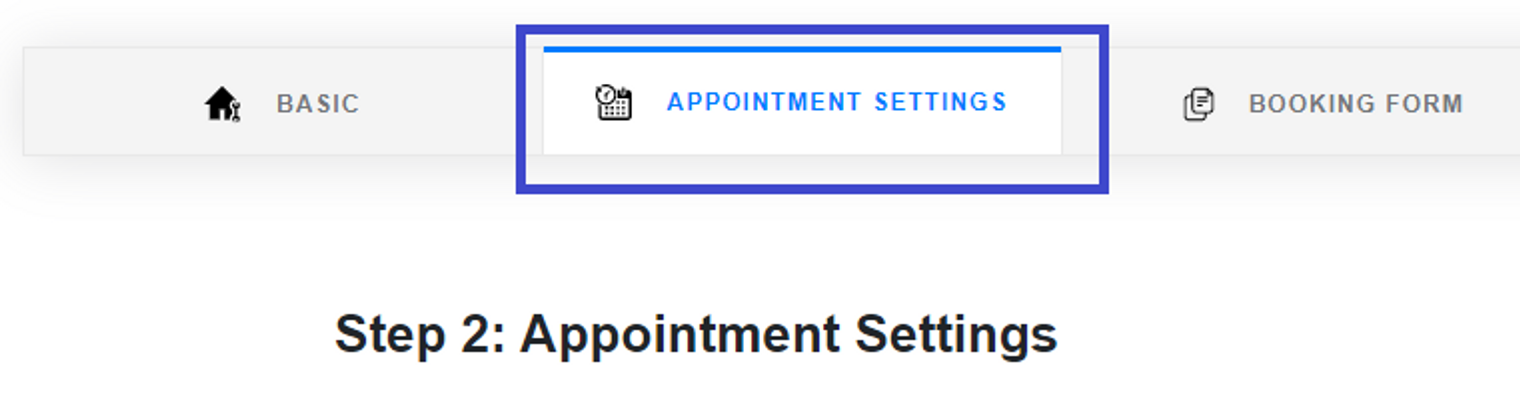
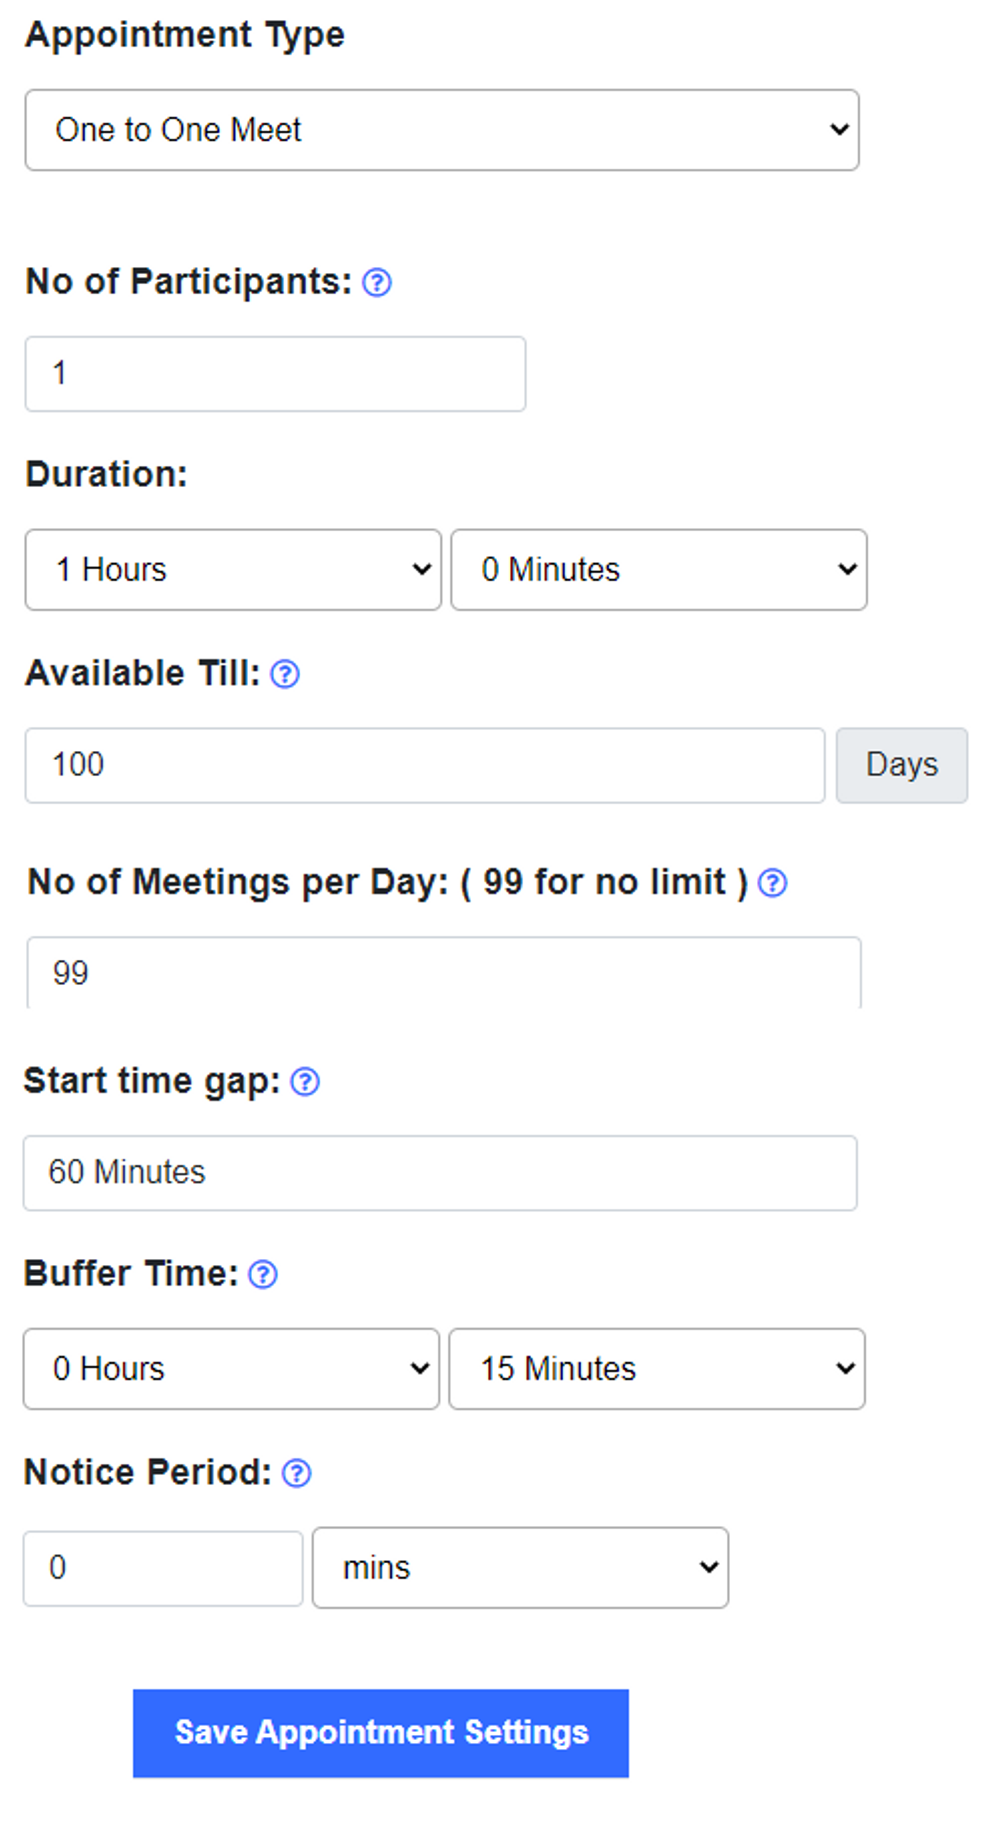
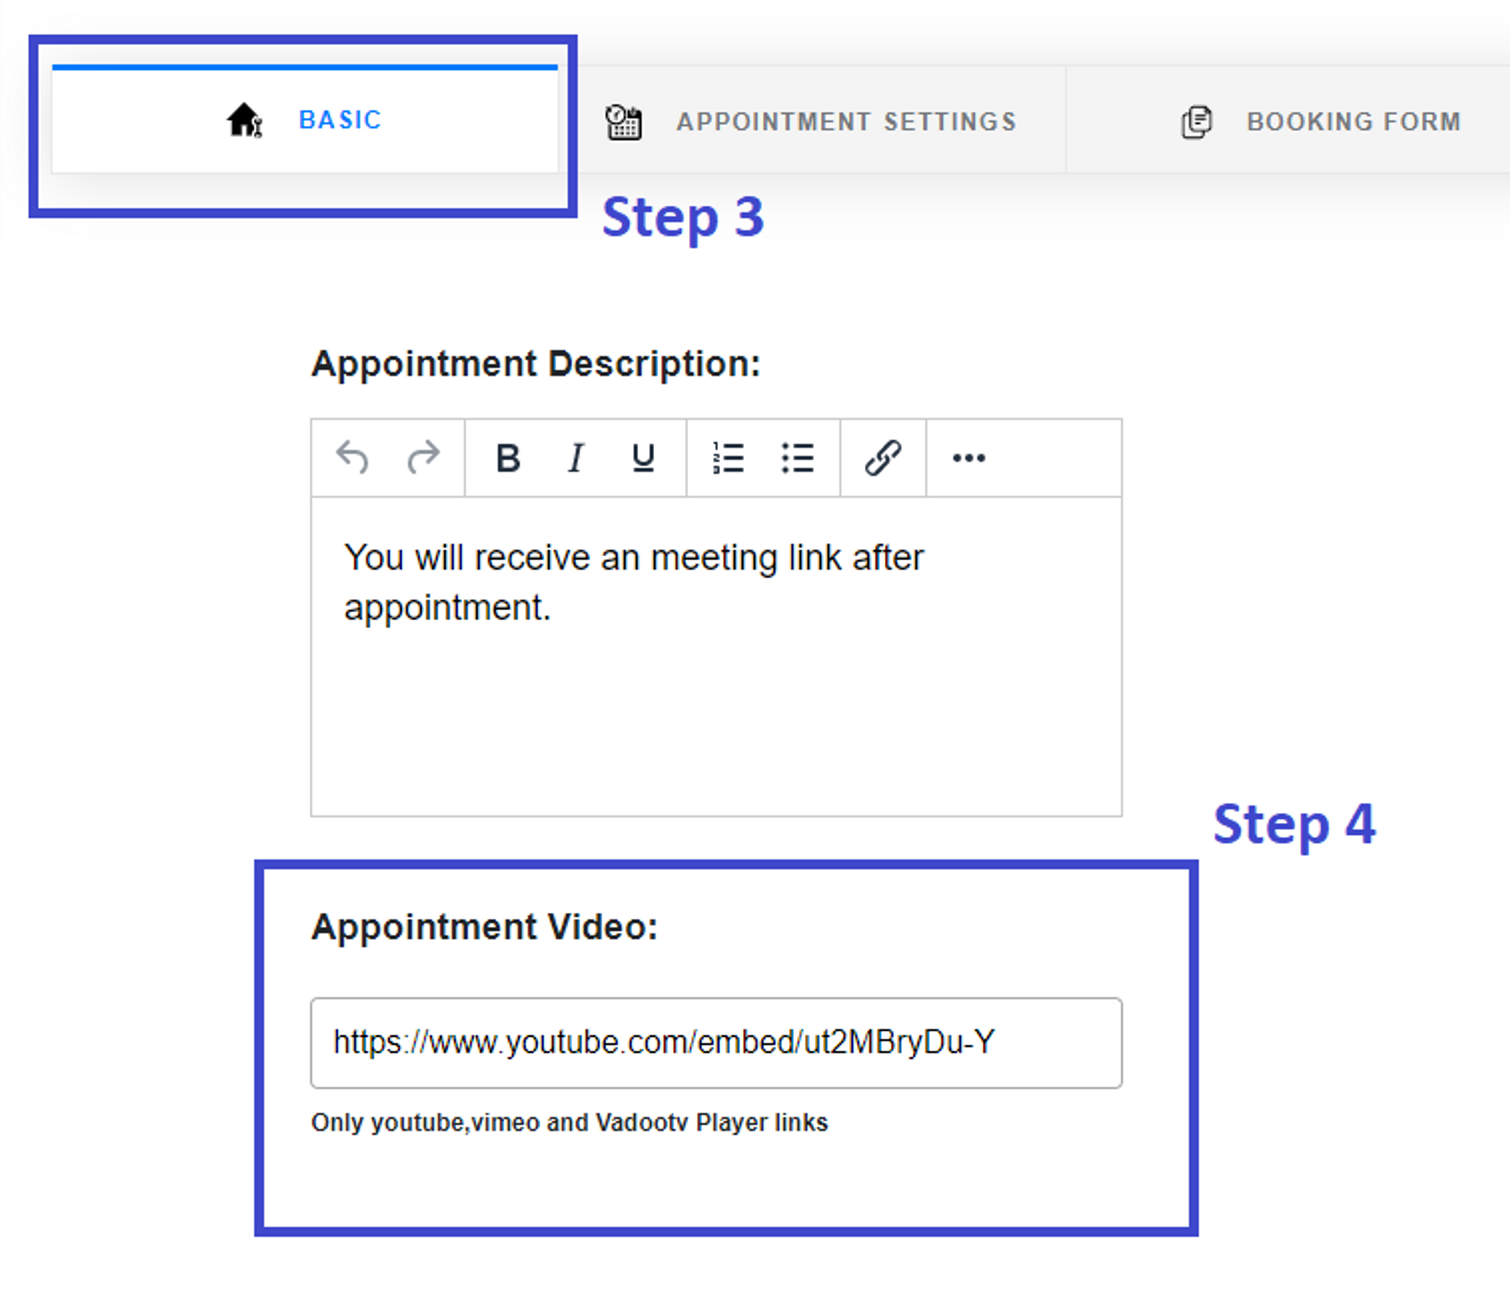
Step 2: In tab 1 scroll below
Add VadooTv link and save